
With Jupiter still near opposition and Mars opposition approaching I would like to do a little high resolution planetary imaging. For planetary I use our Nexstar 11″ telescope, with 2800mm of focal length is has the high magnification needed.
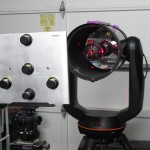
The Nexstar has not been giving me the results I know it is capable of. I shot Venus just before inferior conjunction and noted that there was probably some issues in collimation that were not addressed in the quick star collimation I had performed.
Thus I borrowed a Hotech CT Laser Collimatior from a friend. The collimator is an interesting piece of kit, enabling the user to check more than simple the tip-tilt of the secondary.
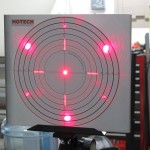
The collimator works through a set of projected laser beams. The beams pass through the telescope and return to a target on the face of the collimation tool. Following the procedure it is possible to evaluate a number of different adjustments in the telescope… Focuser mounting and tilt, secondary centration and secondary tip-tilt.
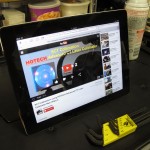
The procedure is well documented in a video available on YouTube. You can find it linked on the Hotech website. In the video the process is very clearly shown with animations of each alignment step. It was a simple matter to grab the iPad and run the video right beside my setup in the garage. Following along and pausing the video at each step.
The first, and most fiddly part of the process, is aligning the collimator to the telescope. This is accomplished with a crosshair laser, aligning the reflected lines on the target at the front of the collimation tool. It takes some patience to correctly align the test setup. The procedure in the video shows how to do this very clearly.
I do not have an auxiliary focuser of the Nexstar, rather a Feathertouch geared knob for the usual SCT primary-shift focus. Using the collimator one could easily see the effect of primary tilt when racking the focus back and forth. Our Nexstar is not too bad on this score, but I could still see the effect. I performed the collimation on a clockwise turn of the focus knob, setting the primary shift to one side. When using the ‘scope for anything critical I need only to remember to do the final focus in the clockwise direction.
It turns out the Nexstar was in fairly good shape. I did mess with the centration of the secondary a bit. The mounting cell of the removable secondary had become loose and had both shifted and rotated. After re-seating the secondary I adjusted tip and tilt to achieve what I hope is a good collimation.
Going on-sky later that evening I generally liked what I saw, things were pretty close. I did tweak the secondary just slightly on a star, adjusting one screw a minimal amount. Swapping the eyepiece for a camera I shot a couple video sequences on Jupiter. the result is good, but not great. I need to try this up on the mountain when we have good seeing, not the mediocre seeing we get in the village.
In general I was rather impressed with the unit. The design and procedure were extraordinarily well thought out. The videos were impressive, with animations that helped understand what was going on in the alignment.
I found the procedure quite easy to perform. Though I may be a poor example of the difficulty, I am rather familiar with making optical adjustments and perform optical alignments in much more challenging systems. I suspect that anyone with a modicum of skill can also perform this if they follow the video procedure closely.
