
The secondary mount is often one of the most complex pieces of a telescope build.
The mount must be small, not blocking any more light than the secondary mirror. It must be adjustable to allow tip, tilt, and centering of the secondary mirror. it must be rigid, able to hold the adjustment precisely once the telescope optical alignments are made.
Thus I have put together a new design for myself, to be used in the 6″ travel ‘scope under construction. The design is simple and robust, a pretty solid little device using the lessons I have learned across the years. It draws upon ideas from many other secondary mounts I have seen.
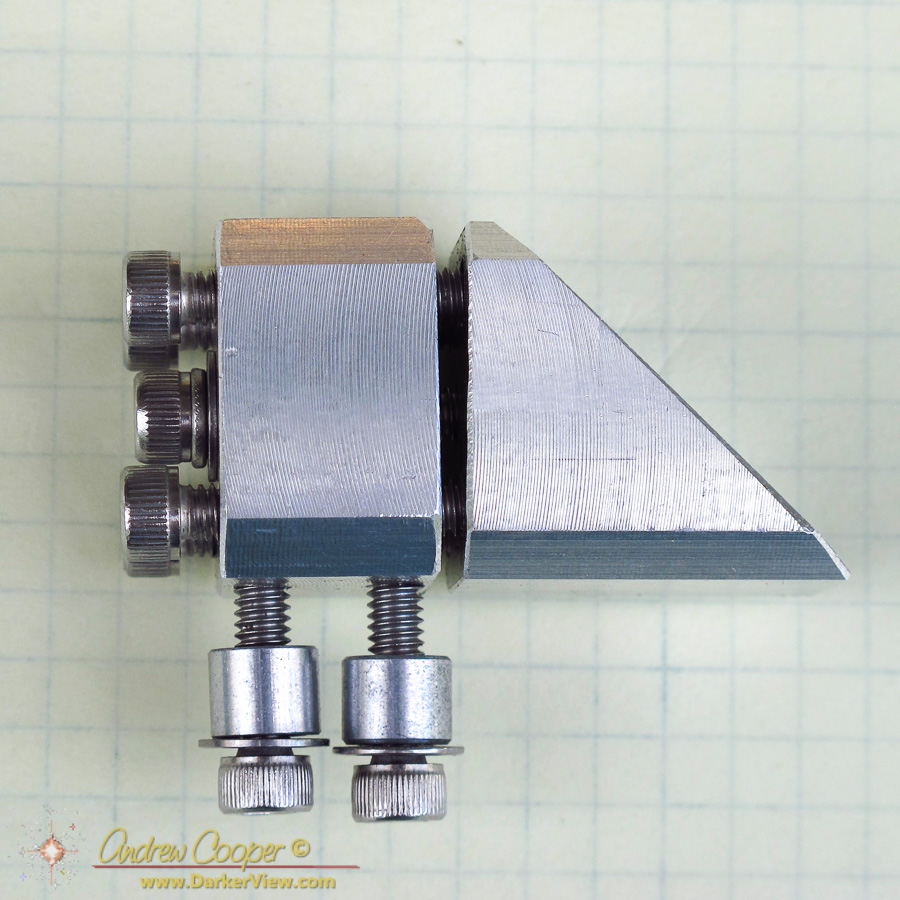
The body is square as this is easier to clamp during each of the manufacturing operations. The square is as large as possible to provide a stable mount, with the corners beveled just enough to stay behind the secondary.
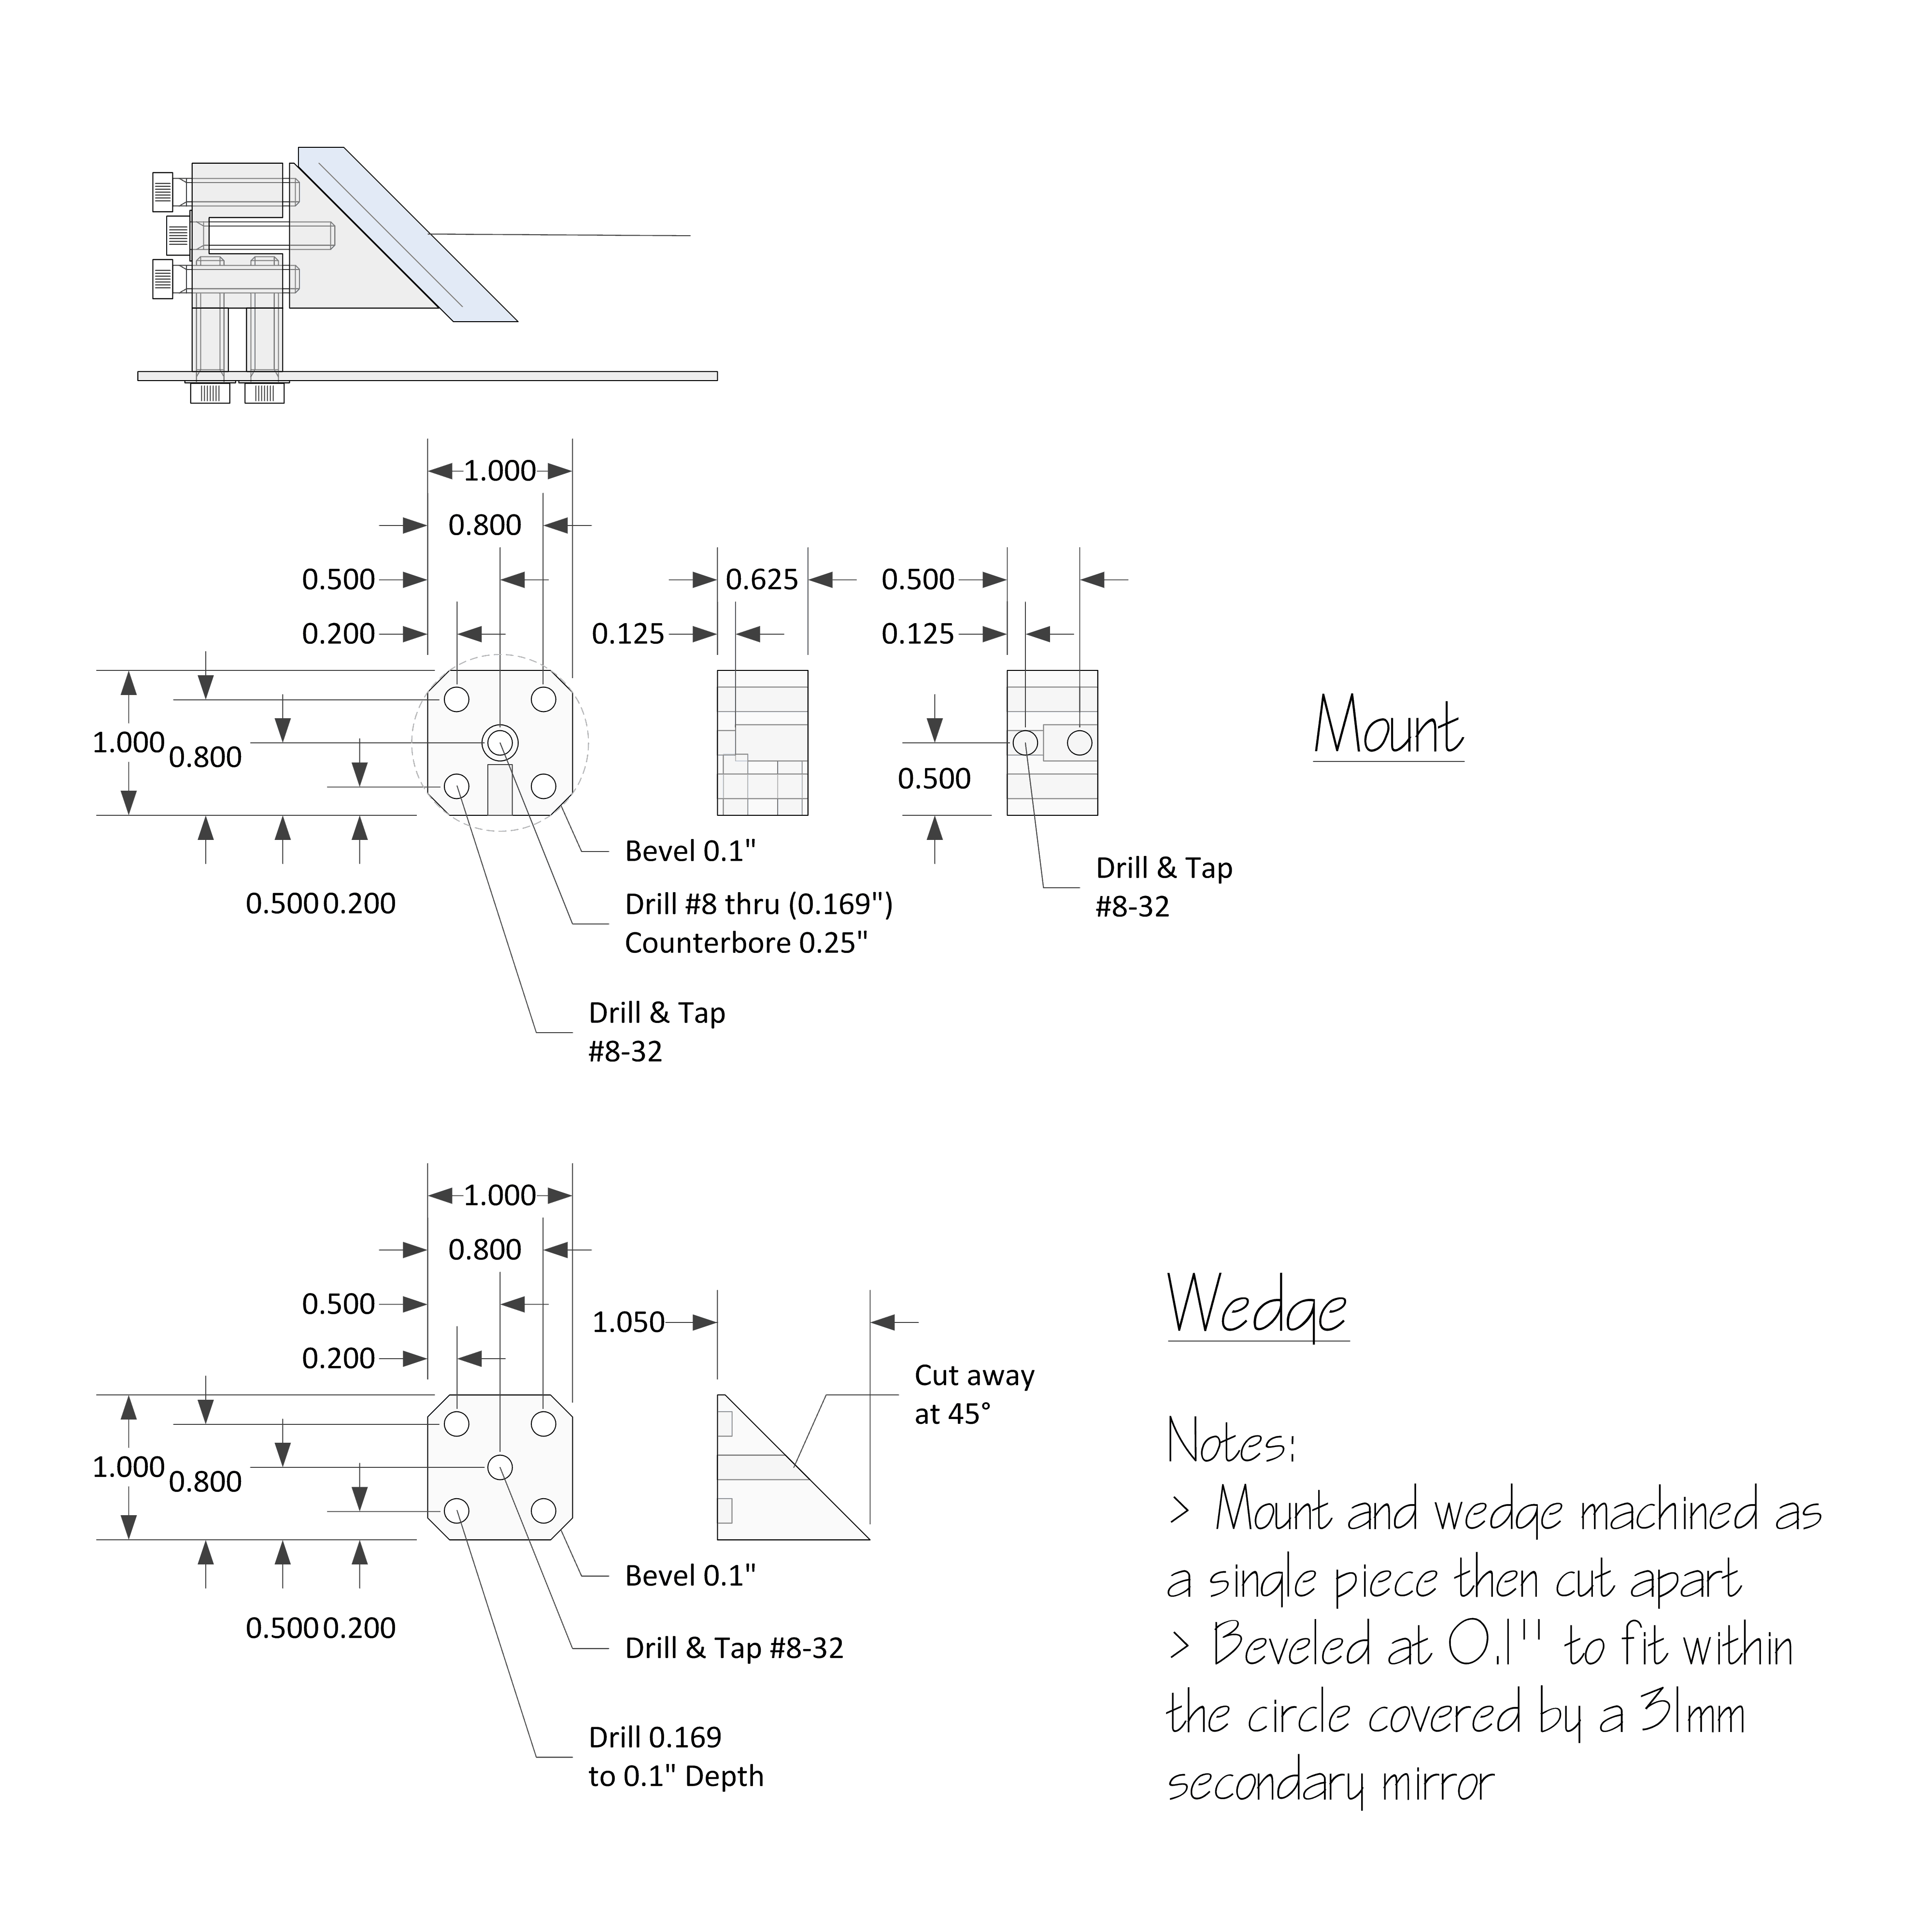
The mount shown here is designed for a 31mm minor axis diagonal mirror. Thus the body of the mount is one inch square with 0.1″ beveled off each edge. This could be scaled up or down for another size diagonal mirror. The overall length of the entire mount is as short as possible. A bar of aluminum was cut to size and beveled first. A four inch bar yielded two complete mounts. I left the machined surfaces a bit rough to break up the smooth surfaces, better to hold paint and to avoid reflections.
There are four adjustment screws here. This allows for a simpler adjustment scheme than a three screw arrangement. With three screws adjustments are often made using all three screws at once. A four screw scheme allows the screws to be adjusted in pairs to effect moves in one axis at a time.
I have made mounts with spring loaded screws in the past. They are easier to adjust, no need to loosen and tighten opposing screws. But they are not as rigid, the careful adjustment more likely to drift. This mount uses pusher screws that must be loosened and tightened in pairs.
Shallow pockets are drilled into the rear of the wedge for the tip of each adjustment bolt. this prevents any rotation of the wedge as long as the adjustment bolts are tight.
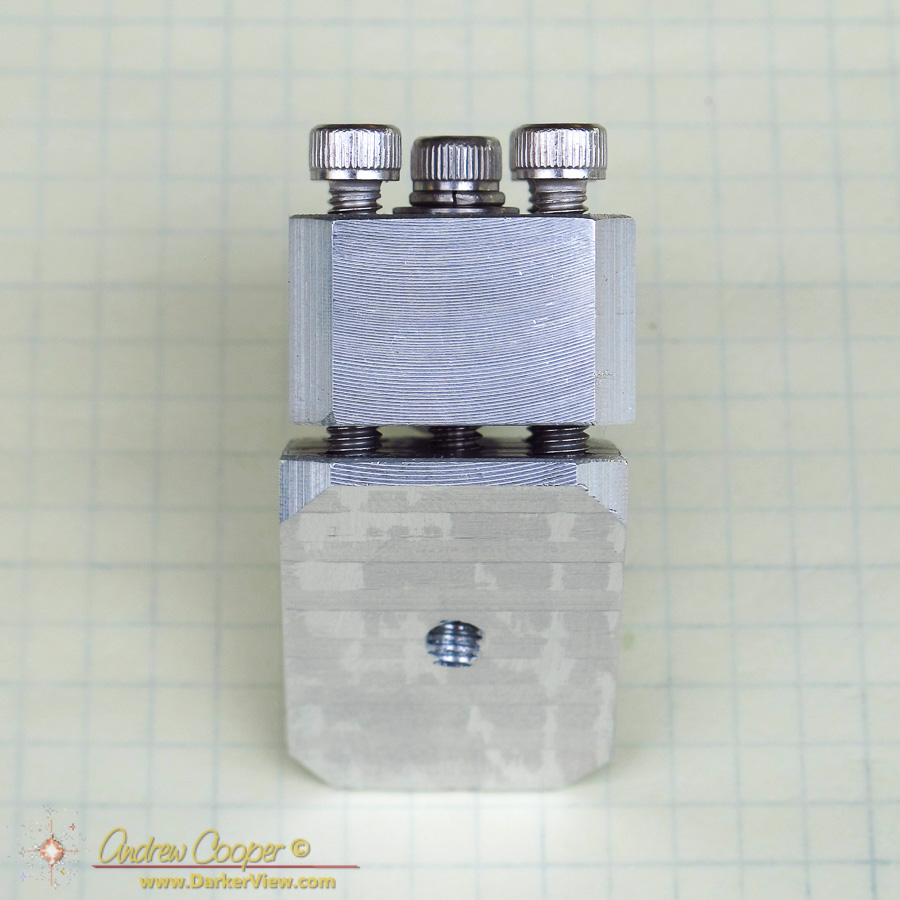
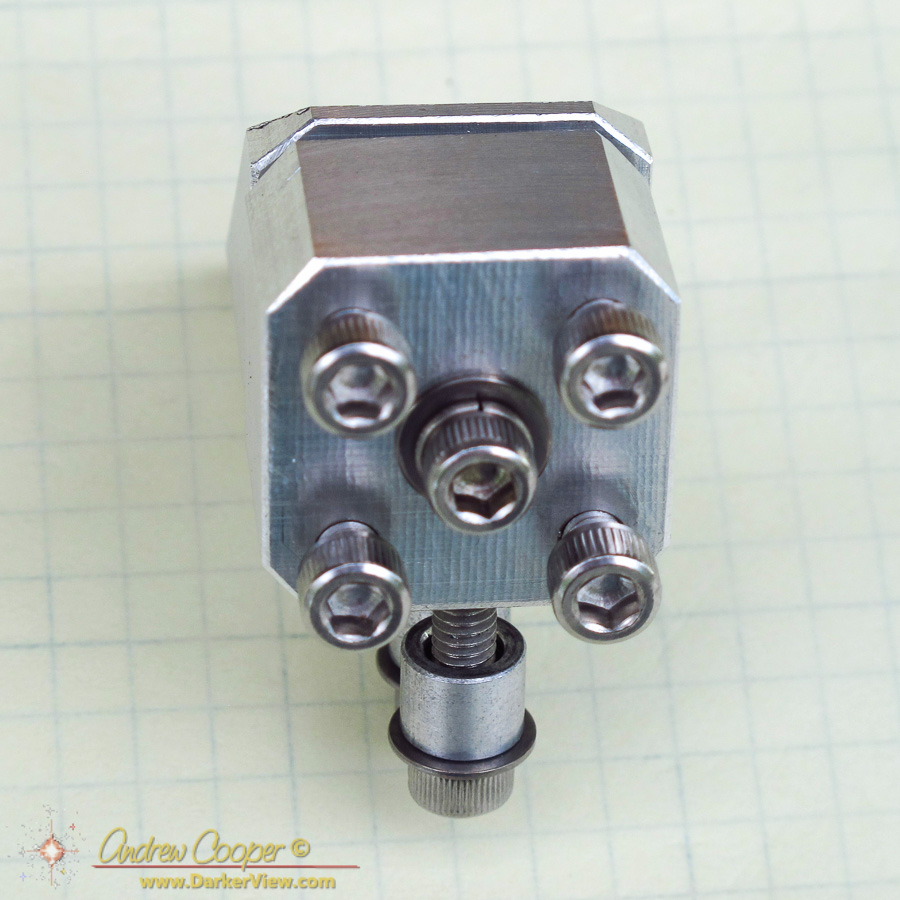
Vertical adjustments will be made by adjusting the height of the standoffs used to mount the secondary, or perhaps by shimming with a washer or two. The two mounting screws will sit in slotted holes allowing the secondary to be aligned with the focuser.
The center screw sits in a counterbored hole, only a small section of the shaft near the head is constrained. This allows it to tip slightly and allow the adjustments. A split lockwasher keeps some back tension during adjustments.
The secondary will be attached with RTV adhesive. The corners of the mount line up with the edges of the secondary making alignment quick and simple. All that is needed is a coat of flat black paint on the sides to prevent odd reflections in the optical path.

Hi Andrew,
What a fantastic concept and design. I say this as someone who has (with others from our club) been perfecting different components designed for an 8″ dob that we are making with/for students of our Youth Astronomy Academy. Our biggest challenge has been to repeatedly make a top-notch secondary holder (to mount to a curved metal vane). The current design uses a large wood dowel and honestly, no two end up being alike and often make setup and collimation a pain.
We’re making all the components from low-cost/reclaimed/Dobsonian inspired ideas and materials. One of the components (a dovetail mount for a red-dot b-b gun finder) is being made by a member with a 3-D printer, and I’m thinking a secondary holder like this might be something we could also produce with a 3-D printer. What do you think about that idea – and would you be OK if we did some fiddling around with that notion using your design?
I don’t know how you find time to do all the things you blog about, but you’re a great reporter, story-teller, and photographer. I recently tipped our membership off to your blog and insights about the TMT controversy.
Thanks…..David
David Nemo
President, Rose City Astronomers
Portland, Oregon
Thanks for the comments! Yes, fool around with the design all you want. I have leaned so much from other ATM’s who share their designs, it is only right to give back to the community.
3D printing the mount is a great idea. I thought that may parts of this telescope could be 3D printed. If you do print the secondary mount successfully let me know, I would love to do a follow up post.