
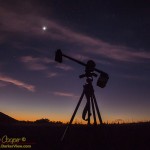
A six-inch f/5 telescope designed to allow maximum portability. A simple travel telescope that can go anywhere, small enough to fit in an airline carry-on bag while leaving room for clothing. Large enough to provide good views of celestial targets.
I call the design Travel6, for obvious reasons. The actual telescope I have dubbed Makaʻiki, or simply “little eye” in Hawaiian. While 6″ may seem big to some, by the standards of amateur telescopes it is quite small. By the standards of the telescopes I work on it is downright miniscule.
Still, a 6″ telescope is quite capable in the right hands, able to give pleasing views of many celestial objects. The design is an RFT, or rich field telescope. A low power, wide angle eyepiece will result in a field rich in stars.
Like all good telescopes the design is based on ideas borrowed from other telescopes I have seen. In this case the basic design is from a very similar telescope by Brett Schaerer he named WikiKea, a telescope I had a chance to examine at Oregon Star Party a couple years ago. He incorporated a clever focus mechanism into that ‘scope that got my attention. This is a design I liked, I would have to build one for myself sometime.
Of course I had no plans for the ‘scope, just a couple photos. The first task was to draw up a complete set of plans, only then would I be able to understand all of the design issues. I have posted the full mechanical plans for the telescope at the link above. These plans should be enough for anyone with a little workshop savvy to duplicate the telescope.
The design shown could be notably simplified if one chose to do so. I have enough parts left over to build a second scope, and may consider a refined design the second time through based on the lessons of the first pass.

The design is a single strut open design. This allows for an absolute minimum in size and volume. A cell that encloses and protects the primary and a secondary support with a single strut connecting them. Also included is an alt-azimuth mount that can be placed on a photo tripod. A wooden clamp holds the telescope, sliding back or forth to balance.
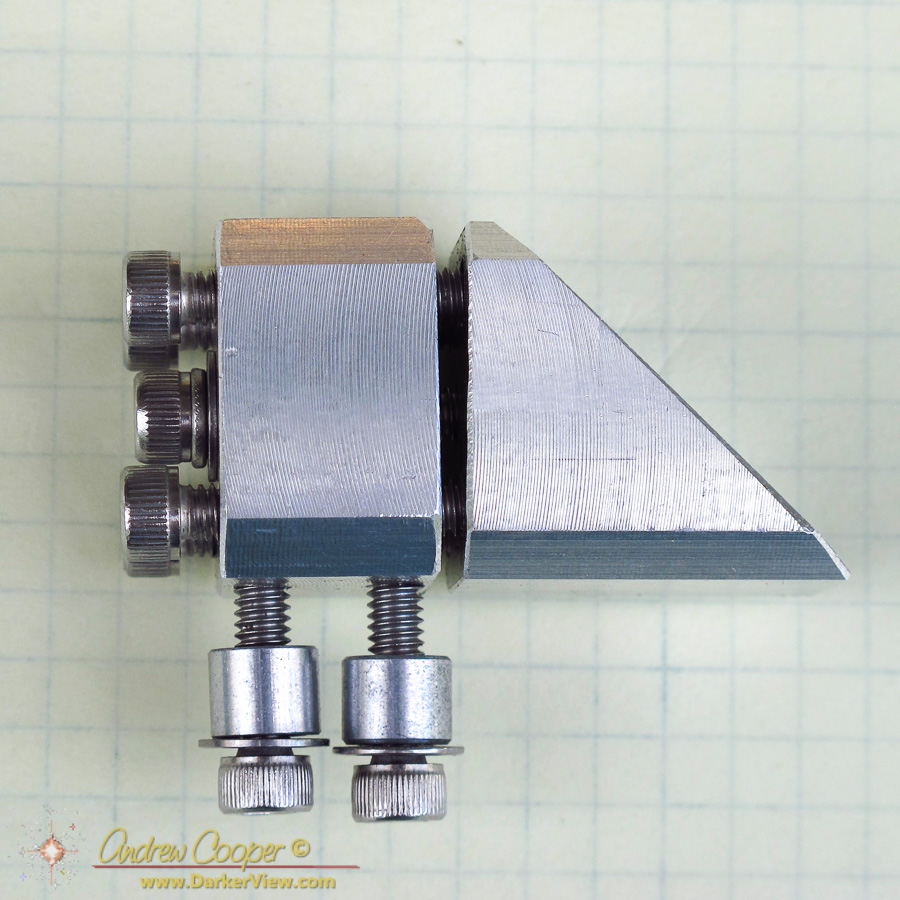
A single strut design demands some careful design of the secondary support. The design may look odd with the flaring metal shroud, but is carefully set up to block any light not arriving from the target. Looking into the eyepiece holder with the eyepiece removed one should see only black around the secondary mirror.
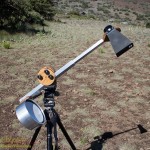
The most interesting feature of the telescope is the collapsable, telescoping strut that also doubles as the focus mechanism. Inside the strut is a threaded rod that has had most of the threads cut away. Attached to the end of the rod and protruding from the rear of the telescope is a knob.
Adjusting this knob allows the length of the strut to be adjusted to focus. Adjust far enough and the end of the threads it reached, at which point the strut collapses to half the original length. Turn the knob a few more times and the strut is locked in the collapsed position.
With no need for a traditional focuser the eyepiece is closer to the optical axis. This means that a smaller cone of light is directed to the side, allowing for a much smaller secondary mirror that blocks less light. The usual secondary size for a 6″ f/5 telescope is 50mm (minor axis) this design allows that to be reduced to 31mm. This is well over a 60% reduction in the area of light blocked by the secondary.
The optics are from GSO, or Guan Sheng Optical ordered from Agena Astro. While I am tempted to grind optics again sometime, it is hard to ignore the inexpensive price of commercial optics. The set cost about $184 with free shipping. Oddly Agena does offer kits (primary and secondary) through eBay, but with the wrong secondary size for this design and with a substantial shipping charge. Ordering direct I could choose the secondary and get free shipping.
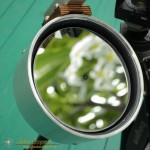
Under the Foucault test setup the mirror looks pretty nice. A slight turned edge, but otherwise well corrected figure. A smooth and featureless Foucault image was a pleasant sight. The focal length measures about half an inch short of the specification at 29.5″, not a problem.
Another surprise, the mirror came center dotted in a very nice way, a small annular area is free of aluminization. A permanent mark with a little center spot of aluminum to reflect the alignment laser, this will make collimation easier!
One structural element is challenging to find or make, the ring that protects the primary mirror. What is needed is some sort of tube that is about seven inches in diameter, or at least 6.5″ inside diamter to enclose the mirror and protect it. This is a matter of creativity, make or find some tubing of the appropriate size.
In Brett’s original telescope the cell was made from a wooden kitchen canister found at Ikea. That does not appear to be available anymore. There are other kitchen canisters that might work. I had planned to make the piece from a scrap of irrigation pipe I kept from older telescope projects. I can not locate that scrap, stashed in a box somewhere? I am sure it is around here somewhere.
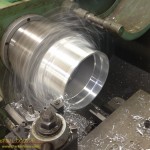
Plan B… I realized there was another source of aluminum tubing about seven inches in diameter that is often available locally… Scuba tanks. We do live on an island with coral reefs and dozens of dive shops. A standard Al80 tank is 7.25″ in diameter with half inch walls.
My friends Mark and Patti had a condemned tank in their garage that had failed inspection. Patti wanted to make it into a bell, never mind that steel tanks make far better bells. We made a deal, I would make the tank into a bell in exchange for the last few inches of the tank… Done. A couple passes with a chop saw and an hour in the lathe the cut that down and I had my mirror cell.
The result is a simple telescope that is quick to set up and very easy to use. As the field of view is several degrees with a low power eyepiece there is little need of a finder ‘scope.
Construction Notes
Following are general notes on the construction of the telescope.
- All wooden parts are sanded, liberally doused with wood stain/preservative, then given a couple coats of spray polyurethane. The use of spray, not brushed, allows for thin even coats to be easily applied.
- The bearings are the classic combination of Ebony Star Formica and Teflon. A disk of Formica is cut with a 4″ hole saw and secured with contact cement. 0.030″ Teflon with adhesive is cut for the other side of the bearing. Ebony Star is no longer manufactured but still available from several sources. I had a few small scraps left over from previous telescopes. Another laminate product or simply aluminum would probably work well with the Teflon to create a smooth motion.
- The wooden eyepiece holder has a thin neck where it is glued into the strut, a risk for breakage. A ¼” hole was drilled through the neck and a ¼”-20 bolt is epoxied inside this area to reinforce it.
- The secondary assembly is painted with ultra flat black spray paint. The primer and paint were sprayed without letting the paint flow in a solid layer, just dusting the surface. This creates a rough finish that is better at preventing low angle reflections and reducing possible sources of glare in the telescope.
- Further details on the secondary mount are included in another posting.
- To provide for a tight fit of the telescoping strut four thin strips of aluminum are glued onto the inner piece. On top of those there are four strips of teflon (the same used for the mount bearings) secured with adhesive. This provides a tighter fit of the two aluminum struts with a smooth sliding motion.
- Depending on the solution used to create the mirror cell some dimensions may change. The distance from the strut to the center of the mirror is of interest here. One should build the mirror cell then make the secondary support to match so that the secondary is directly in front of the primary mirror.
- The inner wall of the mirror cell is also painted with an ultra flat back spray paint.
- The front of the mirror cell was machined with an inset edge, this allows a circular lid to be made to protect the mirror during transport.
The only real problem with the ‘scope is balance. As the telescope is aimed high in elevation the mirror cell begins to cross over the center of gravity. As a result the telescope becomes nose-heavy. I currently have no idea how to solve this aside from adding weight, not an ideal solution for a travel ‘scope. The bearing can be tightened to prevent this, the Teflon allowing smooth motion with quite a bit of friction.


Hi Andrew, I like the design of your maka’iki telescope and was wondering if it’s possible to make it without many of the metal pieces that you used? I’m a first time atm’er and I don’t have a lath, router, etc. I only have basic power tools such as a drill, driver, and a saw. I also wondered if it’s possible to rescale the design to a 6″ f8 scope? Thank you!
The only metal parts that probably have to be metal are the two strut pieces and the threaded rod. These could be made with care using hand tools. I have a 3D printed version drawn up and need to make one of these days.
The design could be scaled up, but might suffer from issues in the rigidity of the single strut design. Personally I would keep it as a 6-inch.
If you do make a version of this scope send me some photos!!
Just wanted to say I enjoyed the read! That is a clever implementation of the focuser, EP holder, and shroud.