
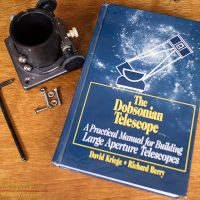
Obsession Telescopes are something of a standard in the astronomy community. David Kriege was one of the first to start building truss tube dobsonian telescopes commercially, bringing portable large aperture telescopes to the astronomy community. These telescopes were a bit of a revolution in the pursuit, with sizes unreachable only a decade before, when a 10″ or 12″ telescope was considered big. When I built my 18″ it is David Kriege’s book I used for much of the design, following in the footsteps of so many amateur astronomers.

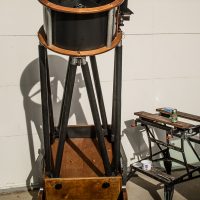
A 20″ f/4 Obsession donated to the observatory has presented a challenge and an opportunity. The telescope was the prized possession of Bob Michael having been ordered new directly from Obsession. The telescope is serial number 004 with a manufacturing date of June 1st, 1990. As David started Obsession Telescope in 1989, this is a very early example of his work. For many years Bob and his wife used this telescope to observe, completing the Herschel 400 and other observing projects. Unfortunately he was forced to give up astronomy due to age and glaucoma, donating his equipment to the observatory.
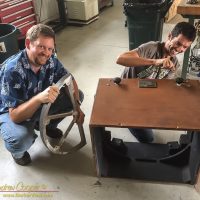
The telescope was in fairly bad shape, the tropical climate of Kona having taken a serious toll. Humidity had damaged the wood, much of the hardware was corroded, and there were traces of fungus growing on the optics. While other telescopes from Bob’s gear were restored and returned to service, the big dob had waited a while, sitting in a corner of the observatory machine shop.
We had started the restoration with a fair amount of optimism, a few evenings work and the scope can be returned to service… Right? No. This was going to take some time, a lot of time. There was a fair amount of structural damage along with the cosmetic damage we saw at first. Discouraged, it was almost a year before I took up the task again.
When I was designing Deep Violet I had access to several Obsession telescopes belonging to other club members. I looked long and hard at these telescopes to learn how to build a large dob. There are things I like about Obsessions, and a few things I do not like. With my own design I was free to do it as I wanted, thanks to good planning and experience with other telescopes like the Obsession I find I got most of those design decisions right.
Now, many years later, it has been very interesting to dismantle and rebuild a 20″ Obsession. During this work I have had a chance to examine every little detail of these telescopes. In dissecting this telescope I have learned much about the construction.
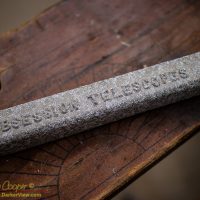
The ‘scope has not stood up well. In some part this is due to our tropical climate, but also to the quality of the materials used. Obsession touts the quality and finish of their telescopes in their marketing literature. Looking at their webpage it appears that things might be better now. This telescope does not have “five coats of polyurethane”, as is advertised on current telescopes. This is an early ‘scope, serial number 004, it appears the build construction has notably improved over the years.
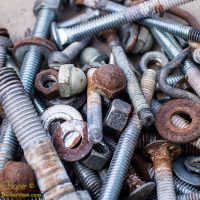
One of the largest gripes I have is the lack of stainless steel hardware, only a few items of hardware in the original ‘scope were stainless, and those may not be original. As a result much of the hardware is badly corroded and required replacement.
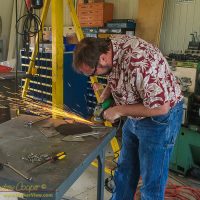
The hunt for new hardware has been lengthy, raided from observatory stocks, our local ACE hardware, and online. Fortunately only two screws sheared during dismantling the frame, any longer and taking the ‘scope apart would have been much harder. On the mirror cell several screws required grinding away, but this was in part due to the method of assembly.
The original birch and maple plywood had failed in some interesting ways, the outer layer separating in many places. As this is the layer that holds the glue bond on a lot of the joints some of these joints had failed. I have had to inject glue into the joints, literally, with a medical syringe and needle filled with wood glue. Inject and clamp the joints back together one by one, I got good at loading the little 5cc syringe with wood glue.
The inside of the mirror and rocker boxes were not properly finished, rather were simply sprayed with flat black paint that did nothing to preserve the wood underneath. I had to deal with a lot of bubbles where the inner layer of plywood was separating, injecting yet more glue. Once the gluing was complete I soaked the wood heavily with a penetrating preservative stain. The outer cosmetic veneer had begun to peel off one whole side of the rocker box. I finished peeling it off then spent an evening gluing it back using every clamp I had.
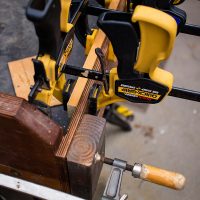
Once the gluing was complete on each piece hours were spent with a hand sander to remove any glue that had oozed out of the numerous repaired sections, remove some of the old finish, and to smooth the edges and corners.
A liberal amount of penetrating stain and a few coats of polyurethane were applied to the outside surfaces. Inner surfaces were treated with penetrating wood preservative stain and flat black paint. The result still shows the scars of many years of use, but looks far better, and should last for another couple decades.
The ground board on this 20″ scope is undersized. The size of the rocker box would have allowed a ground board several inches larger in size, and a bit more stable. Not having a large piece of Ebony Star Formica on-hand I left this as is. I did need to re-glue the formica in a few spots where the old cement had failed. Yet more gluing!
Also interesting is that the lower truss clamps on the mirror box are on the inside. All current Obsession telescopes have these on the outside, and David indicates that outside is the correct choice in his book. Another indication that this is a very early telescope indeed. The clamps required some additional maintenance. Three were re-glued to the side of the box during restoration, some drips of glue indicating that this had been necessary before.
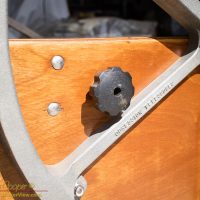
I love the Obsession cast aluminum elevation bearings. They are solid, perfectly shaped, and give a good motion to the elevation These had been corroded a bit, the surface white with alumina powder. These I simply wire brushed and wiped with WD-40 to restore. I had considered painting these to prevent further corrosion, but they look just fine as they were originally supplied. The upper tube clamps were subjected to the same treatment
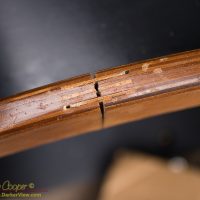
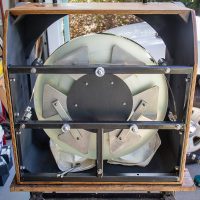
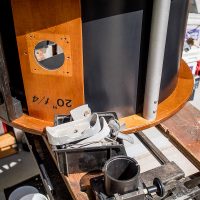
Also interesting… The rings for the secondary cage are not cut from a sheet of plywood. Rather they are pieced together in sections with lap joints to make the needed 22″ ID rings. This is a technique that undoubtedly saves a great deal of plywood. Unfortunately several of these joints had failed, requiring yet more glue to be injected and some rather creative clamping to restore.
The heart of the telescope is the primary mirror in the mirror cell, the most complex part of the design. The primary mirror was produced by John Hudek at Galaxy Optics, the manuafuctuer name and serial number etched into the side of the mirror. His son, Sky, now works here at Keck Observatory. I told him we had one of his father’s mirrors and he wanted to see it.
The coating on both the primary and secondary are degraded. Dirt, fungus, and other contaminants were removed in cleaning, but the damage has been done. The glass underneath should be in good shape, but a re-coating is in order. For now the performance of the telescope is acceptable, and re-coating can be put off for a while. It would be nice to get this done some day.
The secondary mount had another problem. It appears that the front half of the tube holding the mirror itself had a tendency to split open, threatening to drop the mirror itself. There had been previous attempts to fix this, remnants of RTV inside the holder at the back of the mirror, and electrical tape wrapping the holder to prevent it from opening. I solved this by fabricating a small bracket, a bit of aluminum and a couple more screws positioned to keep the mount from opening. I also installed a safety cord just as detailed in the book, a bit of nylon string glued to the back of the secondary and tied around the mount.
The mirror cell was, of course, rusted. This required stripping, brushing away the loose rust, then prepping and painting. All of the hardware was replaced, with new stainless steel collimation bolts made with custom machined knobs. The original nylon strap replaced with a adjustable beryllium copper strap similar to what I did in my 18″ dob. This metal strap will not stretch, keeping the correct alignment of the primary mirror.
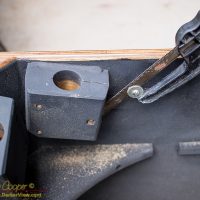
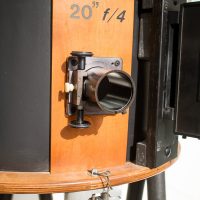
The last major issue was the lower tube clamps. These wooden clamps had flexed and deformed over the years, exactly as I would expect from wooden parts. There was some previous damage and repairs on the clamps to fix as well, one clamp was glued back together from multiple pieces. The mounting bolts were reinforced with a small metal plate at each clamp. The clamps needed to be shaped a little to fit the poles smoothly, a little sanding with a drill and a sandpaper drum needed here. To allow a little more clamping range the gap was widened by working a hacksaw blade through each gap.
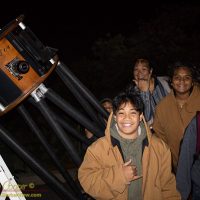
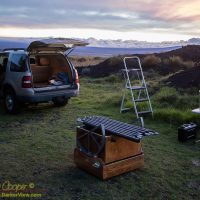
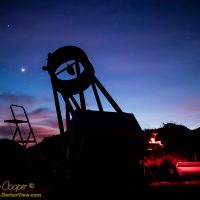
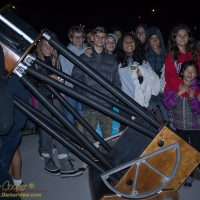
This early Obsession telescope, serial number 004 is now the property of the W. M. Keck Observatory. For twenty five years it was used by Bob Michael to wander the night sky. Already in use for outreach it has seen several nights under the stars including an evening with local students at Hale Pohaku high on the side of Mauna Kea. May it see many more years of use showing students and guests of the observatory the wonders of our universe.
Update Oct 24, 2016
I have been exchanging emails with David Kriege, the original builder of this telescope. He readily admits this was an early ‘scope and his design has seen any number of improvements across the years. Apparently a number of parts on the telescope are not original and were replaced across the years, including the secondary mount and the lower truss clamps.
That is a very old scope. Heck it’s only the four one I had built at that time. My modern scopes are considerably improved and different. At that time I wasn’t even a commercial entity. I’d like to help you get it up to the level of performance I now build. I noticed the split blocks are not ones that built. – David Kriege via email Oct 24, 2016
He has generously offered to assist in this restoration effort to repair any remaining issues. He was also kind enough to quickly respond to a couple questions I needed answered. Thanks David!
Update Nov 2, 2016
The primary and secondary mirrors are on their way to Galaxy Optics in Colorado. John Hudek has generously offered to re-coat the optics for free. We just had to pay shipping. Thanks John!
Update Apr 29, 2017
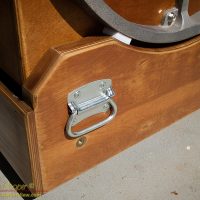
The ‘scope is complete and in service. The re-coated optics are installed and look great. The missing handle was installed. The ‘scope has now had several additional trips out into the dark and been used for a couple student groups including this weekend with kids from HPA out at Mauna Kea Recreation Area.


Wheres Da fiberglass and gelcoat? Oh thats right you dont usually rinse down your scope ,or take it under water
aloha
I did think of your fiberglass restoration of Cliff’s 24″ when I was working on this one. The plywood was in bad shape, much like the challenge you faced. On the other hand, I am not a boat builder, I used the techniques I know.