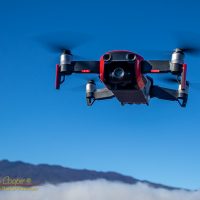
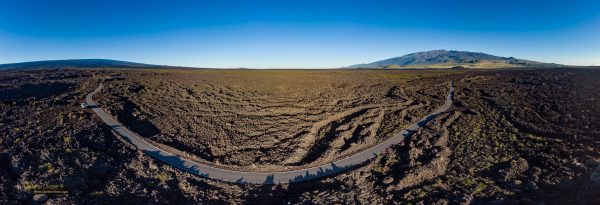
One of the fun things you can do with the panorama images created by the Mavic Air drone is to upload them to places these images can be seen a wide audience. Posting to Facebook is fun, but very few places will see more traffic than images posted to Google Maps.

The newer DJI drones like the Mavic Air produce 360 panoramas automatically. Stitched on-the-fly onboard the drone the panoramas are saved to the memory card ready for use at the end of the flight. The images are not without issues, the onboard stitching is quick and small flaws are usually visible. Far better results can be achieved by other stitching software in post, but the drone produced panoramas are generally good enough for web posting.
When using the images there is another issue… The DJI software in the drone does not add the specific EXIF tags needed for online services like Google Maps and Facebook to recognize the images as panoramas. When uploading an image right out of the drone the image is displayed flat, not with a panorama viewer that allows perspective correction and panning around in the image.
To allow addition of the needed EXIF tags there are a few solutions. You can manually edit the tags with command line tools like EXIFTool or a photo editor that gives access to the EXIF tags. There is also an online tool that will do some manipulation of the tags in an uploaded image.
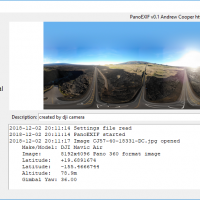
Wanting a bit more control, and the ability to do other tag examination and manipulation, I expended some effort to write my own tool… PanoEXIF is a Python GUI based program that allows for addtion of the needed panorama EXIF tags, stripping personal info tags out of the image, as well as examination and editing of every EXIF tag in the file.
The front end GUI provided by this script sits atop Phil Harvey’s excellent EXIFTool command line utility. EXIFTool allows extraction and modification of all the EXIF tags you are likely to find in an image.
The code is specifically set up for the DJI Mavic Air Drone. In order to recognize images as 360 or 180 panoramas the code looks at the image dimensions. it ahould be a simple matter to convert the software to recognize images from another source.
For Facebook only one EXIF tag is needed, XMP:ProjectionType=equirectangular must be present. Documentation of use of the ProjectionType tag in panoramas can be found in the FaceBook support pages. There are some additional requirements on aspect ratio and files sizes to note.
Google Maps is a bit more complex. Proper integration into Maps requires GPS location, heading, and other information with the image. The addition of quite a few other tags allows additional features to be added, including partial panoramas. There are a couple dozen tags that can be used, some required, some optional.

Adding the Facebook tag is simple, adding the Google Maps tags takes some work. The code for PanoEXIF extracts the needed DJI tags and moves the information to the new tags. In some cases a bit of math is required to generate the values needed.
I first ran into problems with reporting of the image heading. In a 360° panorama the stitched image centers the first frame taken. But this is not the heading found in the XMP:GimbalYawDegree tag for the resulting panorama image.
After poking around I found that the yaw reported is taken from the last frame taken, and is thus 45° off the center of the image. The Mavic Air shoots eight sets of images at 45° offsets to the left, plus one image straight down, for a total of 25 frames to complete a 360° pano. Thus subtracting 45° and then adding 360 if the result is less than zero results in a corrected 0-360° heading for the center of the panorama.
For a 180° panorama the spacing is 34.3° azimuth between images, as the last frame is also used here, the offset to the the heading of the final image is 3 x 34.3= 102.9°. Again the result is normalized to 0-360° to meet the Google Maps specifications.
Another issue is that the altitude reported by the drone is not from sea level, despite the GPSAltitudeRef indication that it is. The altitude reported is altitude above or below the drone launch point. I do not have a solution for this one as of yet.
If the imaging library Pillow has been added to the Python installation you also get a thumbnail view of the image. If Pillow is not present the image area will remain blank.
This is not a clean program, there will be bugs, and not nearly enough checking is performed to catch input errors. It is a personal software tool that others might find useful. Anyone wishing to manipulate EXIF information using Python will find this code useful for study.


Hi, thanks for the info. I have a Mavic Pro 2 and while my 360 pano is recognized after adding certain tags, it shows as distorted. I expect that the FOV for Ricoh is different. Do you what tags can affect FOV so it shows accurate for Mavic camera?