A Camera Security Device

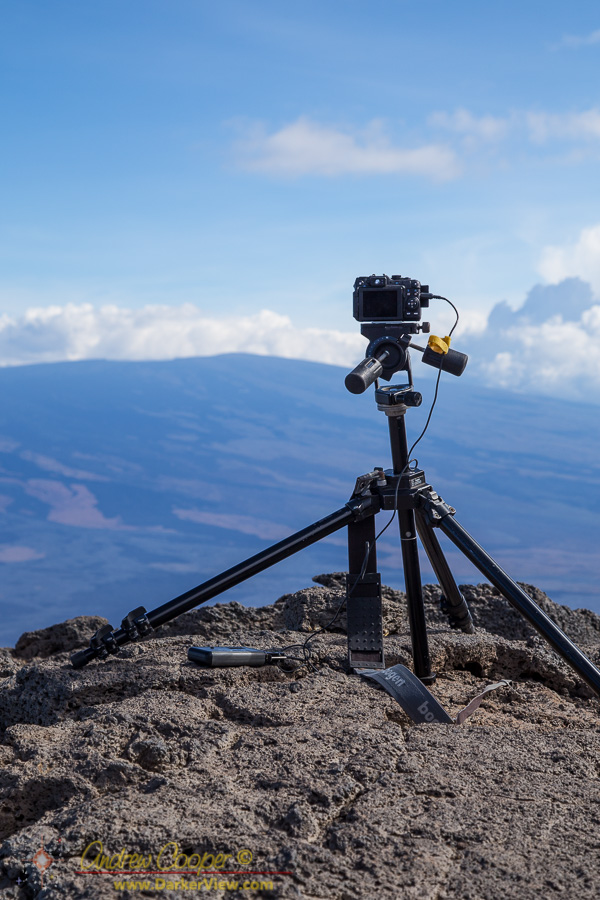
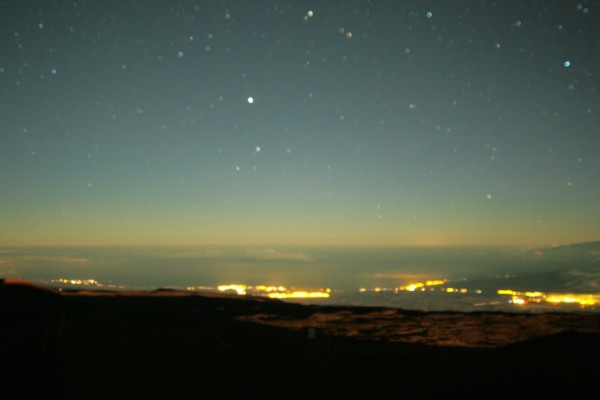
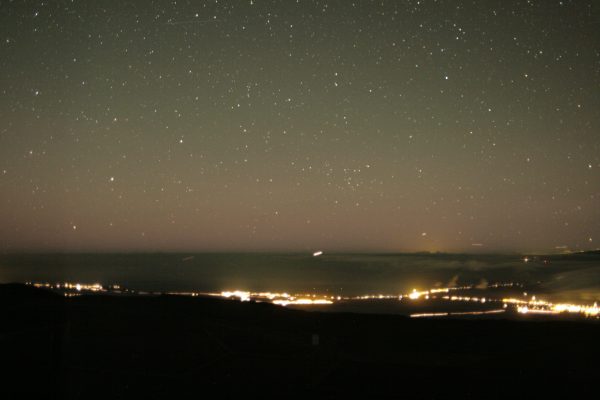
Taking astrophotos or time lapse often involves leaving a camera out in the dark for long periods. Cameras are somewhat more robust than humans, tolerating the cold for a bit longer. As a result often the cameras are unattended while the human seeks shelter in some warmer place. This can result in the theft of the unattended camera.

CamLockBlock
A camera security block for unattended camera operation
This was recently highlighted when a camera was stolen from near the Keck 2 telescope last week. Left outside for a nighttime time lapse it simply vanished. We all commiserated with the victim in a Facebook conversation, we have all run the same risk and worried about this happening to us. I usually place the camera somewhere inaccessible to the public or somewhere remote enough that it is unlikely to be found. I still worry.

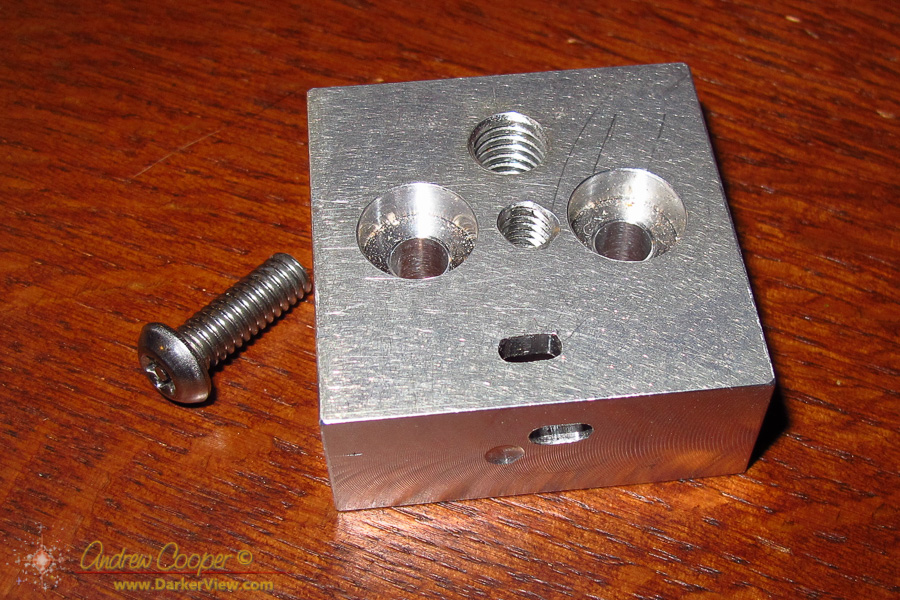
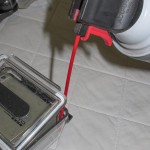
On the mountain is not the only place this risk exists. I have often left a camera operating for hours in my driveway at the front of my house attached to a telescope. In an attempt to make it somewhat more difficult to simply grab and run I designed a simple security device. A little block of aluminum with a slot that accommodates a standard computer cable lock.

Machined from aluminum the block took very little time to make and provides a great deal peace of mind. It is not impervious to a determined attack, but does prevent the camera from simply walking away. In place of aluminum it could probably be 3D printed if you do not have a machine shop available. With a little more patience it could be manufactured with simply hand tools.

Mechanical design for the CamLockBlock

The slot is the standard Kensington security slot, a 3mm x 7mm slot as found in almost all laptop computers. The locks are available from just about anyplace that sells computer accessories.

The screw I use is a tamperproof button head screw, one that requires a special tool to remove. A standard hex button head screw would probably work in most situations, it is unlikely that an opportunistic thief will have a set of allen keys handy.

The block can be used on a telescope, with the cable wrapped around a tripod leg. It can also be used on a tripod, a ¼-20 hole is tapped to allow the block to sit between the camera and the tripod head. The security cable can then be secured to anything available. Atop Mauna Kea there are many railings, guardrails and signposts that would provide a solid locking point. In nature there are fewer steel poles, but a tree trunk or something similar would also serve.

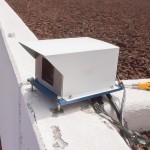
The design can be modified to suit ones needs, the mechanical drawing above shows the device in its simplest form. As you can see in the photo my prototype block includes two screw holes for the camera and a 3/8″ threaded hole for larger tripods. I also put a second lock slot on the bottom to have the option of having the lock stick out in a different direction.

Check the dimensions of your camera, tripod head or favorite adapter plate to insure that the lock will fit without interference. You can always adjust the dimensions or the mounting hole positions to accommodate your setup.

Street Photography with the Canon EOS-M3

Packing the camera for a trip always presents a set of vexing decisions for a photographer. What do you plan on shooting? What gear will be needed? This particular trip would be to a place I have never been and would present a range of unique photo opportunities. Nicaragua for the first time!

Cobbler
A cobbler practices his trade in the Boaco market

While I had never visited Nicaragua I had been in Mexico many times, I expected the photographic situation to be much the same, an expectation that was not disappointed. Each town in Latin America may be unique, but at at the same time looks much the same as the last. The character of these towns offers varied photo opportunities. Best of all to my thinking… Many towns feature markets, a sampling of the people and goods unique to the region, a condensation of the local culture in one convenient place.

Thus I chose my gear uncompromisingly for street photography. Leaving the big DSLRs and lenses at home I loaded two EOS-M bodies. I have one original model and one of the new M3’s purchased just before the start of the trip. These two cameras would take very little room in the luggage and offer a good range of capability. Traveling with only a single backpack meant space was at a premium. The primary lens would be the 18-55mm to allow a good general purpose walkabout capability.

Continue reading “Street Photography with the Canon EOS-M3”

Vintage Glass

One of the advantages of a mirrorless camera, like the EOS-M, is the very shallow backfocus requirement. The distance from the lens mount to the sensor is quite small, allowing use of just about any series of lenses on the market. All that is needed is the correct adapter, a need that several specialty manufacturers have addressed with products. The result is that the camera is useful in a wide range of photographic experiments and projects.

EOS-M with Canon 24mm f/2.8 FD
The EOS-M with a Canon 24mm f/2.8 FD lens mounted
This includes older lenses from years past such as the Canon manual focus FD system from decades ago. Forgotten by most, these lenses have none of the modern features photographers have come to expect. No autofocus, no image stabilization, just solid optics from an age now past. These old lenses are not obsolete, there are creative uses still available for these classic lenses.

Any sort of zoom lens need not apply, the quality of the older zoom lenses often suffered. Designed without the aid of modern optical design software and without aspheric elements these designs fall short of modern standards.

You can find these classic lenses languishing on shelves in the back of camera stores, in garage sales and on eBay. There is a lot of junk out there, it takes some research to differentiate the good from the bad. A couple quick rules of thumb will sort out most of the junk… Stick to a first rank name in old camera gear; Canon, Nikon, Ziess, Hasselblad, and Leica. The next hint of a hidden gem is the focal ratio. The classic primes were fast, f/2.8 or faster. Still, it is wise to look up the history of the lens before plunking down any cash. The good lenses will be well written about, even in modern times. You will find good references with a quick web search.

Continue reading “Vintage Glass”

A Night on the Summit

A photographer needs a guide around Keck for the night? Setup time-lapse cameras throughout the facility? Sounds like fun… Sign me up.

Two Lasers
Two AO lasers aimed at the galactic center with a large red glow coming from Kilauea
Thus I meet local photographer Jason Chu at Keck in the afternoon and help him drag a mountain of camera gear into the summit facility. We loaded quite a pile onto the cart, eight full DSLR cameras and a stack of tripods. The plan is to set them up in the domes for the night then re-collect the cameras in the morning. Six cameras in the domes and a couple more to carry through the night.

Two lasers, both aimed at the galactic center were on the schedule for the second half of the night. Andrea Ghez and her team having time on both telescopes. The weather looked a bit problematic, thick cirrus covered the sky, but the forecast called for clearing after midnight.

Jason came with a carefully drafted plan, where to set and aim each camera, timer settings, lens choice, all carefully considered. A pretty good plan too, only a few details needed changing as we placed each camera. Four cameras in Keck 1, another two in Keck 2. One camera placement was my idea… Clamped to the Keck 1 dome where it would track with the telescope. I had spent a few minutes in the machine shop putting together a solid camera clamp.

Unfortunately the clouds did not clear as predicted, thin cirrus hanging on through the night. It was clear just to the west, but stubbornly would not give us the clear skies we needed overhead. Several times it looked to clear, but the clouds would thicken again. We did have both lasers on sky for a few minutes, just enough for a few photos and not long enough to do any science.

With high hopes for some dual laser time-lapse I was ready to set up my own camera, but ended up with only a few still photos. Jason got a few nice shots during that short time, having eight cameras helped make the most of those few minutes. I did get a nice video clip of the telescope shot by rotating the dome with a camera.

Jason is working on a personal project and will be out shooting more images in the dark. I will certainly feature the results of his effort here on DarkerView when he finishes. For myself? I will have to schedule another opportunity to go up and shoot some laser time-lapse. There is an intriguing night at the beginning of July on the schedule with both Keck lasers. I also need to mail Jason a camera remote, an accomplishment that only one bit of camera gear got left behind.

Preventing Fogging in a GoPro Camera

Fogging is a real problem with GoPro cameras, particularly in diving where humidity is so often an issue. Closing the camera in a damp tropical environment, then submerging the camera in cooler water to dive a tropical reef is a sure recipe to fog the inside of the optical window.

Purging the Air
Purging the air an moisture from the GoPro case with difluoroethane
I understand the desire to keep the case as small as possible. particularly for an action cam. But why? Why could GoPro not include enough room for a small desiccant package, a few millimeters would have been enough. Yes, there are the little pieces of blotter paper sold by GoPro and others, but these are not nearly as effective at removing moisture from the case as true silica gel desiccant products that absorb far more moisture per volume. I have seen GoPro cameras fog up even when properly used with the Anti-Fog inserts.

There is plenty of room in my other camera cases for desiccant packs. I keep a good pile of desiccant on hand in nice little packets just perfect for loading into the camera cases. I put the used packs in my toaster oven for an hour at 150°F to bake the moisture out and reuse the packs over and over again. Simply store in a tightly sealed, airtight container for use.

Continue reading “Preventing Fogging in a GoPro Camera”

Reasons to Carry a Camera

I work at the summit of a nearly 14,000ft mountain that sits atop a pretty tropical island. That alone is good enough reason to carry a camera at all times. You never know when you will need that camera, beauty appears when you least expect it.

Dome Motor Controller
The control wiring for a Keck 1 dome VFD motor controller
There are other reasons to carry a camera in my life. I often use the camera to document my work. There is a camera, the little EOS-M, in my backpack alongside the rest of my tools. Wire cutters, screwdrivers, allen wrenches, a multimeter, all the useful tools I need every day, along with a camera, memory cards and spare batteries.

The advent of digital cameras where the cost of each photo is negligible has made this possible. This would not have been practical in the days of film. Yes, I remember those days, counting out every frame of a 36 exposure roll, deciding if the shot was worth it. In this digital age I usually have a dedicated camera along and never worry about shooting. If that camera is out of reach there is always the iPhone in my pocket.

The equipment I work on is often unique, there may be only one copy in the world. Two if we have one installed on both Keck 1 and Keck 2. The documentation can be of varying quality, some is good, some is abysmal, some is just plain wrong. Some of this gear was professionally built by engineers, some of it was built by graduate students who would never need to fix it years later.

Continue reading “Reasons to Carry a Camera”

MastCam

Some parts of the job are simply fun. Installing the various upgrades to the weather system has been just that. The latest piece of kit being more fun than usual.

Weather Mast
The Keck weather mast with a sonic anemometer at top, MastCam, and the housings for the temperature, humidity and barometric pressure sensors.
We are installing a number of new cameras throughout the facility. Replacing an ancient CCTV system that still uses composite video and black and white monitors. Yeah, that ancient. The system is quite useful, it allows visibility of the telescopes from the operator stations and the manual control panels when you are driving the telescope.

Even that is topped by the camera I installed this fall. The latest camera is a new pan-tilt-zoom camera attached to the weather mast.

The camera does have more prosaic reasons to justify the effort of installing it. With the camera the operators can observe the weather conditions around the telescope, observing supervisors can view the ice and snow on the domes from Waimea, the day crew can check the weather conditions before driving to the summit, and more. The camera does have enough sensitivity to see the brighter stars and the banks of fog that roll over the summit. In full dark and at full gain the image is noisy and faint, not all that great. Given just a little moonlight the performance is much better, allowing visibility of oncoming clouds.

MastCam Ice
Hanging ice blocks the view of MastCam after a severe winter storm on January 4th, 2015
Weather conditions can be extreme on the summit. Last week’s storm being a good example… 100mph sustained winds, 135mph gusts, more than a foot of ice coating any vertical surface and several inches on the ground. The camera is rated to survive such conditions, and has now survived its first major winter storm. Electronic operation is guaranteed by the manufacturer for -40°C, and there is a heater and blower inside the camera dome to remove ice. It was able to melt its way clear, at least partially on the first day, while it took a week to clear the domes for operation.

Even more fun! On Christmas Eve I was contacted by Hawaii News Now for photos of the storm, they were eager to do something about a white Christmas for the evening news. As I had not been to the summit and no one on our crew was up, I simply grabbed some MastCam images and forwarded them. The images were aired in the first couple minutes of the Honolulu evening news!

The camera is not available to the public, it would be too much wear and tear to the pan-tilt mechanism and a huge hog of bandwidth. You have to be inside the Keck network to use, from there it is available to anyone on staff. It has proven quite popular, with many folks using the imagery to check on mountain conditions in the latest bad weather.

Next up, yet more cameras in the dome and even a couple on top of the domes. there is also a precipitation sensor and more in the works for the weather station.

OK, enough fun, back to revising the Keck 2 dome schematics.

The Keck CloudCam

It works! We now have a CloudCam at Keck. It is not quite ready for full active service, but it is alive and taking images. I got the network connection running yesterday, after mounting the camera and running the various cables over the last couple weeks. A little time for commissioning and getting the software setup and the camera will be available to everyone.

Keck CloudCam
The housing for the Keck CloudCam ready for the worst in Mauna Kea weather.

Our camera was built by Kanoa over at the Canada France Hawaii Telescope. Kanoa built the first CloudCam that has served CFHT so well. In service for a couple years now, the CFHT CloudCam gives our telescope operators an unparalleled view of the weather. This is critically important as heavy fog, rain or snow can damage the telescope optical coatings.

Post Update… The Keck CloudCam Link!
Video Archive

To secure and protect the enclosure Kanoa built I fabricated a solid mount. A heavy machined plate and an aluminum cover should shield the camera from the worst that Mauna Kea Weather can dish out. The camera electronics warm the box nicely and a heater is installed to warm and deice the window. We shall see how it fares, the summit weather can be amazing.

With the original CloudCam pointing east, over Hilo, our CloudCam points west, a complementary view of the weather approaching the summit from either direction. The imagery will be closely monitored by all of the telescope operators on the summit during marginal weather.

The imagery will be available to the public as well. Expect live images as well as compiled movies of each night. The first CloudCam has quite a following, quite a few people check the camera constantly. This includes quite a few UFO consipracists. If anything odd shows up on the camera the video quickly shows up on YouTube and linked to postings on the UFO sites.

Yes, the focus needs to be adjusted (I expected that), but the scene covers a nice range from the Waikoloa resorts on the left, past Kawaihae, to Waimea on the right.

CloudCam at Keck
A test image from the Keck CloudCam

And after focus adjustment we get much nicer stars…

CloudCam Image
A CloudCam image showing the lights of Waikoloa, Waimea, and a lot of evening inter-island air traffic.

Starscape Photography

Starscape photography is becoming increasingly popular. Dramatic photographs of a starry sky over a scenic landscape. Properly done the results can be truly impressive. The photo is a beautiful landscape with a glorious display of bright stars overhead. For those who have long enjoyed the night such a photo captures a sense of being there, of standing beneath those brilliant stars. This is starscape photography, a relatively new type of photography made possible by improved photographic technology.

Summit and Winter Milky Way
The winter Milky Way over the summit of Mauna Kea, Canon 6D and Samyang 14mm f/2.8 lens, 30s at ISO 6400

We will define starscape photography as shooting traditional landscape photographs with only starlight and skyglow for illumination. The exposure is fast enough to keep the stars from trailing. The result is a recording of what the scene would look like to a person standing under a starry sky.

Continue reading “Starscape Photography”