Astronomical Intensification

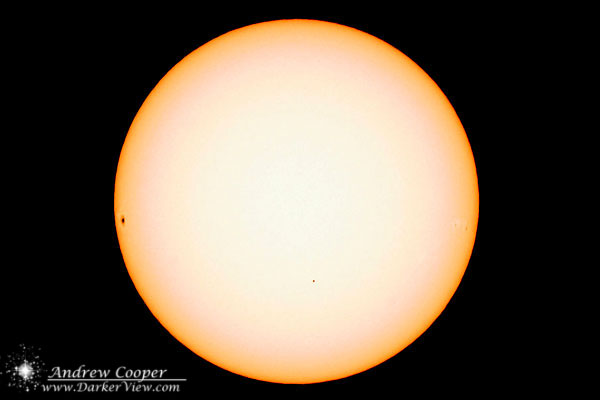
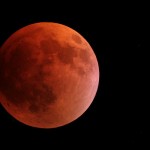
Visual astronomy is the practice of pushing our built in optical detectors to the limits of performance. Our eyes are surprisingly good optical instruments, and until the advent of film about a century ago were the only means we had of observing the universe. Even now, in the age of sensitive electronic detectors there are those who appreciate the view of the heavens through our own eyes.

Intensified M104
The edge on spiral M104 photographed with a Collins I3 Image Intensifier
This does not keep some from trying other ways to improve the view. Night vision technology, devices pioneered by the military that amplify the available light, offer intriguing possibilities. Available in compact packages these amplifier image tubes have been incorporated into an eyepiece sized package that can replace a standard eyepiece and offer an amplified image.

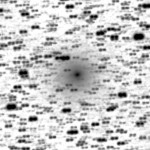
The image tube operates by charging a grid to a high voltage inside a small vacuum tube. Incoming light (photons) strike this grid and create a shower of electrons that continue onwards to strike a phosphor screen at the rear of the tube. A single photon can create a shower of hundreds of electrons, a very large signal gain. The phosphor screen glows where struck by photons, creating a image of the amplified signal.

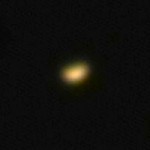
A bright image is seen on the screen of the object, hundreds of times brighter than the original. The image is green, as result of the phosphor, this amplification is a monochromatic process. There is some noise in the image, random “sparkles” called scintillation that result when electrons leave the charged grid in a random fashion.

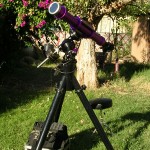
The images shown here are taken with the Collins I3 eyepiece or I3piece. The device is a very nicely built unit that is about the same size as a modern high quality eyepiece. Actually it is much smaller than some of the large designer eyepieces seen on some telescopes. An internal battery means there are no cables resulting in a neat package. The intensifier has a standard 1.25″ or 2″ nose piece threaded to accept standard astronomy filters.

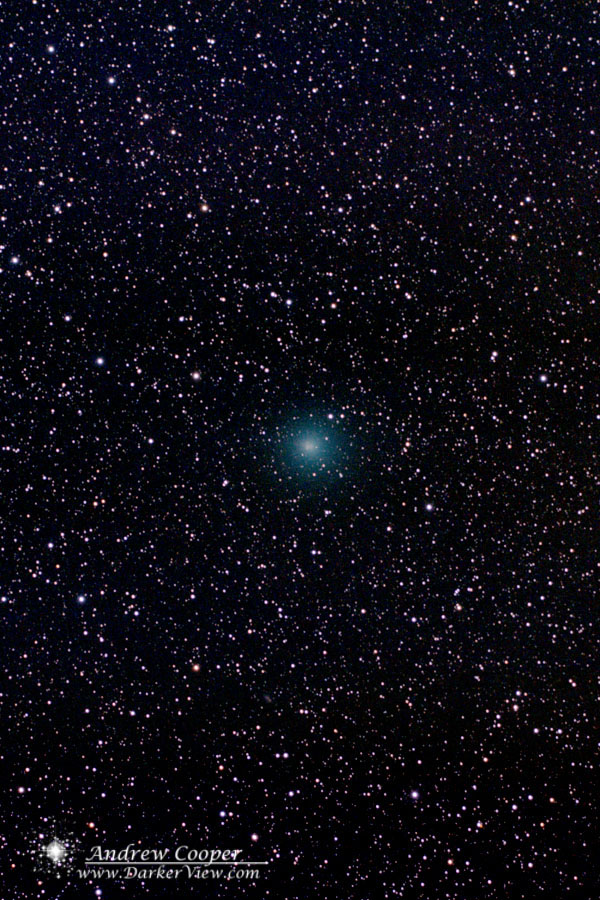
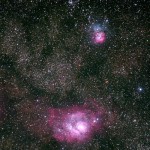
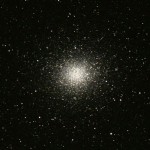
The image intensifier is not a panacea, there are some objects where the intensifier works well, and others where it does not perform. Globular clusters and planetary nebulae are quite dramatically represented in the intensified view. It is faint, low surface brightness objects like galaxies and extended nebulae that are often better appreciated with a normal eyepiece. Switching back and forth is generally a poor idea as using the intensifier decreases dark adaptation.

Intensified M51
The edge on spiral M51 photographed with a Collins I3 Image Intensifier
During personal observations of galaxy views in two large telescopes side by side, I noted more detail in the un-amplified images compared to those using the intensifier, particularly where subtle detail was concerned. I have had opportunity to observe the same galaxy in my 18″ f/4.5 followed by the view in a 24″ with the intensifier. The images in the intensifier were much brighter, but the contrast range seem compressed, such that HII regions and similar low contrast details disappeared.

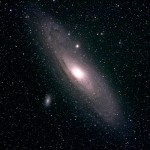
One place where the value of the intensifier is undeniable is in public outreach. The live views of bright galaxies show far more detail to the inexperienced observer that they would otherwise have missed in the eyepiece view. A spiral galaxy is clearly a spiral galaxy, even to a first time observer. In addition the intensifier can be used to provide views of faint objects under less that ideal conditions. Addition of a narrowband filter can increase the signal to noise and allow viewing of emission nebulae even with substantial light pollution from natural (e.g. the Moon) or artificial sources.

Unfortunately the Collins intensified eyepieces are no longer available from the manufacturer, though the website still appears functional. There is an equivalent product from BIPH which uses the same technology. At nearly four thousand dollars these devices are not for everyone. they can be used to good effect under the right conditions.

Mercury in the Sunset

Mercury
A crescent Mercury, 16Apr2010
Earlier this month, as Mercury was slipping back into the glare of the Sun, I had an opportunity to shoot some webcam material of the planet in hopes of getting an image of the crescent shape. The resulting image does not look like much, but I have to think it really isn’t all that bad.

The photo does represent Mercury fairly well, at least the normal view you get in a telescope. As the innermost planet does not get very far from the Sun, it is typically seen quite low on the horizon. This leads to poor views seen through a great deal of atmospheric distortion.

What the photo does not show is the chromatic distortion, this was corrected during processing of the photo. The atmosphere will also break up the color, refracting the light when an object is low on the horizon. The processing software allows realigning the color planes, correcting much of the effect.

What can go wrong?

I mentioned in another recent post that astrophotography is an art of details. Dozens of little issues must be dealt with, failure to properly address even one item, and hours of work can be lost. Each technical issue must be understood, and a solution found through technique and experience.

The saving grace of modern astrophotography is that once all the equipment has been set up and the details under control, the process becomes automatic. The computer, telescope mount, and camera operating for long periods of time, often hours, with no human intervention. One of the critical functions to long exposure photography is an autoguider, a small, automated secondary camera that keeps the telescope and mount pointed at exactly the same point in the sky for the entire exposure.

Guiding Error
An exposure of the Christmas Tree Cluster is guided into oblivion when the ST-4 autoguider loses the star
Last Sunday all was going well, several hours of exposures looked pretty good, at least on the little LCD display of the camera. The astrophoto gear had setup smoothly, all systems checked out and running well in just a few minutes after rolling the rig out of the garage. Mental checklist complete I hit the button to start exposures and left the gear to do it’s thing.

The first hint of trouble was the display on the autoguider. I did not see this until I went to stop the series of exposures I had hoped was complete. The guider was displaying large guide errors each cycle, where I should see zeros, or at least small numbers, it had E’s, a bad sign with the venerable ST-4 autoguider.

Hoping for the best, but fearing the worst, I rolled the ‘scope back into the garage and setup the camera to take calibration frames. I would discover the truth later, after I got a few hours of sleep.

When I downloaded the memory card the extent of the problem becomes apparent. Much of the last sequence of photos is ruined. The guider clearly lost the star somewhere into the third exposure, reason unknown. What resulted was twelve exposures with ziz-zag star trails across them, well over an hour and a half of wasted exposure time.

All of the evening’s early exposures were fine, only the last sequence was ruined. Thus, the evening was not a total loss, and I do have some new material to process. Now to figure out what went wrong with the autoguider, probably just some small detail I missed.

Comet C/2007 N3 Lulin

Another frame of Comet Lulin taken from the driveway. This one was taken on the evening of the 26th, a day after opposition, when the comet was directly opposite the sun in the sky. The interesting ion tail that was to the west of the nucleus has swung around behind the coma from our point of view. The frame was aligned on the comet as it moved and processed to suppress the streaked stars.

C/2007 N3 Lulin
Comet C/2007 N3 Lulin on the evening of 26 Feb 2009, a stack of 10 x 4 min exposures, Canon 20Da and TeleVue 76mm APO

Comet C/2007 N3 Lulin

The clouds have not been kind to those of use hoping to observe a comet here in Hawai’i. Last night Deb and I were at the Mauna Kea VIS, volunteering with the evening stargazing. I had hoped to get a good look at the comet from a dark site. But the clouds kept me from seeing the comet at all. A few people did get a look when a hole in the clouds allowed a glimpse, but by the time I got to an eyepiece the clouds had again closed over Leo, obscuring the view.

I did get a few hours of decent skies a few nights ago from the driveway in Waikoloa. I took advantage of that time to get twenty four minute exposures with the Canon 20Da and forty exposures with the CCD camera. Unfortunately the streetlights precluded my getting a decent visual view. The camera did a bit better, revealing some interesting structure to the tail.

Processing the image proved to be quite a challenge. The comet is moving very fast against the background stars. Aligning the images on the stars turns the comet into a long blur, likewise aligning the images on the comet creates streaks in place of stars. The answer is to process the image both ways and add the two resulting frames together as layers in Photoshop. This is the first time I had attempted this process and the results are reasonable…

C/2007N3 Lulin
Comet C/2007 N3 Lulin on the morning of 22 Feb 2009

Comet 144P Kushida

I took advantage of a clear evening to do a little more driveway astrophotography. The target was comet 144P Kushida. The comet is nearly at the Zenith in the evening, very conveniently placed with ample time to take more than a few frames.

The setup was fairly typical for me, the Canon 20Da and the TV-76 shooting for over 40 minutes (10 frames at 4 min each). The frames were calibrated and stacked in Images Plus and post proccessed with Photoshop and FITS Liberator. I followed Jerry Lodgriss’ instructions for preserving and enhancing the star colors with pleasing results. I suspect I will be using this technique more in the future and star colors are something that has always frustrated me.

144P/Kushida
Comet 144P Kushida, 20 x 2min exposures w/180mm lens @ f2.8 and IDAS LP Filter, 15 Feb 2009
Since I have a CCD camera co-boresighted with the TV-76mm refractor I was able to use the CCD to take frames simultaneously. This arrangement is convenient as I can use the CCD for finding and framing the target, the field of view is very similar between the two cameras. I spent time early in the evening to carefully align the CCD to match the view in the refractor. There is also a small 10cm SCT in the setup for use as a autoguider scope, but I have not been using this lately. I suspect I will try some longer exposures of C/2007 N3 Lulin in a few days and will need the guider.

The comet itself was fairly straightforward, a round coma with no real tail, a slight off centered shape to the coma. The cyanogen green comes through nicely, very apparent when processing the color planes separately. It is moving fairly slowly, for the DSLR photo I aligned on the stars and only had slight issues with the comet trailing. For the CCD image I aligned the images on the comet, showing some trailing in the stars.

The CCD frames do not show any sign of a tail or other structure either. This is not surprising as 144P Kushida is usually a fairly dim comet that is bright only due to material from an outburst a couple months ago. It is not a highly active comet with jets, tail and all of the other features that can make comet photography so interesting.

144P/Kushida
Comet 144P Kushida passing through heavy starfield in Taurus on the evening of 15 Feb 2009, stack of 10 x 4min exposures with a Canon 20Da and TV-76mm

A Daytime Comet!

C/2006 P1 McNaught is currently passing close to the Sun. At a mere 18 million miles (0.197 AU) from the Sun the intense solar radiation is causing the comet to boil and vent violently. The resulting cloud of gas and dust is reflecting enough sunlight to brighten the comet dramatically. Estimates are placing the comet at mag. -5 or even mag. -6. This is much brighter than even Venus! Some observers are reporting easy unaided eye visibility, but in the sky over Tucson a lot of dust and aerosols in the air are causing a great deal of glare around the Sun. Thus binoculars or a telescope is required to see the comet.

C/2006 P1McNaught
C/2006 P1 McNaught captured with a TV-76 operating at f/5 and a Canon 20Da DSLR, 1/8000 sec, gain at 100ISO. Taken 2:29pm 14 Jan, 2007 and processed with Photoshop. Three frames aligned and stacked in Photoshop to improve the signal to noise ratio.
The challenge is that Comet McNaught is just five degrees east of the Sun. Observing so close to the Sun presents distinct dangers, I do not want to fry my retina! So I carefully positioned my TV-76 on the alt-az mount so that the Sun was just behind the edge of my carport. Thus I could pan around and locate the comet with little fear of direct sunlight down the tube. A few frames with the Canon 20Da turned out OK but not great, those dust and aerosols in the sky and the resulting glare is reducing the signal to noise in the images. The photo to the right is a stack of three images in an attempt to improve the signal to noise, then greatly cropped in and levels adjusted in Photoshop.

The view was better in the eyepiece. A sharp point of the coma with a fan shaped tail. This really looks like a classic comet, I had not expected such a good tail in the bright sunlit sky. This is my first daytime comet, and since the opportunity may not come again anytime soon, this may be my only chance to see one, truly a once in a lifetime event!

Mercury Transit

About a dozen times a century Mercury passes in front of the Sun as seen from Earth. The event is observable with a modest telescope and a solar filter, Mercury can be seen as a small black dot crossing the surface of the Sun. If half of those happen when the sun is below your horizon the average person will have the chance to observe five or six in a lifetime. Since the next opportunity will not occur until May 9th, 2016 I didn’t want to miss this one!

Photographing a Mercury Transit
90mm refractor Violet Haze photographing the transit
I took the day off.

Considering that Mercury never gets very far from the Sun means that most of the time you can observe Mercury it is low on the horizon and is typically seen through a great deal of atmospheric distortion. A transit is one exception to this, during a transit mercury is a sharp disk, very different from the multicolor jello ball that is usually seen.

The 2006 Transit was well timed for observation across western North America, starting just after noontime and ending at 5:09pm MST. This put the Sun high in the sky for all but the last part of the event. Our weather cooperated as well, delivering a cloudless blue sky the entire day in place of the clouds that had been forecast. The air was reasonably steady as well allowing good photographic and observing conditions.

I took advantage of the weather and photographed almost the entire transit, all but the very end when the sun sank below the trees in my neighborhood. I used the Canon 20Da and setup a timer to shoot every 5min. The only issue was the inability to do a polar alignment on the mount when setting up in the middle of the day. The result was I had to manually guide the scope every 10-15 min to keep the sun centered.

I got plenty of good photographic material, enough for a few single photos as well as an animation of the transit. A transit is an impressive demonstration of the scale and arrangement of our solar system. Not hard to visualize the reality of those textbook drawings of planetary orbits after you have had such an opportunity to see the real thing.

No complaints on my second Mercury transit.

Mercury Transit 8Nov2006
The Mercury transit of 8 Nov 2006 in progress. Mercury is about halfway between the center to the bottom, a large sunspot complex is visible on the left edge. Photo with a 90mm APO refractor, a Thousand Oaks full aperture filter and a Canon 20Da camera.

DSLR Astrophotography

Digital SLR cameras make surprisingly good astrophotography cameras on bright objects. Good sensitivity, low noise and a convenient form factor make these camera a good choice for shooting the night sky.

One useful modification to the camera is removing the standard IR cutoff filter present in cameras and replacing it with a filter that is tuned to let in more of the red. The new filter should allow light at 656nm, what astronomers call hydrogen alpha, or Hα, the light emitted by neutral hydrogen atoms, the most common element in our universe. This is the red glow that makes the emission nebulae so colorful. An astrophotographer can do the filter change themselves, send it to a specialist who can do the work, or buy an already “modded” camera. Canon has produced two special models specifically for the astrophotography market, the EOS 20Da and 60Da, with this special filter.

Below, one can see the results of using modified, and unmodified cameras and relatively small telescopes…