A Dark Night

Another new Moon weekend, another observing outing to Mauna Kea. With some shiny new astro equipment to play with I decided to load for photography instead of visual. Disassembling the photographic mount I realized it had not been taken apart in over two years, setup in the garage and used in the driveway. I did not expect to be alone, a few other local observers had indicated plans to get out this night.
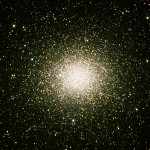
Omega Centauri
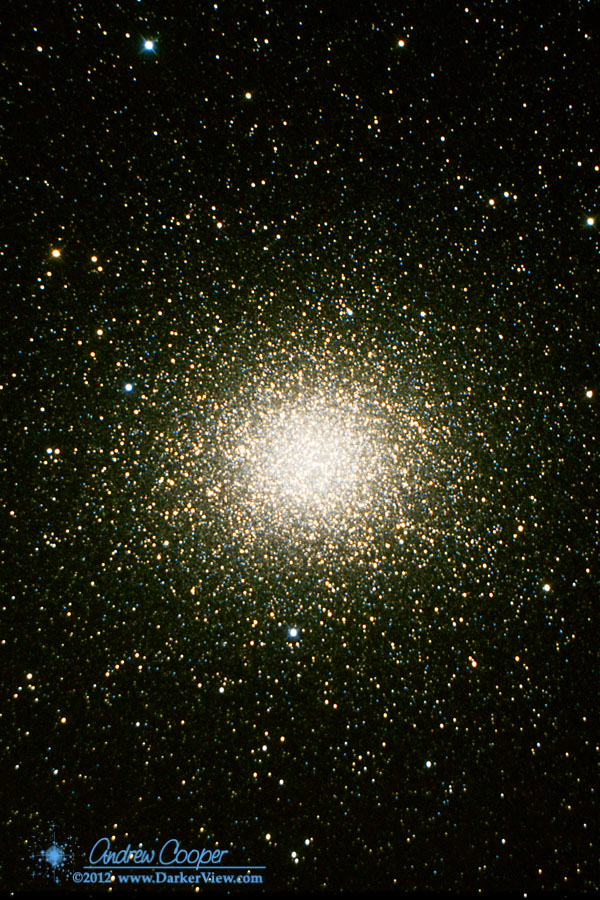
Omega Centauri, NGC5139, sum of 31 x 1min exposures, AT6RC and Canon 60D
Worry on the drive up, the cloud deck seemed quite high. I was concerned that the Mauna Kea VIS, at 9,200ft, may be in the clouds. With wipers and headlights on, through the heavy fog I drove, not encouraging when you expect to use a telescope. The worry persisted until the last switchback, ascending through the last wisps of cloud just a few hundred feet below the VIS to behold a cloudless blue sky overhead.

As expected the Mauna Kea Visitor Information Station was a zoo. A dozen summit tour buses added to a heavy Saturday night crowd. The parking lot was full with even more cars parked along the road. Not a real problem, the tour buses use reserved spaces right in front of the building. They pull out about an hour before sunset, headed for the summit with their customers. We swoop in on the vacated parking spaces and set up our gear.
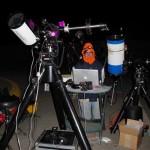
Astrophotography
A trio of telescopes set up for astrophtography at the Mauna Kea VIS
The crowd is an interesting experience. Well over a hundred folks waiting for dark and the evening program. There are the usual issues of headlights and camera flashes. It may not be all that dark for a while, but we gain a nice paved place to setup, and there is electrical power available. The crowd will slowly wane as the night progresses, mostly gone by 9pm, driven off by the cold. At 10pm the VIS closes and the remaining lights are turned off.

In addition to the VIS telescopes, there were quite a few local amateurs taking advantage of a moonless Saturday night. Cliff and Tony brought Cliff’s 24″ Dob, a two person job to move that ‘scope. Wayne brought photography gear. Mike was likewise set up for photography, planets instead of deep sky, using a Flea 3 and an ancient 10″ Celestron. Olivier brought his 19″ Pricilla, providing plenty of glass for visual astronomy while the cameras exposed for hours.

It was Malalo o Ka Po Lani, cultural night at the VIS, with a special lecture. This meant a large crowd, most of whom stayed to enjoy the perfect skies the mountain provided this night. They wandered around the telescopes asking lots of questions. While the photographic ‘scopes did not offer views through the eyepiece, there was still a lot of interest in the process. I chatted with many folks as I worked, fiddling with the complex equipment necessary to take photos of the sky.

It was quite the gathering of Losmandy G-11’s! Wayne brought two, Mike brought one to carry the old 10″ Celestron, I had mine setup for photography with the AT6RC. Add the three that the Mauna Kea VIS uses! A testament to these well-built mounts, some of which are two decades old.

The astrophoto gear was working nicely. There were a few issues to deal with at the beginning of the night, the usual new gear stuff. A few things I need to fix before next time… need to remount the guider so I can co-align it with the imaging ‘scope. I need to mount a real finder, and make it easier to hunt down the targets. But overall I was pleased, the new setup worked as I hoped it would.
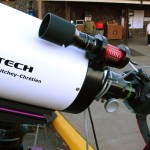
SBIG ST-i Autoguider
The SBIG ST-i autoguider mounted to the top of the AT6RC telescope
I will write more about the SBIG ST-i later. The short version… Much easier to use than the ST-4, accurate, painless acquisition of guide stars, it just locked on and stayed there. The only real drawback is the inability to dispense with a computer. I recently re-built one of my older laptops for use as the astrophoto machine. But since the computer is going to be there, I may as well use it, time to integrate the DSLR with the computer and shoot tethered. I have the software, just that I had tried to keep it simple in the field.

Another pleasant surprise was the ease of focusing with the AT6RC with a Bahtinov mask. I have been wondering about the stock focuser on the new ‘scope, how well does it handle the heavy DSLR camera. One lesson is that it locks the focus quite well, I noticed no drift each time I checked focus. Indeed, at one point I pulled out the 60D, swapped the focal reducer and adapter onto the 20Da and checked focus again, it was still perfect.

While my camera took exposure after exposure, I took in the views that big glass can produce. Bouncing back and forth between Cliff 24″ and Olivier’s 19″. No surprise for a spring session, galaxies were in rich supply. We viewed a lot of the showpiece objects, from Ursa Major to Virgo and Corvus.

This night was the type of night we hope for when planning an observing outing… Not too cold, no strong wind, and no clouds. Just a dark sky to delight the imagination all night long.

A Thin Moon and Venus

A very thin crescent Moon will join Venus low in the evening sky tonight. The Moon will be a mere 4.3% illuminated. Both will be about 20% above the setting Sun and about 6%deg; apart. As Venus approaches inferior conjunction and transit, it too will be a thin crescent, about 6.5% illuminated. You will need a telescope to see the phase of Venus, but the beautiful pairing can be appreciated with the eye alone.

Postcard from the Universe – Omega Centauri

I love it when everything actually works. As I have often stated… Astrophotography is an art of details. After dealing with each detail, one by one, sometimes it works…

Omega Centauri
Omega Centauri, NGC5139, sum of 31 x 1min exposures, AT6RC and Canon 60D

New Moon

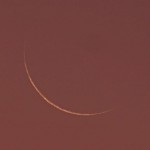
Young Moon
A very young moon over Waikoloa, this is only 26 hours after new, visible to the unaided eye as a sliver in the fading glow of sunset
New Moon will occur today at 13:47HST.

With this new Moon, an annular solar eclipse will sweep across the North Pacific from China and Japan to the west coast of the United States. In Hawai’i this will be seen as a minor partial eclipse with only a few percent of the Sun obscured by the Moon.

Continue reading “New Moon”

Photographing the Transit of Venus

With the Transit of Venus looming on the calendar, a discussion of solar photography is in order. Taking good photos of the Sun is not that difficult, but can be aided with a little information. There are some unique challenges in solar photography.

Solar Filter
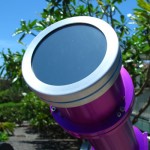
A solar filter mounted on a refracting telescope
The one obvious problem is dealing with the sheer intensity of the Sun. An intensity that can easily damage a camera if placed behind unfiltered optics. A proper solar filter is the easiest way to reduce the light to a safe level.

A solar filter will also produce the most pleasing images of the Sun. Indirect techniques like projection can be used. But for good solar photos, a proper filter in front of your optics is the single best method.

Solar filters for optics are constructed with a thin film of metal such as aluminum or stainless steel vacuum deposited on a substrate. This substrate is usually glass or a thin mylar film. The resulting filter allows only a small fraction of the light through, about 0.01% or 1/10,000 of the unfiltered value. Importantly, the filter blocks the ultraviolet and near infrared part of the spectrum as well. The result is a safe filter than can be used on a telescope or telephoto camera lens.

Sufficient magnification is needed if details of the Sun’s surface are to be well recorded. A few hundred millimeters focal length, found in common telephoto lenses will produce a reasonable solar image. The image will still be fairly small. To fill the sensor requires more. For an APS-C sized sensor (Canon T2i, 60D, 7D, Nikon D5000, D3200 or similar) a telescope with 1,000mm focal length will create an image filling a good portion of the image.

Image sizes for APC-C Sensors


Focal Length     Image Size (arcmin)
100mm   760×510
400mm   190×128
800mm   95×64
1000mm   76×51
1500mm   51×34
2000mm   38×25

The table to the left shows the resulting images sizes, in arc-minutes, given various focal length lenses, on an APC-C sized sensor. Recall that the Sun is about 30 arcminutes across as seen in our sky. With 100mm the resulting image is 510 arcminutes from top to bottom in the frame. This is 17 times the width of the solar image, a pretty small image indeed. With 400mm this improves to about 4, thus the Sun will reach about 1/4 the height of the image. At 1000mm this is about ideal, the Sun will reach more than halfway across the frame.

1500mm will just fit the solar image. While this may seem ideal, there is an issue. A small amount of drift will put part of the Sun out of the image, cutting off part of the disk. Sizing the image to fit in the frame with a good margin will allow some drift, while still giving a good image scale.

If you have a full frame camera (Canon 5DMkII, Nikon D800, etc.) a larger image can be used to fill the larger sensor, thus a longer focal length can be used. A telescope with 2000mm focal length will produce an image 17mm across, neatly fitting in the area of a full frame sensor.

Few compact cameras can boast a lens that will zoom far enough to produce an image of the Sun filling the frame. For these cameras another technique can be used, afocal photography. This can also produce good images, but will require experimentation to find the right combination of telescope, eyepiece and camera to produce a correctly sized image.

Solar Framing
The full frame solar image with about 1000mm of focal length and a Canon 60D
If you want to calculate the image scale for your optical combination, lens and camera, I suggest downloading the CCD Calculator from New Astronomy Press. You can enter the optical parameters and see exactly what the resulting image will look like with a sample image of the Sun, Moon or other selected objects.

Another issue is resolution. Our atmosphere usually limits the practical resolution to about one or two arcseconds, blurring any finer detail through atmospheric distortion. This can be much worse in the daytime with solar heating of the ground and air around the telescope. Thus the limit for resolution will be reached with about 1000mm focal length and a modern 10-15 megapixel camera. Any further magnification beyond about 1000mm will simply result in magnifying the blur. There are techniques for overcoming this (image selection and stacking), but if you know how to do that, you already know what you are doing.

Just a bit of summing up… You need a proper solar filter or other method of safely reducing the solar intensity. A long telephoto (400mm or more) will produce a reasonable solar image. A small telescope with about 1000mm of focal length is ideal for photographing the entire disk of the Sun with a DSLR camera.

Postcard from the Universe – Sol

Set up the gear again to get ready for Venus Transit. Attempting to autoguide on the Sun. No luck with the guiding, the software just does not like a non-pinpoint target. I did take a few photos in the process of messing about…

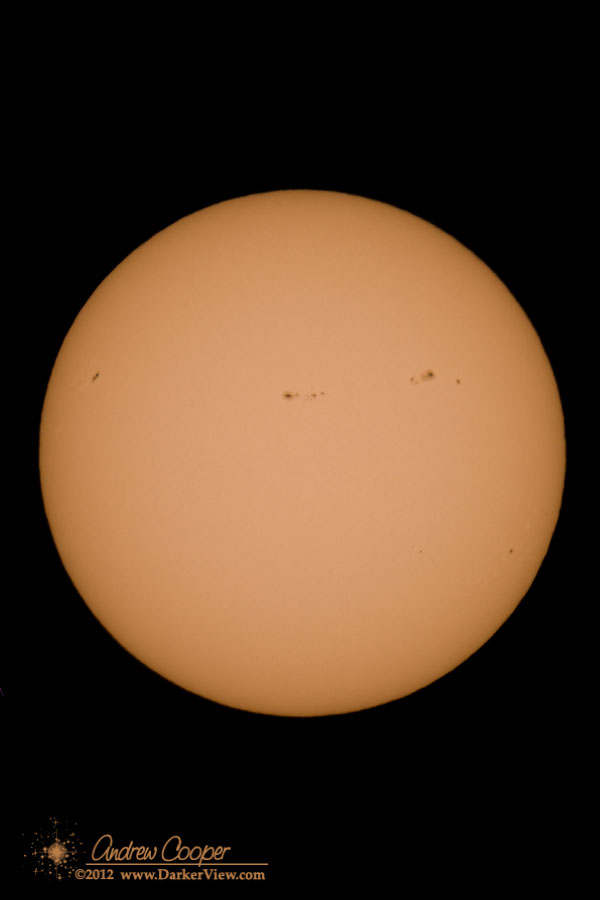
The Sun 19May2012
The Sun on 19 May 2012, 90mm APO and Canon 60Da

Safe Transit Viewing

You have heard it before, but it really is true! Looking at the Sun for longer than a few brief moments with an unprotected eye can lead to permanent damage. Looking at the Sun with any sort of optical deceive that has not been properly filtered can lead to instantaneous eye damage.

Discussed below are the only safe methods I am aware of to view the Sun. There are some dodgy methods out there. Take chance with your irreplaceable eyesight? I think not. Be careful and do it right if you want a look.

For the unaided eye there are a couple options to view the Sun safely…

  • Solar Viewing Glasses Proper solar viewing filters are made from a thin plastic film, usually mylar, coated with metal to properly filter the Sun’s light for viewing with the unaided eye. These are widely available and quite cheap. Local astronomy organizations have been giving them away in preparation for the transit. Do not attempt to use these viewers in conjunction with binoculars or small telescopes, they do not provide sufficient filtering for optics!

  • Welding Glass Filters used for viewing welding offer much the same protection as solar filters. A shade 13 or darker welding filter can provide good protection for the unaided eye. Again, do not use a welding filter with any sort of optical device such as binoculars, they are not designed for such use and may not block enough light.

A much better view of the event can be seen if modest magnification is used. Do keep in mind that any soft of binoculars or telescope also concentrates much more light that the eye alone. Remember those childhood “experiments” involving a magnifying glass and ants? The best options here are the use of solar filters designed to be used on a telescope, or indirect means such as image projection.

Solar Filter
A solar filter mounted on a refracting telescope
  • Solar Filters for Telescopes Filters specifically designed for telescopes consist of either a plastic film, or a sheet of glass, coated with a thin layer of metal to block the Sun’s light. These filters pass about 1/1000 of one percent of the light. More importantly, they block the harmful infrared and ultraviolet light that could so easily cause damage. The filters can be purchased in many sizes as appropriate for various models of telescopes, costing between one hundred and several hundred dollars.

  • Image Projection One of the simplest methods of displaying a solar image is projection. A white screen placed a foot or two behind a telescope will produce a very nice image of the Sun that can be safely viewed by a number of people simultaneously.

    Keep in mind that the beam of light out of the eyepiece is quite intense, potentially hot enough to burn a careless finger placed near the exit from the telescope.

    The method works best with small optical systems, binoculars or the smallest of telescopes. You do not need big optics to project a very nice solar image.

    You do not have any optics? Use the simplest optical arrangement of all, the pinhole camera!

If you do not have a safe means of viewing the transit and do want a look, you can go to one of the many public events being organized. Here on the Big Island there are quite a few options, one should be close to you.

Viewing the Transit of Venus on Mauna Kea

Everyone is gearing up for the Transit of Venus. Starting at just after noon on June 5th, Venus will cross the face of the Sun. This will be our last chance to see such an event in our lifetimes, as a result, many skywatchers are making an extra effort to see this transit. This includes a number of folks who are traveling to Hawai’i this June, just to be here for the transit.

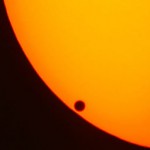
Transit of Venus
The June 2004 Transit of Venus, image credit Jan Herold
The Office of Mauna Kea Management and and Mauna Kea Support Services are making an extraordinary effort for the transit. An interesting exercise, protecting the mountain, ensuring everyone is safe, and allowing reasonable access to the summit. This is a challenge under normal circumstances. Throw in the possibility of a much larger crowd and it could be a real problem. Thus, the following extra measures will be in place…

  • The summit access road will be closed to public vehicular traffic at the Visitor Information Station.
  • Access to the summit will be provided via free shuttle service between the Visitor Information Station (VIS) and Mauna Kea summit.
  • Parking at the Visitor Information Station (VIS) is limited. Additional parking will be provided, however If parking spaces fill up, vehicles will be held below the VIS until parking becomes available.
  • Mauna Kea Rangers and Hawaii County Police Officers will be present to assist with parking and public safety.

There will be solar telescopes stationed at the MKVIS, at the summit, and at a number of other locations around the island. With many options to choose from, you do not need to go to the summit to get at least some view of this event.

The diehards, those wanting to see the entire transit, will probably go to Mauna Kea. I really do not know what sort of crowd to expect on the mountain. While it could be substantial, I really expect a more modest showing than some folks are predicting. In any case it will be a fun event.

Myself? I will be on the summit. I will be running the Keck live webcast of the event using one of my telescopes. From a vantage point behind the Keck 1 telescope we should be in position to witness the entire event from start to finish.

More Astronomy Haiku

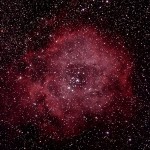
Rosette Nebula
The Rosette Nebula and cluster

Dark sky filled with stars
Telescopes help us see them
Takes your breath away
    – Jennifer Sanchez

Space explorers
In the night implore
Please let it not rain!
    – Mz’ili McKezfue (age 7)

Falling from the skies
In our scary, lonely nights
Brightening the sky
    – Angelita Camacho

It is amazing how much can be encompassed in so few words.

Poems used with permission.

Transit of Venus Timing

Transit of Venus
The June 2004 Transit of Venus, image credit Jan Herold
For reference I am posting precise transit timing for the June 5th Transit of Venus. The data is taken from Fred Espenak’s wonderful NASA Eclipse Website. I just extracted the cities that are of most interest to my Hawaiian readers. For the full list of US cities you can go here.

As you might notice, the times change by a mere two seconds between Kona and Honolulu. These times will be pretty close for the entire island chain. That last number is the Sun’s altitude, the angle above the horizon. Note that this is near 90° for Hawai’i, nearly straight up for the start of the event. Final contact will occur with an altitude of about 5°, just above the horizon near sunset.

Location Name External Sun
Ingress Alt

h m s °
Internal Sun
Ingress Alt

h m s °
Greatest Sun
Transit Alt

h m s °
Internal Sun
Egress Alt

h m s °
External Sun
Egress Alt

h m s °
Anchorage, AK 14:06:30 51 14:24:04 51 17:26:53 38 20:30:46 16 20:48:32 14
Honolulu, HI 12:10:07 85 12:27:46 89 15:26:20 49 18:26:38 9 18:44:38 5
Kona, HI 12:10:09 86 12:27:48 87 15:26:16 47 18:26:33 7 18:44:33 3
Los Angeles, CA 15:06:26 58 15:24:02 55 18:25:33 18 — – — –
Phoenix, AZ 15:06:03 54 15:23:40 50 18:25:32 13 — – — –
Portland, OR 15:06:05 57 15:23:40 54 18:25:53 23 — – — –
San Francisco, CA 15:06:29 61 15:24:04 57 18:25:39 22 — – — –
Seattle, WA 15:05:58 56 15:23:32 53 18:25:57 23 — – — –

All times are local time. Keep in mind that this event occurs on June 5th for viewers in the US and Hawai’i. Some sources show June 6th for a date, and so it will be for viewers on the other side of the date line in Australia, Japan and China.