I had been looking to acquire another astrophoto toy. The desire is for a small, portable astrophoto setup. Yes, I am aware that the words “portable” and “astrophoto” do not really belong in the same sentence, all things are relative.
Thus I have decided on the new iOptron ZEQ25. It is a new design, with some radical differences from the more traditional German equatorial mounts.
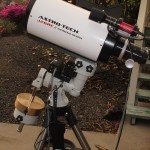
The mount is pretty small, a mere 10 pounds of steel and aluminum. Compact enough to be packed into a suitcase for air travel. Performance sufficient to do wide field astrophotography with focal lengths up to 1000mm and a DLSR camera. Perfect for use with either my TV-76 or AT6RC. Unlike my old Losmady G-11 it features a modern GOTO system and can be run from the computer.
AT6RC atop an iOptron ZEQ25 mount, note the additional counterweight necessaryThe chatter over at Cloudy Nights was promising. A few early production mounts were in the hands of some stateside amateurs, and they have been posting their impressions and images. I was particularly impressed by the measurements of periodic error with results around two arc seconds. This was a small mount that could very easily be a good astrophoto option.
I ordered the mount from the good folks at OPT. It was not yet listed in the website catalog, but a phone call confirmed they were expecting delivery of three mounts shortly. I put down my deposit. A week later I had confirmation that the mount had been received and was ready for shipment to Hawaiʻi as promised.
It looks like it may clear. There should be a few dark hours before moonrise. Maybe I can get the new astrophoto rig out and get everything working properly.
<Commence tropical downpour>
Nothing like two tenths of an inch of rain in half an hour to put a damper on astronomical plans.
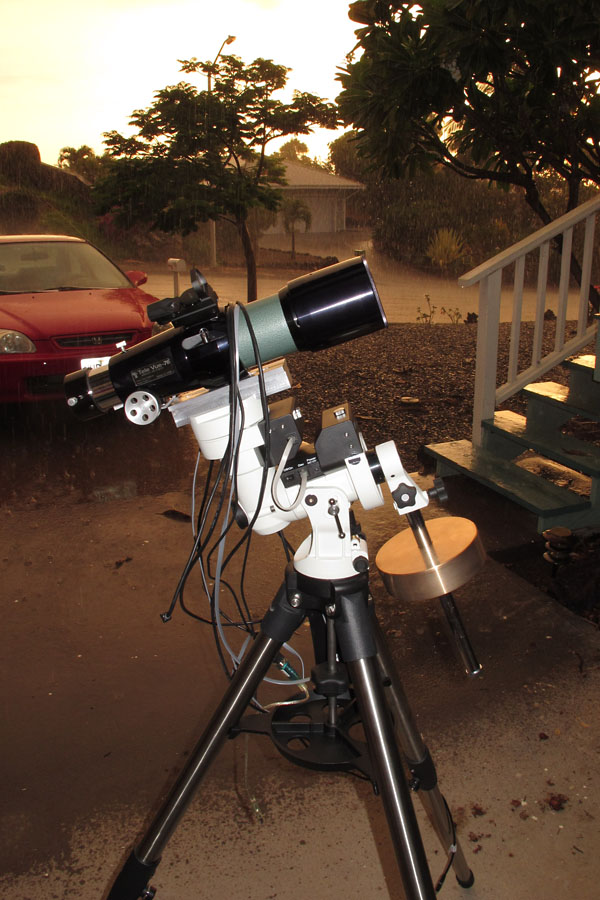
The trade-winds have returned for the evening. And while they are welcome for the comfortable temperatures they bring, the winds are unwelcome for the problems they create at the telescope. I am trying to get in one last exposure sequence for the evening, but the guider graph shows trouble. There are constant errors, not small errors either. The Right Ascension axis seems to be the issue, with errors of +/-3 pixels on the guider. This is just not going to work.
I watch the graph for a while, trying to figure out what I can do. I have had an issue where the guide star was the source of the problem, two stars to close together, a double star I did not notice when selecting my guide star. I stop the guider and select another star… The problem continues.
As I feared, my problem is most likely the wind this evening, a continual issue on this rock I live on. A speck in the middle of a very large ocean, the winds are a fact of life here. I only shoot with small telescopes, less sail area to catch the wind with a short tube. A TeleVue 76mm, an AT6RC, or simply a wide angle camera lens. The smaller scopes provide less loading for the old Losmandy G11 I mount them on.
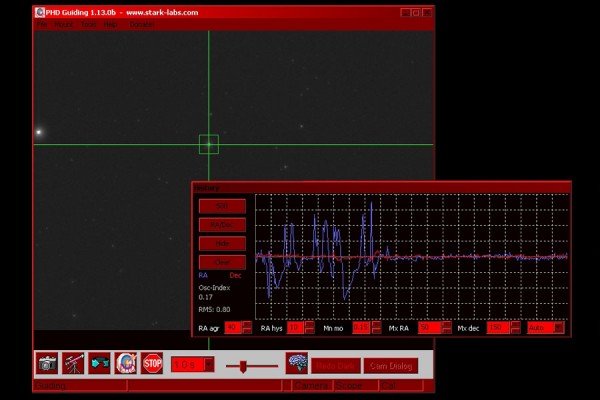
I decide to try something else, shifting the balance to load the RA gear down. I gently slide the counterweight down the shaft about an inch. There is barely a blip on the guider as I make the adjustment. Better yet the guide error graph settles down! Looks like I will be able to get in a few more exposures before putting the ‘scope away.
The guide error graph showing the effect of shifting a counterweight.
In the few days I had the camera I was determined to acquire some astrophotography test shots with the EOS-M camera. Even if it meant getting up at 3am to have some dark sky after moonset. It would have been easier a few days before, but a Pacific storm system had provided several days of overcast with occasional rain. This particular morning was just about perfect, clear skies, decent seeing and no wind to bounce the telescope around.
Astrophoto setup with AT6RC, SBIG STi autoguider and the EOS-M cameraFor testing I used the same setup I often use with my Canon 20Da or 60D. An Astro-Tech 6″ (150mm) Ritchey–Chrétien telescope riding atop a Losmandy G11 mount. A 0.8x focal reducer has T-thread at the rear allowing a Canon EOS lens adapter. To attach the EOS-M I used the Canon M Mount to EOS Mount adapter. An SBIG STi autoguider completes the setup.
The result is an f/7 optical system with 1080mm focal length. This gives a field of view of about 72×48 arc-minutes (1.2 x 0.8 degrees) on the sky when using a camera with an APS-C sensor.
Another product of this last new Moon star party at the MKVIS. An easy target, suited to checking the performance of the new setup. As usual, click on the image to view the larger size…
The Lagoon Nebula, NGC6523, in Sagittarius, 11 x 8min exposures, Canon 20Da and AT6RC
As we approach the Transit of Venus I decided to attempt to photograph Venus as a very thin crescent. I do not normally pay much attention to the planet, it is pretty when seen in the sunset. But when you turn a telescope to Venus it is quite boring, a white ball with no detail to be seen. I find I have been paying a bit more attention with the transit looming close on the calendar.
I could photograph the planet after sunset, but as Venus is quite near the Sun it would be very low in the sky and I would be shooting through a lot of air to get the imagery. Atmospheric distortion would be a major problem. The other method is to try something I had not done before, photograph the planet in the daytime, high in the sky and quite near the Sun.
Imaging Venus in the daytime a mere 12°44' from the Sun.Don’t try this at home?
Yeah, This will be a tricky operation. Venus will be only 12°44′ from the Sun, meaning I will have to be quite careful to avoid roasting my equipment, or my eyes.
I chose to use the 90mm APO refractor. With the optics at the front there will be some sunlight splashed down the interior of the tube. It should not be a focused image as it will hit the tube not even halfway down. There the heavy aluminum tube walls should dissipate the heat efficiently. The fully baffled tube should also stop much of this light before it reaches the camera. I may not have designed and built the optical tube with this sort of abuse in mind, but I did build it heavy, it will take it.
Venus on 28May2012, about 12°44' from the SunI located Venus by centering the Sun with the solar filter on the ‘scope. I then adjusted the setting circles and offset to the correct coordinates for Venus. After a visual safety check I removed the solar filter for a look. And there it was, a graceful and very thin crescent shining brightly against the blue sky. Replacing the eyepiece with a camera I focused and shot several video sequences.
The results? The final image can bee seen to the left. Not horrible, but it could have been better. The seeing at 11am was already starting to degrade, I am always amazed at how well the software can extract a half decent image from such distorted original material. The magic of sorting through and averaging a thousand frames. I wonder what I could do with better seeing.
Another try? Probably not, Venus is quickly getting closer to the Sun as we approach transit in nine days. The next time I photograph Venus it will most likely be silhouetted against the solar disk. Maybe an attempt after transit? I could shoot earlier in the morning with possibly better seeing.
A box in shipping and receiving with my name on it. A much awaited box. The new SBIG ST-i autoguider!
For those who are uninitiated into the mysteries of astrophotography, an autoguider is the secret to taking hours of exposures without having the manually correct the telescope position constantly. For almost two centuries, from the first time a camera was attached to a telescope, through the invention of auto-guiders, guiding was a supremely tedious task. The photographer would spend hours on end, peering through an eyepiece watching a single star, if the position of the star started to drift, he would press a button to correct the position of the telescope during the exposure. This was necessary to achieve any sort of long exposure, as the telescope, no matter how precisely made, would drift a little during the night, leaving streaks in place of pinpoint stars.
I have done this, it is no fun at all.
Then came the autoguider. A small digital camera that could take a picture of the star, then check the image for drift in the star’s position and, if necessary, send a command to the telescope to correct the position automatically. The first commercially available autoguider appeared in 1989, the Santa Barbara Instrument Group model ST-4. This little device revolutionized astrophotography, allowing far longer exposures with much less effort and much better precision.
The SBIG ST-i with the optional accessory kit including mount and lensIt is an ST-4 I have been using to guide my photographs for over a decade. Any of the long exposure astrophotos seen here on DarkerView have used this venerable little device. I have had some issues with it as of late. Trouble acquiring stars, struggling with the cryptic displays to lock onto a star, the unit does require a great deal of experience and intuition to return good results. Modern autoguiders are so much easier to use with far better performance. I have been looking at the advertisements with envious eyes for some time now.
No more, I have broken down and purchased the new ST-i from SBIG.
The newest, latest and greatest, just released model.
Unpacking the box I am happy with what I see. Everything looks good.
It does seem like a small device for the $595, smaller than most of my eyepeices. Fit and finish looks good. A nice small package that will be easy to mount to any of my telescopes.
I setup the software and drivers on the laptop with no issues, simply following the provided instructions. The SBIG software for the camera , CCDOps ran first time, connecting to the camera and taking a frame. You can hear the soft click of the mechanical shutter in the camera. The bias frames look quite nice, a smooth field of salt and pepper noise with no gradients or other artifacts.
Attaching the lens from the accessory kit I take a few images of wood-grain on the kitchen cabinets across from the table I am working at. Another task will be to properly evaluate the imaging performance of the camera. It does have a decent CCD in it, the specifications indicate a proper 16-bit A/D system. A real photon transfer test will reveal if that system lives up to the specifications. A subject for another post!
An improper fit of a button head screw into the mounting plate on the SBIG ST-i accesory kitI did find one problem. Someone in engineering or purchasing screwed up when setting up the accessory kit. The screws meant to secure the rings to the mounting plate do not fit into the provided recessed holes. The head is notable larger than the machined recess. This leaves the head of the screw above the surface preventing proper mounting of the whole assembly.
A proper fit after modification on the SBIG-ST-i mounting kitNot to be deterred in setting up the camera I quickly set about a solution… I clamped the screw into the chuck of my cordless drill and removed the outer edge of the head with a file. A minute or two per screw reduced the head diameter enough to fit into the recesses. The remainder of the assembly went well. The mounting appears to be very solid, with little chance for flexure and the resulting image issues that can cause.
The package offers a nice solution, on paper at least. With the included 100mm lens the camera should provide a 165 x 123 arcminute field of view, or a 2.7 x 2.0 degree field of view. The literature promises sub-arcsecond guiding accuracy with this setup, with the ability to use 7th magnitude stars with one second exposures. These are claims that will have to be checked as well. I intend to do a proper job of verifying these numbers, I expect to get many years of service out of the guider. The new camera has quite an act to follow, replacing my classic ST-4!
I also hope to be able to guide on the Sun for the Transit of Venus. I will be trying the included software as well as Dave Solar System Recorder in the coming week. I wonder if either package will be able to guide on a large, non-stellar object like the Sun, perhaps with a shorter focal length lens.
This leaves only one real question… How well does it work? Unfortunately that will have to wait for another day. In true astronomical tradition, the receipt of new astro toys invariably occurs when the weather precludes their use. In other words… I have clouds!
A writeup of the operation of the new autoguider will be another post, when the skies provide me a chance to use it.
Set up the gear again to get ready for Venus Transit. Attempting to autoguide on the Sun. No luck with the guiding, the software just does not like a non-pinpoint target. I did take a few photos in the process of messing about…
Finally, a night where… A) The sky is clear. B) The wind is not howling through the palm trees. C) I am not exhausted by working the summit. D) I do not have to get up early the next morning.
A + B + C + D = Astrophotography from the driveway!
Comet C/2009 P1 Garradd on 29 March 2012 showing both tails, sum of 50 x 1 min exposures CoolSNAP ES and 180mm f/2.8 lensThus, under a very pretty sky, I rolled the photo rig out of the garage and spent some time getting everything back together. I was not in a hurry, time to let a bright crescent Moon set a little and my primary target rise a little. The target at the top of the list? Comet C/2009 P1 Garradd.
The comet is nicely placed in Ursa Major, transiting late in the evening, available for several hours of exposures. And expose I did, with the auto-guider locked on the a dim star beside the comet, the shutter open for well over two hours. I was shooting my Canon 20Da and the AT6RC, a combination that framed the comet nicely.
It will take a while to get the resulting images processed. In the meantime I did a quick process on a set of images taken with the wide field/finder CCD camera. The results of which can be seen at the right. I also shot a few quick images of the M95 area with the CCD to capture SN2012aw.