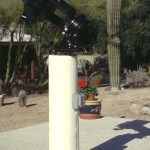
Building a Sun Finder

Aiming a telescope at the Sun is deceptively difficult. You can not use a optical finder for risk of eye damage. Unit power finders, like a Telrad, are of little use as you can not see the projected image. Telrads can also be damaged by sunlight. In a pinch you can simply use the shadow of the telescope, positioning for a minimum shadow. This at least gets you close.
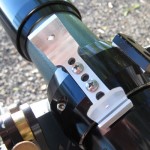
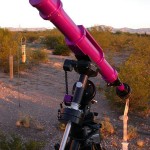
Sun Finder
A Sun Finder mounted to a TeleVue 76mm 'scope
The best solution is to build a finder designed just for the Sun… A Sun Finder.

There are many plans for Sun Finders posted to the web. Most use a shadow or projected point of light. The version I built is no exception, using a pinhole to project a point of light on a translucent screen. The trick is to make such a device simple and accurate.

With simple metal working capability a Sun Finder like this one can be made from sheet metal, or machined from solid aluminum. I chose the latter as I had the capability. This design uses a pinhole that projects a similarly sized dot of light at the rear of the finder. The front face or the finder, through which the pinhole is drilled, creates a shadowed area for in which the projected dot can be seen.
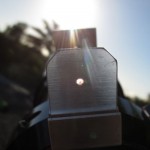
Sun Finder
A Sun Finder in use with the projected dot visible
A longer distance from the pinhole to the screen will increase the sensitivity in aiming. In practice I have found that at least three inches is sufficient for most telescopes while keeping the device compact. Experimentation with the design can be entertaining and educational. No need to stick strictly with this design, just borrow the basic ideas, a lot of variations will work.

This design is based on an aluminum extrusion, a 3″ x 1.5″ channel. This save a good deal of machine work in creating the finder. As much of the machining is done along the length, a number of finders can be made at the same time. I made six finders from a seven inch scrap of extrusion out of the shop scrap pile.
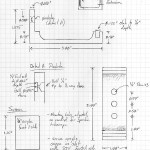
Sun Finder Plans
Plans for the Sun Finder
The screen is made from a small piece of 1/8″ thick acrylic. Common 0.1″ thick material will work as well. One side is frosted with sandpaper to create a translucent screen. Use of a clear screen allows the solar dot to be seen from front or behind while aiming the telescope. The screen is simply secured with a glue, preferably RTV. The frosted side should be mounted towards the pinhole.

To keep the device simple there is no adjustment in aiming. If the finder is mounted reasonably well, the dot of light will be on the screen. The first time out it is necessary to first get the Sun in the field of view. You can then mark the position of the projected dot with a permanent pen (Sharpie or similar). After that aiming is simply a matter of positioning the dot on the mark. If the mark is made on the smooth side of the acrylic screen it can be easily erased and re-marked if necessary.

Done, a simple and reliable Sun Finder to work with just about any small telescope.

USB to ST-4 Autoguiding Adapter

The rearrangement of my astrophoto setup proceeds. If somewhat frantically in the face of the upcoming Transit of Venus. Another device has joined the toolkit, a bit of hand-wired electronica that gets the job done.

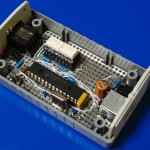
USB to ST-4 Guiding Port
A copy of Gene Nolan's USB to ST-4 guiding adapter
This particular device will allow remotely guiding of the telescope during the seven hour long event. The computer sitting beside the telescope will be controlling both a camera and the mount. Also set up on the computer is a VNC server, so I can remotely view the screen from inside. With this arrangement I can keep an eye on the whole setup, including nudging the telescope as needed to keep the Sun centered in the image. Since the mount will only be roughly polar aligned, set up during the day, I expect to get a fair amount of drift during the event.

I did not design the device this time. This would have been completely within my capability, but why do so when someone else has already done the job? This is typical within the astronomy hobby, where many designs are shared for the benefit of everyone. In this case it is the USB to ST4 adapter designed by Gene Nolan.

All I had to do was follow the schematic and download the code into the microcontroller, the device worked first time. Gene does sell kits, but I wanted to do this quickly and had everything I needed on hand except the microcontroller and opto-isolators.

The only real problem that cropped up during construction was the wrong part received for the opto-isolators. The DigiKey description read DIP-8, so I ordered it, expecting to get something that fit into the DIP socket I had already wired onto the board. When the parts arrived I found that they were indeed DIP… lead-formed DIP packages meant to be surface mounted, with chopped off leads. I ended up soldering the devices to another DIP socket, using it as a header, which then plugged into the socket on the board. It looks funny, but it works.

It did take a couple hours of downloading and installing the drivers and other useful software packages to get everything working. This includes the very useful ASCOM driver framework, and PHD Guide. Both of which I plan to use beyond the upcoming Transit of Venus to do more astrophotography.

My wife may have been a little perturbed by the testing setup strung across the kitchen table, a laptop and the heavy Losmandy head, a Canon 60D camera, all connected by a snake pit of cables. But it worked, first time, that is always nice.

Better Elevation Bearings for an Orion XT8

A telescope needs to move smoothly, without any binding or sticking. The elegantly simple bearing design used in dobsonian telescopes uses a smooth surface riding on a small pad of some low friction material. This requires a pad of some material that slides smoothly and does not stick, to provide the motion. The standard answer of telescope builders is polytetrafluoroethylene, simply referred to by the acronym PTFE or the trade name Teflon.

Orion Elevation Pads
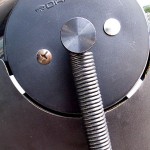
Elevation bearing of an Orion XT8 8" dobsonian telescope
I recently spent some time rebuilding a small dobsonian telescope, one of the telescopes that belongs to the Mauna Kea VIS and is used every night in the public program. The ‘scope is a commercial unit built by Orion Telescopes, an 8″ f/6 ‘scope. These telescopes are quite popular, with good reason… low cost, decent performance and very easy to use. The 8″ version I was working on retails in price for about $330.

The price is excellent for an 8-inch telescope, but there is some sign of cost cutting in the more recent versions. One interesting difference I found in this ‘scope was the bearing material. The bearing pads that are supplied do not appear to be PTFE, but instead a much harder material, possibly HDPE instead, which would be cheaper than PTFE. replacing these with PTFE results in a nice improvement in the smoothness and ease of movement of the telescope.

This particular telescope was missing two bearing pads, so some replacement was required, whatever the material. Without access to the original parts it was necessary to obtain whatever material was available, and that would be PTFE. Since it came in a different thickness than the original bearing it was also necessary to replace all four pads.

Elevation Pad
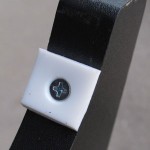
Elevation bearing pad on an Orion XT8 8" dobsonian telescope
Teflon in sizes suitable for bearing pads can be ordered from a number of suppliers across the web. The material shown here was purchased from Scopestuff, where a 12″ x 3/4″ strip of 1/8″ thick PTFE is available for $11, just the right size to cut bearing pads for the Orion XT series telescopes.

In place of the original staples, a small flat head screw is used to secure the Teflon in place. The soft material is easy to work. As long as the tools are sharp drilling and countersinking the pieces is easy. Best use a new drill bit if you have one, or grab one of the odd sizes that never seem to be used.

Position of the bearing around the radius of the trunnion have some impact into how easily the telescope will move. Positioned closer together and closer to the bottom of the bearing and the telescope will move more easily. Positions further part and higher on the bearing sides will result in more friction as the trunnion presses outwards against the pads.

The repair worked quite nicely, with a ‘scope that move smoothly across the sky. A bit more cleaning and a few minutes collimating the optics had the small telescope again ready for the sky.

A Dew Heater Controller

I have had a problem observing here in Hawai’i. The skies can be gorgeous, there is little to no light pollution, and you have access to much more of the southern sky. What could go wrong? …Dew!

Dew Heater Electronics
A view of the interior of the handwired dew heater controller
This is a tropical island, this means tropical humidity and moisture. Dew is a feature of observing that I have not had much problem with in the past. In Arizona it was rarely an issue, but here it can quickly shut down a night’s observing. My last time out on Mauna Kea dew was a problem, it didn’t shut me down, but it was a constant hassle. I had to be quite careful about breathing on the eyepiece. One mis-aimed exhalation and that eyepiece needed to be put in the back of the vehicle to dry out!

I had one dew strap available, given to me by a friend and fellow observer, a small one just right for wrapping around an eyepiece. So I just needed a controller to get started. There are several of these available on the market. But I had some issue with the cost, it seemed a bit high for what was essentially a very simple device. Some of the commercial units offered features like temperature sensing and regulation. Simple overkill for most users actual needs, just warm the optic slightly until the dew goes away. Sounds like an excuse for another evening project to me… Build it!

Continue reading “A Dew Heater Controller”

A Driveway Telescope

Astrophoto gear takes a while to setup. A lot of little bits and pieces are required that make up the mount, the telescopes, and the cameras. This is all connected with cords and cables, a computer, an autoguider, extension cords for power and more. Coming up with a way to minimize the setup is a big advantage. The best solution is to build a personal observatory where the telescope can be setup and remain setup. Since I am not likely to have that solution available any time soon I use the next best thing. I assemble all of the gear and simply roll it out of the garage to use and roll it back when I am done. This reduces the setup time to about 10-15min, in place of almost an hour if done from scratch. The computer and support gear sits on a table small enough to pick up and carry out intact. connect an extension cord for power, connect three cables from the table to the telescope, turn it on and go.

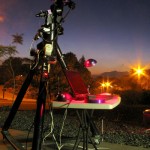
A Driveway Telescope
The Losmandy G11 mount setup in the driveway for an evening of astrophotography
The mount sits on a custom wheeled dolly designed just for moving the telescope. To align and level the scope there are three jackscrews one at each leg to level the mount at setup. Leveling and aligning the scope is one of the longest steps in the process, about 5-7minutes to level and align properly to the Earth’s axis.

Continue reading “A Driveway Telescope”

Deep Violet, an 18″ f/4.5 Dobsonian

In April 2001 I realized a dream that had been many years in the dreaming and a year in the making, a large aperture dobsonian.

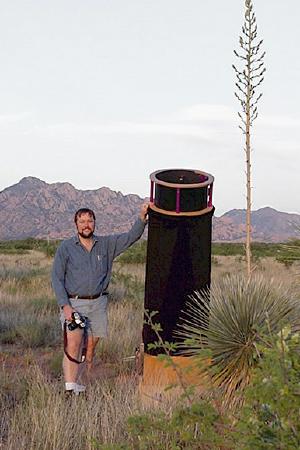
Deep Violet
Deep Violet set up near the Dragoon Mountains in Southern Arizona
The decision process that eventually settled on the 18″ f/4.5 design was a long one. As a very active amateur I had had many opportunities to examine other scopes. To see where they excelled or where they fell short. With this experience I eventually decided on a list of requirements.

  • The scope had to have sufficient aperture to take advantage of the dark skies available near Tucson. I wanted to see spiral arms in galaxies.
  • The design was to be visual only. No drives, but provisions for an equatorial platform at a later date.
  • The mount would be a no compromise rigid structure, capable of allowing good optics to perform at their best.
  • The scope had to fit through a standard doorway.
  • The scope had to fit in the cargo compartment of a Ford Explorer Sport without dropping the seat for safety during transport.
  • The eyepiece must not be an excessive distance above the ground, allowing use while standing on the ground much of the time. (But then, I’m 6’2″ tall)

Over a decade of engineering experience has taught me that a well defined set of specifications can make all the difference at the end of a project. With these design goals in mind the plan then progressed rapidly.

Continue reading “Deep Violet, an 18″ f/4.5 Dobsonian”

A Red LED Desk Lamp

Need a red lamp to provide soft red illumination around the telescope? Described here is an easy way to do this. Take a commonly available desklamp and convert it to LED’s. This is a single evening project, taking just a few hours to accomplish once the parts have been obtained.

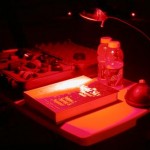
Observing Table
A red LED desk lamp in use on the observing table

I have found the resulting light extremely useful when observing. No more holding the flashlight in your mouth when reading charts or making observing notes.

Because the light can light up a whole area when turned fully on it can be used as a worklight when breaking down gear and packing it into the vehicle without bothering other observers at a dark observing site. Or you might build the 120V version for a personal observatory.

I have also found that these lights also make great gifts for fellow astronomers.

To accomplish this we will disassemble the lamp, remove the 12V bulb and replace it with an array of LED’s. To control the brightness we will install a variable regulator to allow dimming of the lamp from completely off to very bright. An option is to install another connector to allow DC power to be supplied from a battery for field use.

Before embarking on this project be sure to read this entire article. Having the entire task in mind will help you plan ahead. It is important to use safe electronic assembly techniques to avoid any risk of damage or injury when making the modifications or when using the lamp. We will make no modifications to the high voltage side of the transformer to insure the lamp remains safe to use.

One secret to the lamp is the LED’s. These wonderful devices convert a small trickle of electricity into a very bright red light. Be sure to get ‘Ultrabright’ or ‘Superbright’ types that put out at least 3000mCd (millicandela). I found some that put out 6000mCd that I use in my lights at All Electronics. Perfboard, regulators and many of the other parts can also be purchased there.

Continue reading “A Red LED Desk Lamp”

Rebuilding a 12.5″ f/5 Truss Tube Dobsonian

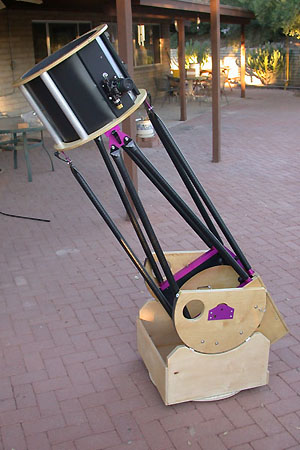
12.5" Dobsonian
 
Some time ago my friend Bill Lofquist bought a dobsonian telescope from Roger Ceragioli. Roger had built the ‘scope to provide a home for a beautiful 12.5″ f/5 mirror he had made. The mirror is gorgeous, as is typical for Roger who is one of the best opticians I know. I have an APO triplet of Roger’s that is a prized possession.

Mechanically the scope had a few problems. The truss tubes were attached with separate hardware top and bottom, so that setup required over 20 minutes of sorting through screws and futzing with eight separate truss tubes waving around the whole time.

The elevation bearings had been set about 1/8th inch off from each other leading to a side to side twist when the scope was moved in elevation. This was not a major problem when using the scope visually but would make the use of digital setting circles impossible as DSC’s require orthogonal axis in the scope.

The ground board was a bit undersized, making the scope prone to tipping when used at low elevation.

The rebuilt scope is essentially finished with the usual tweaking and small adjustments remaining. Things are coming out very well and a few of the changes are worth passing along to the ATM community. In the sections below I will concentrate on practical details in hope of conveying some of the finer points in telescope making.

Continue reading “Rebuilding a 12.5″ f/5 Truss Tube Dobsonian”

Violet Haze, A 90mm f/13 Apochromat

Violet Haze
Violet Haze, a 90mm f/13 apochromatic telescope
I had wanted a high quality APO refractor for some time. Mostly for photographic use. Opportunity presented itself when Roger Ceragioli offered me a 90mm telescope he had finished the year before and was willing to sell. Working for the Steward Mirror Lab, Roger normally grinds very large optics, things like secondaries for six to eight meter telescopes. But as a hobby he makes somewhat smaller telescopes. This particular lens set had won him a merit award at RTMC in 2002. I had previously seen this telescope and after some negotiation we settled on a price.

The lens triplet is exquisite, providing absolutely perfect airy disks at high power. The photo below shows an example of the out of focus image of Antares taken with the telescope. Pulling out my copy of Suiter’s Star Testing Astronomical Telescopes shows nearly identical images for the ideal diffraction pattern. No wonder the ‘scope won a RTMC merit award.

Photographically it has proven to be almost perfectly free of color, corrected across the spectrum. There do not seem to be any detectable UV or IR halos around bright stars. This is partly a result of good design, and aided by the long focal length of f/13. No field flattener is required, with pinpoint stars across the focal plane.

Continue reading “Violet Haze, A 90mm f/13 Apochromat”

A Backyard Telescope Pier

Complete Pier
The completed pier with a telescope atop
Have you ever wanted to have a place to set up your scope easily in the backyard? with instant polar alignment? no tripod legs in the way? Even for someone with little handyman experience a pier is an easy weekend project that can be completed for around $60. Add the cost of a wedge for your scope, about $125-$400 new, less used, and you have a usable pier. A few bags of concrete, a little rebar and a sonotube will do the job. I know, we ATM’s usually use sonotube for telescope tubes, but this is what it is really meant to do, cast concrete.

A pier is also the first step in a real backyard observatory, build the pier first, then a building around it. The process shown here works for any pier and can be scaled as needed for larger scopes. The pier shown in the photos is intended to hold an eight inch SCT.

The plans and photos shown here have been used for several piers here in the Tucson area and have been refined with the experience. Feel free to improve on what is here, and if your idea works well send photos!

Continue reading “A Backyard Telescope Pier”