Postcard from the Unverse – Eta Carina
When you want to see the stars, find someplace dark

Peering into the dark with a camera
Starscape photography is becoming increasingly popular. Dramatic photographs of a starry sky over a scenic landscape. Properly done the results can be truly impressive. The photo is a beautiful landscape with a glorious display of bright stars overhead. For those who have long enjoyed the night such a photo captures a sense of being there, of standing beneath those brilliant stars. This is starscape photography, a relatively new type of photography made possible by improved photographic technology.
We will define starscape photography as shooting traditional landscape photographs with only starlight and skyglow for illumination. The exposure is fast enough to keep the stars from trailing. The result is a recording of what the scene would look like to a person standing under a starry sky.
Continue reading “Starscape Photography”Yeah, that didn’t work…
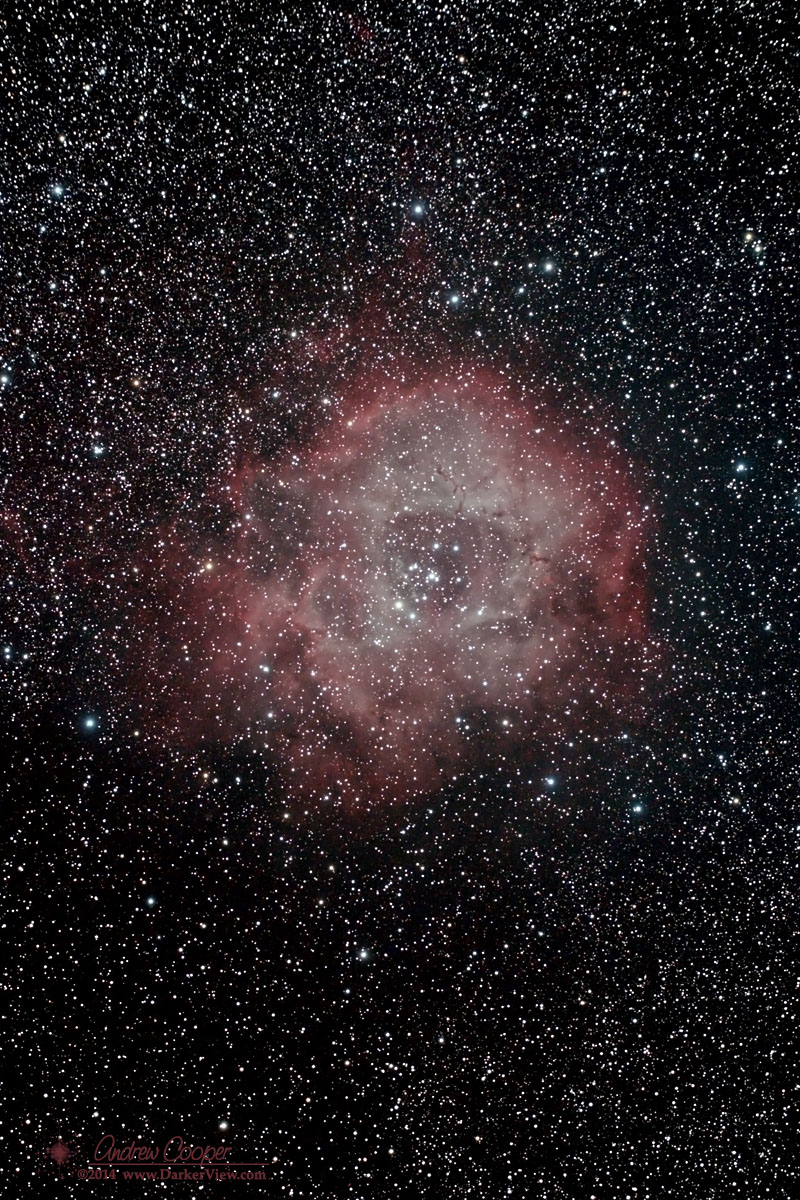
Eighty four images representing four and a half hours of exposure on the target. In this case NGC2244, the Rosette Nebula. It takes a few minutes to setup the software to align all of the images, then it takes about half an hour for the software to digest everything and produce a result. At the end of this you get to see if the effort worked. Sometimes it does not.
Complicating the issue is that a number of the sub-frames are taken at different exposures. Finding the correct stars in the these different exposures gives the software fits.


The Great Nebula of Orion is a beautiful object, the brightest nebulae in the sky. It is also quite easy to photograph, making it somewhat of a standard target. I, like many astrophotographers, use the nebula as something of calibration target to check new equipment and processes.
This shot was taken with a Canon 6D and a TV-76mm telescope, a combination I want to work with this summer. I also changed up my processing flow a bit, re-ordering the steps, to achieve better calibration. The result is a more neutral color tone in the original, I can then saturate the image to taste for display or printing. Th original might be a bit closer to true color. Of course, “true color” is a bit of an illusion in astrophotography, where everything is relative.


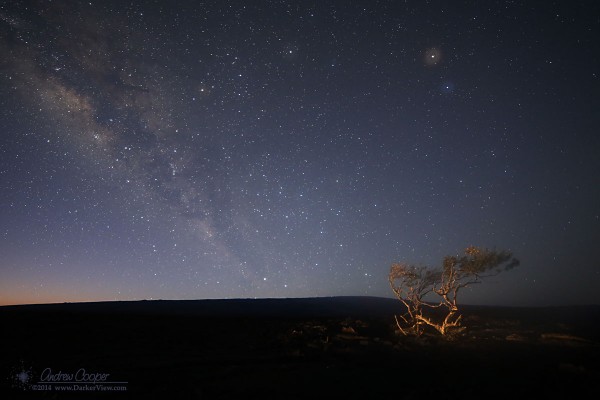
A photograph of serendipity.
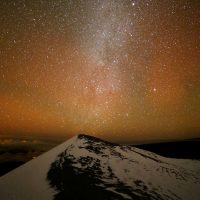
The photograph was planned… Somewhat. I knew there were some picturesque trees on the lava field along Saddle road. The plan was to shoot one of these trees silhouetted against the Milky Way and Mauna Loa. That was the plan. At least until the plan met reality.
Shot as planned the results were less than stellar. Actually they were rather boring. The rising summer Milky Way was spectacular, nothing else worked. The enormous bulk of Mauna Loa became a bump on the horizon from the low angle with the 14mm lens. The trees did not look like much against the dark.
Serendipity intervened… First a passing car lit the trees with dramatic results. Car headlights caught the trees at just the right angle to light up the right bits, a lucky bit of geometry and road alignment. Looking at the image on my screen I was intrigued… I repositioned the camera and shot again when another vehicle passed… This was working!
As I waited for other passing cars the shots deteriorated, odd glows across the frame. Were the headlights catching the big dome of glass at the front of the lens? Blocking the light from the headlights on the camera did not help. I pull out a flashlight to check the camera… Ack! The lens was fogging up!
Retrieving the anti-dew kit and a battery from the vehicle I secured a dew strap around the camera lens. At this point I wanted the shot and was willing to work for it. I was lucky again… I had thrown the dew gear in the car as a last moment afterthought.
It took time for the lens to warm and clear. As I waited dawn crept into the sky. I took a last few shots as the light increased and the stars faded. The dawn light added a nice shade of blue to the sky with a hint of peach to one side, another serendipitous bit that added to the photo. A last wisp of fog on the lens was just enough to create halos around Mars and the brighter stars.
Not a bad result! With a little skill and more than a little luck. The shot has been entered in the Hawai’i Photo Expo. Hopefully the jurors think the shot is as good as I think it is.
The current astrophoto setup in the driveway… The TeleVue 76mm atop the iOptron ZEQ-25 mount. The camera is currently the Canon 6D, providing a 5.35° x 3.57° field of view with a 3.52 arcsecond per pixel image scale.
Atop the main scope an SBIG STi provides auto-guiding. With a 100mm lens it has a 15 arc-second per pixel image scale. It is mounted with a custom mount machined for this setup.
The setup is intended to provide a high performance astrophoto setup with a minimum of fuss. This is about as far as I can reduce things without giving up performance. It is pretty portable, airline luggable at least. The whole setup fit in two suitcases for the trip to Oregon Star Party last summer.
The only real issue with this setup is the laptop. The big old 17″ HP Pavalion chews a lot of power, requiring an AC outlet to supply. I have my little Asus netbook configured to run the setup, a far more power efficient machine. With the netbook I can setup anywhere and shoot.
Cable management is a bit of a chore. A lot of separate cables must be routed to connect everything together. Much of the time I keep the setup assembled in the garage for deployment in the driveway. The cable tangle can be tamed with a handful of zip ties and velcro strips this way. A wheeled dolly allows the entire setup to be rolled out of the garage.
With this setup I have a capable astrophoto rig, capable of producing very nice material for processing. I just need a chance to get out and use it more often.

For my first pass on the Rosette I used about an hour of data. Ten four minute exposures, ten one minute exposures and ten 15 second exposures. The stack is designed to capture a wide dynamic range by using several different exposure lengths. Multiple images taken at each exposure to reduce the noise inherent in long exposure astrophotgraphy. All of this data is aligned and stacked to produce the final image.
The next night I acquired and shot again, another 24 exposures on the Rosette, another 1.6 hours of exposure. A planned astrophoto outing to the MKVIS at 9,200ft elevation offered a chance to get even more high quality exposures. This time I got 30 more exposures, another two hours of total exposure time.
Combining all 3.8 hours of exposure resulted in a notably nicer image. The noise in the fainter sections of the image is pleasantly reduced. It should be with 54 four minute exposures used.
I need to do some sort of systematic comparison of the data gathered in my driveway versus the data obtained at the MKVIS up on the mountain. Having a series of exposures taken with the same gear, on the same target, and at the same time of night just a few days apart should allow a reasonable comparison. I was unable to expose any longer at the VIS despite the colder temperatures (the camera was about 10°C colder). How much better is the VIS? Can I get data nearly as good without packing up the gear and heading up the mountain?