Postcard from the Universe – Scutum & M11
When you want to see the stars, find someplace dark

Peering into the dark with a camera
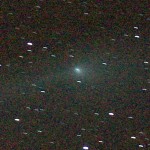
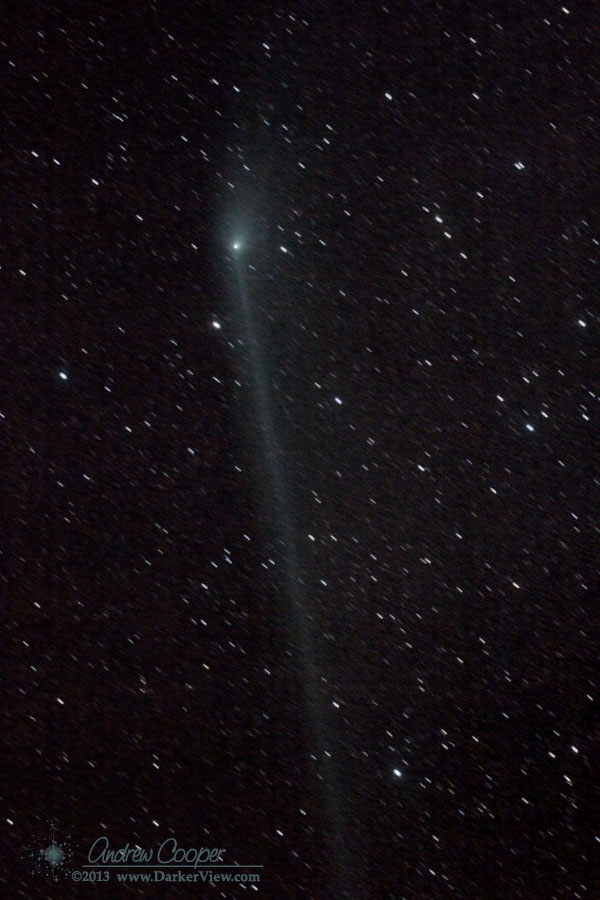
A better image of comet C/2001 L4 PanSTARRS. The comet is moving slowly near the north celestial pole, still a nice object for observation through much of the night for any northern hemisphere observer.

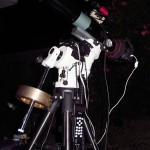
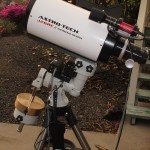
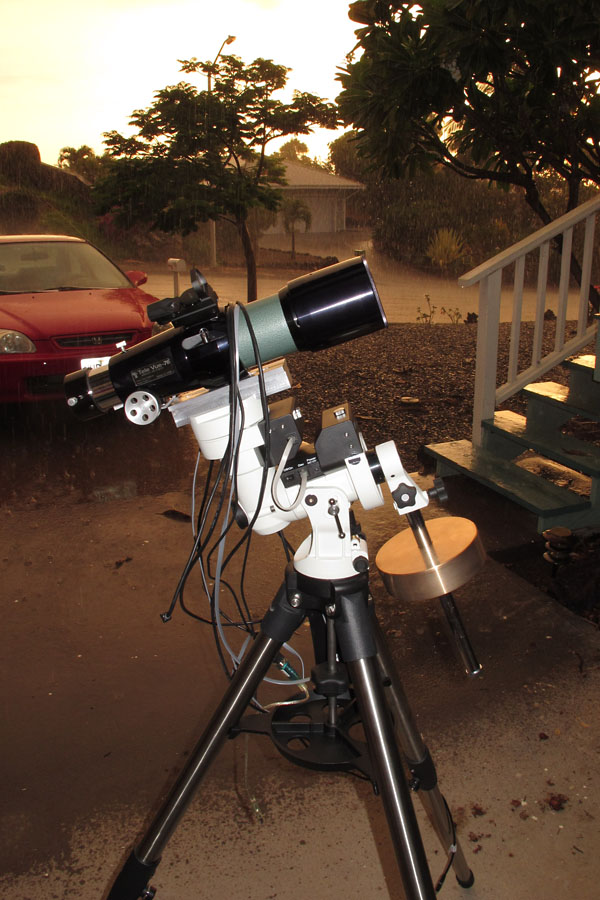
A small, light telescope mount, a small refractor, and a modern autoguider. Seems like a perfect setup! There are a few issues…
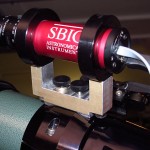
The setup is pretty straightforward. A TeleVue 76mm riding atop the iOptron ZEQ25 mount. Atop the TV-76 is a red dot finder and an SBIG STi autoguider. The guider is attached with a bit of custom machining and uses the SBIG accessory kit, including a 100mm lens giving a 2.7 x 2.0 degree field of view. With such a wide field of view the guider also functions as a finder to aid in aligning and framing the photographic telescope.
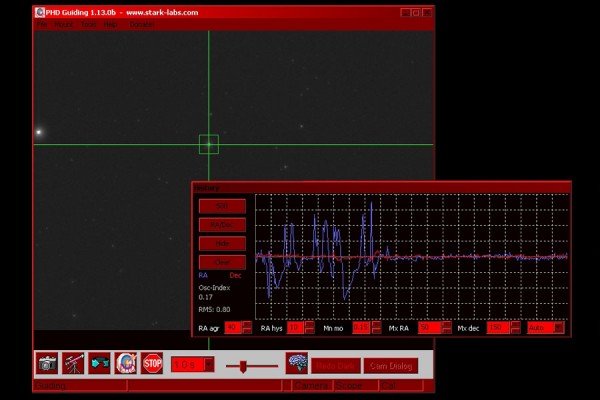
Without guiding the performance is not satisfactory. Even with a modest focal length of 380mm there are objectionable guiding errors. The frame at right shows the errors seen during a four minute exposure. Based on my first impressions I would expect to need guiding on any exposure using more than 100mm and a few minutes exposure.
A few steps here have not gone smoothly..
Configuration? There are a lot of setups to check. All of the correct software and drivers… Planetarium software, autoguiding software, camera control, ASCOM, all of the hardware drivers, etc., etc. After everything talks it is a matter of checking settings and tuning the setup with several parameters in the software and on the mount that need to be checked.
I am using PHD to do the guiding, a bit of kit I have used for a while. It works quite well with straightforward controls. It does have quite a few parameters that require checking to tune the control algorithms.
The iOptron controller has a setting for guiding speed in the menus. This is purported to be a fraction of sidereal speed by the manual, up to 100%, but the menu reads as if it is 100x on the controller. I suspect the manual is correct here, will need to test.
The first issue cropped up fairly quickly. I could get no motion from the mount while sending corrections with the STi. PHD was unable to calibrate, no motion. I attempted to use the manual controls in PHD with similar lack of motion. (See update below)
To troubleshoot I needed to make sure that the guide port on the ‘scope worked. I grabbed a Losmandy hand controller and connected it to the ZEQ25 guide port. This worked, the port was working properly and I could see what the guide speed setting on the controller really meant. It looks like 100x is 100% of siderial speed, or close enough.

| Parameter | Value |
|---|---|
| RA Aggressiveness | 100 |
| RA Hysteresis | 10 |
| Max RA Duration | 750ms |
| Search Region | 15pix |
| Min Motion | 0.1pix |
| Calibration Step | 2000ms |
| Time Lapse | 0ms |
| Dec Guide Mode | Auto |
| Dec Algorithm | Resist |
| Dec Slope Weight | 5 |
| Max Dec Duration | 750ms |
| Star Mass Tolerance | 0.5 |
| Noise Reduction | None |
Some tuning of the parameters in PHD has started to result in very nice guiding graphs and some excellent test images. These could probably be refined a bit more, but they are working for now. The PHD help menu has a fairly good description of each of the parameters, there is also a great guide to PHD on the Rose City Astronomers website.
It is really necessary to set the autoguide rate to 100% when using shorter focal lengths. Otherwise the mount does not move very far during each calibration step, as a result calibrations take a very long time and will sometimes fail.
Another observation. When guiding near the pole, shooting comet PanSTARRS at near +80° declination, I encountered very regular declination errors using PHD. Every couple minutes the dec error would deviate by about a pixel, alternating in each direction. Shutting off the declination correction worked pretty well, the mount was polar aligned accurately enough that there was very little declination drift.
I still have yet to understand just why the STi will not directly interface with the ZEQ25, something in the ratings of the photo-isolators used in the STi? The manual simply states these are good to 25mA and 25V, which seems generous for the task. It may be in the voltage levels, I did discover that the iOptron uses 3.3V on the guide port. Perhaps the STi will not pull down low enough for a valid low logic level? I built the USB to ST-4 adapter with MOSFET optocouplers, these can switch harder than standard photo transistors.
UPDATE– The interface issue was just a cabling problem. The same cable I use with my Losmandy G11 does not work, it is flipped from the pinout needed for the ZEQ25. With a corrected cable I now connect the STi directly to the guide port on the ZEQ… It works.
A rigid mount to adapt the TeleVue-76 to the SBIG STi autoguider? I need such a solution, I have both of these bits of kit that need to be wed together for the minimal astrophoto setup. As I am unlikely to find such a part commercially, I would have to make it myself.
Another couple hours in the machine shop were in order, another small pile of aluminum chips. This actually went pretty quickly, these are easy cuts to make. No tapping is required, the four holes are simply drilled through. The two hours included design and cleanup for a quick project.
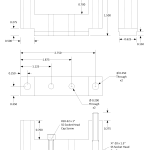
The TV-76 has a rather non-standard mounting point on top for accessories like this. A pair of #10-32 threaded holes, 0.75″ apart and located in a slot 0.625″ wide milled into the mounting ring. This seems simple enough. An adapter made for the TV-76 should work with any of the TeleVue refractors that use this mounting. Another concern is that the solution must also be very rigid, any flexure between the autoguider and the telescope will result in smeared stars.
The design assumes that you have the additional guiding kit sold by SBIG for the STi autoguider. This provides the mounting rings that clamp the camera body.
The hardware required will be two ¼-20 x 1½” socket head cap screws, and two #10-32 x 1″ socket head cap screws. A pair of plastic press on caps convert the #10 screws to knobs. All parts you can find in a neighborhood hardware store.
The mount is 1.5″ high to set the autoguider away from the main OTA, as to not encounter any vignetting. This also allows space to get fingers onto the mounting knobs. The dimensions are chosen so that standard screws protrude by just the right amount. I messed this up on the one I made, machining the center to far. As a result a few washers are needed for the screws that mate with the refractor. This is fixed in the mechanical drawing.
To co-boresight the TV-76 with the autoguider it was necessary to slip a 1/4″ washer between the mount and the rear ring as a shim. With that in place the same object is centered in both fields of view. The STi has a 2.7° x 2.2° field when used with the 100mm lens supplied in the SBIG accessory kit. With this wide field of view it also serves as a finder to locate and frame the photographic target.
It assembles nicely, a good start. The true test will be the quality of the images produced by the rig.
Well past perihelion comet C/2011 L4 continues to put on an impressive show. Amateur sky-watchers have been enjoying the impressive anti-tail reaching out a few degrees from the coma. True, you may need a telescope or at least good binoculars to see the comet. It may be dimming, but still worth the effort to observe.
I had been looking to acquire another astrophoto toy. The desire is for a small, portable astrophoto setup. Yes, I am aware that the words “portable” and “astrophoto” do not really belong in the same sentence, all things are relative.
Thus I have decided on the new iOptron ZEQ25. It is a new design, with some radical differences from the more traditional German equatorial mounts.
The mount is pretty small, a mere 10 pounds of steel and aluminum. Compact enough to be packed into a suitcase for air travel. Performance sufficient to do wide field astrophotography with focal lengths up to 1000mm and a DLSR camera. Perfect for use with either my TV-76 or AT6RC. Unlike my old Losmady G-11 it features a modern GOTO system and can be run from the computer.
I ordered the mount from the good folks at OPT. It was not yet listed in the website catalog, but a phone call confirmed they were expecting delivery of three mounts shortly. I put down my deposit. A week later I had confirmation that the mount had been received and was ready for shipment to Hawaiʻi as promised.
It looks like it may clear. There should be a few dark hours before moonrise. Maybe I can get the new astrophoto rig out and get everything working properly.
<Commence tropical downpour>
Nothing like two tenths of an inch of rain in half an hour to put a damper on astronomical plans.
Maybe it will clear later.
Beaches? Tropical gardens? The volcano? Yeah, BTDT, not what I came to Hawaiʻi for. Visiting Mauna Kea is at the top of the list for some folks who visit our island, a priority I can fully understand. Even better? Bring a camera to this spectacular mountain. After six years of working on Mauna Kea I still carry a camera and find new shots. Some of the most fascinating photographic opportunities occur after the Sun has set. For those who pursue shots in the dark, long exposure photography, the summit provides a setting that is worth the effort to shoot.

So what are the real rules for summit access after dark?
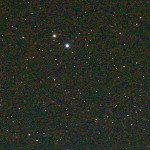
The weather finally broke, leaving a clear western sky and a chance to photograph the comet. I set up and managed just a few shots before the comet set into the top of a tree across the street.
At least I was able to get on-sky. Much more than can be said about our ‘scopes on the mountain. Observing was cancelled earlier this afternoon, there is too much ice on the domes to operate safely. At least the ice was pretty, and photogenic.

The trade-winds have returned for the evening. And while they are welcome for the comfortable temperatures they bring, the winds are unwelcome for the problems they create at the telescope. I am trying to get in one last exposure sequence for the evening, but the guider graph shows trouble. There are constant errors, not small errors either. The Right Ascension axis seems to be the issue, with errors of +/-3 pixels on the guider. This is just not going to work.
I watch the graph for a while, trying to figure out what I can do. I have had an issue where the guide star was the source of the problem, two stars to close together, a double star I did not notice when selecting my guide star. I stop the guider and select another star… The problem continues.
As I feared, my problem is most likely the wind this evening, a continual issue on this rock I live on. A speck in the middle of a very large ocean, the winds are a fact of life here. I only shoot with small telescopes, less sail area to catch the wind with a short tube. A TeleVue 76mm, an AT6RC, or simply a wide angle camera lens. The smaller scopes provide less loading for the old Losmandy G11 I mount them on.
I decide to try something else, shifting the balance to load the RA gear down. I gently slide the counterweight down the shaft about an inch. There is barely a blip on the guider as I make the adjustment. Better yet the guide error graph settles down! Looks like I will be able to get in a few more exposures before putting the ‘scope away.