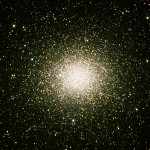
Another product of this last new Moon star party at the MKVIS. An easy target, suited to checking the performance of the new setup. As usual, click on the image to view the larger size…

When you want to see the stars, find someplace dark
Peering into the dark with a camera
Transit is over, an exhausting and exhilarating day! I am headed to bed, but still totally jazzed with the experience. Keeping the webcast going for seven hours was a huge effort. Given the comments from our viewers it was worth it. I will have to more fully write up the experience for a later post.
The best visual for the day was the few minutes just before second contact… A beautiful, razor thin arc of light coming through the Venusian atmosphere, connecting the two horns of the occluded Sun. It was delicate and sublime, one of the most memorable sights I have ever seen through a telescope. With the excellent seeing of Mauna Kea, and the wonderful optics of my TV-76 telescope, the sight was clear and steady. I have yet to find a photograph that captures what I saw through the eyepiece.
I will post a quickly processed version of one of the frames from the second camera…

It was a full dress rehearsal. Both telescopes, two cameras, the entire streaming rig set up on the lanai. No less than three computers with cables all over the driveway! Surprisingly enough, everything went pretty well!

Everyone wandering by the house noted the telescopes. I gave peeks to our mail-lady and a couple young women who stopped by, intending to read me a bible verse or two (that was fun;)
Two technical issues were key today… Using thirty feet of active USB extension cables to run the streaming camera remotely, no problem. Co-aligning the two telescopes to aim at the same point, no action needed, aligned from the start. I had thought I might need to shim the mount for the piggyback ‘scope. I was also able to play with the streaming camera further. The Baader film filter gives a blue-white image. Adjustment of the camera white balance will restore a little yellow cast. I do not have much problem with the white, but a hint of yellow will allow people to instantly realize they are seeing the Sun. The same reason I adjust my processed photos for a golden orange hue.
We are all swapping gear around to get the set-up ready. Chris was nice enough to loan me a Canon T-ring and some Baader film. I built a battery pack and some sun-finders for several telescopes. Last night I picked up a whole solar rig from Cliff for delivery to Olivier. Olivier lent a 40mm eyepiece to Keck for the public telescope that will be setup at HQ. The list goes on…
I was not the only one doing a dress rehearsal. So far today I have been on the phone to other folks setting up and using a sunny Saturday to check gear. Some of the guys over on Maui even posted a video of their test run. I should have thought to do the same thing! Will have to time lapse the summit setup.
The rearrangement of my astrophoto setup proceeds. If somewhat frantically in the face of the upcoming Transit of Venus. Another device has joined the toolkit, a bit of hand-wired electronica that gets the job done.
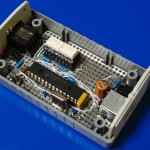
I did not design the device this time. This would have been completely within my capability, but why do so when someone else has already done the job? This is typical within the astronomy hobby, where many designs are shared for the benefit of everyone. In this case it is the USB to ST4 adapter designed by Gene Nolan.
All I had to do was follow the schematic and download the code into the microcontroller, the device worked first time. Gene does sell kits, but I wanted to do this quickly and had everything I needed on hand except the microcontroller and opto-isolators.
The only real problem that cropped up during construction was the wrong part received for the opto-isolators. The DigiKey description read DIP-8, so I ordered it, expecting to get something that fit into the DIP socket I had already wired onto the board. When the parts arrived I found that they were indeed DIP… lead-formed DIP packages meant to be surface mounted, with chopped off leads. I ended up soldering the devices to another DIP socket, using it as a header, which then plugged into the socket on the board. It looks funny, but it works.
It did take a couple hours of downloading and installing the drivers and other useful software packages to get everything working. This includes the very useful ASCOM driver framework, and PHD Guide. Both of which I plan to use beyond the upcoming Transit of Venus to do more astrophotography.
My wife may have been a little perturbed by the testing setup strung across the kitchen table, a laptop and the heavy Losmandy head, a Canon 60D camera, all connected by a snake pit of cables. But it worked, first time, that is always nice.
As we approach the Transit of Venus I decided to attempt to photograph Venus as a very thin crescent. I do not normally pay much attention to the planet, it is pretty when seen in the sunset. But when you turn a telescope to Venus it is quite boring, a white ball with no detail to be seen. I find I have been paying a bit more attention with the transit looming close on the calendar.
I could photograph the planet after sunset, but as Venus is quite near the Sun it would be very low in the sky and I would be shooting through a lot of air to get the imagery. Atmospheric distortion would be a major problem. The other method is to try something I had not done before, photograph the planet in the daytime, high in the sky and quite near the Sun.
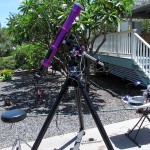
Yeah, This will be a tricky operation. Venus will be only 12°44′ from the Sun, meaning I will have to be quite careful to avoid roasting my equipment, or my eyes.
I chose to use the 90mm APO refractor. With the optics at the front there will be some sunlight splashed down the interior of the tube. It should not be a focused image as it will hit the tube not even halfway down. There the heavy aluminum tube walls should dissipate the heat efficiently. The fully baffled tube should also stop much of this light before it reaches the camera. I may not have designed and built the optical tube with this sort of abuse in mind, but I did build it heavy, it will take it.
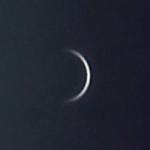
The results? The final image can bee seen to the left. Not horrible, but it could have been better. The seeing at 11am was already starting to degrade, I am always amazed at how well the software can extract a half decent image from such distorted original material. The magic of sorting through and averaging a thousand frames. I wonder what I could do with better seeing.
Another try? Probably not, Venus is quickly getting closer to the Sun as we approach transit in nine days. The next time I photograph Venus it will most likely be silhouetted against the solar disk. Maybe an attempt after transit? I could shoot earlier in the morning with possibly better seeing.
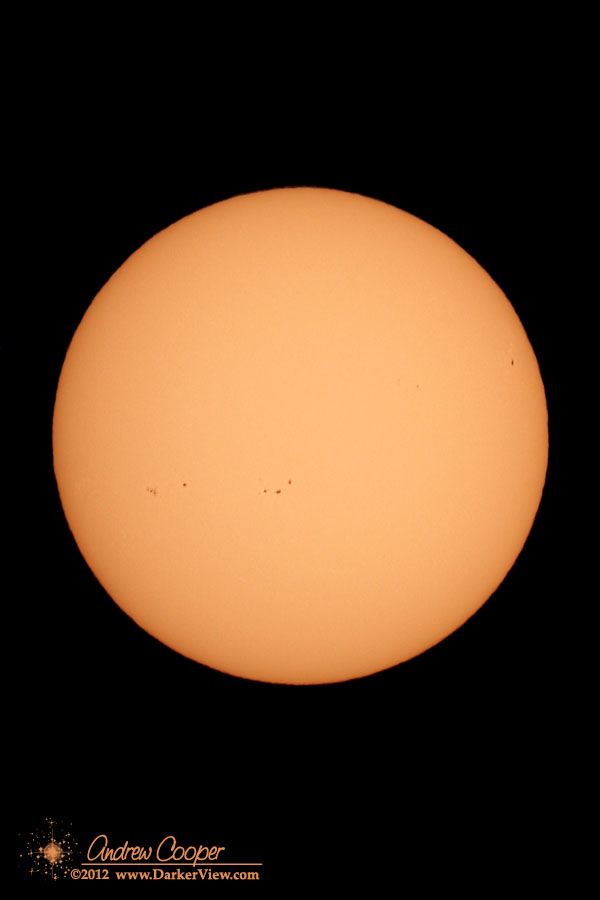
A Memorial Day Sun from Hawai’i. Another run at setting up and testing gear for the upcoming Transit of Venus. The seeing was not great, but I shot the Sun and some material of a thin crescent Venus just 12°44′ from the Sun.
A box in shipping and receiving with my name on it. A much awaited box. The new SBIG ST-i autoguider!
For those who are uninitiated into the mysteries of astrophotography, an autoguider is the secret to taking hours of exposures without having the manually correct the telescope position constantly. For almost two centuries, from the first time a camera was attached to a telescope, through the invention of auto-guiders, guiding was a supremely tedious task. The photographer would spend hours on end, peering through an eyepiece watching a single star, if the position of the star started to drift, he would press a button to correct the position of the telescope during the exposure. This was necessary to achieve any sort of long exposure, as the telescope, no matter how precisely made, would drift a little during the night, leaving streaks in place of pinpoint stars.
I have done this, it is no fun at all.
Then came the autoguider. A small digital camera that could take a picture of the star, then check the image for drift in the star’s position and, if necessary, send a command to the telescope to correct the position automatically. The first commercially available autoguider appeared in 1989, the Santa Barbara Instrument Group model ST-4. This little device revolutionized astrophotography, allowing far longer exposures with much less effort and much better precision.
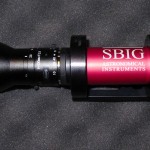
No more, I have broken down and purchased the new ST-i from SBIG.
The newest, latest and greatest, just released model.
Unpacking the box I am happy with what I see. Everything looks good.
It does seem like a small device for the $595, smaller than most of my eyepeices. Fit and finish looks good. A nice small package that will be easy to mount to any of my telescopes.
I setup the software and drivers on the laptop with no issues, simply following the provided instructions. The SBIG software for the camera , CCDOps ran first time, connecting to the camera and taking a frame. You can hear the soft click of the mechanical shutter in the camera. The bias frames look quite nice, a smooth field of salt and pepper noise with no gradients or other artifacts.
Attaching the lens from the accessory kit I take a few images of wood-grain on the kitchen cabinets across from the table I am working at. Another task will be to properly evaluate the imaging performance of the camera. It does have a decent CCD in it, the specifications indicate a proper 16-bit A/D system. A real photon transfer test will reveal if that system lives up to the specifications. A subject for another post!
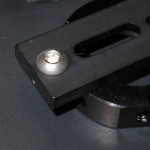
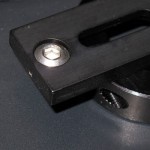
The package offers a nice solution, on paper at least. With the included 100mm lens the camera should provide a 165 x 123 arcminute field of view, or a 2.7 x 2.0 degree field of view. The literature promises sub-arcsecond guiding accuracy with this setup, with the ability to use 7th magnitude stars with one second exposures. These are claims that will have to be checked as well. I intend to do a proper job of verifying these numbers, I expect to get many years of service out of the guider. The new camera has quite an act to follow, replacing my classic ST-4!
I also hope to be able to guide on the Sun for the Transit of Venus. I will be trying the included software as well as Dave Solar System Recorder in the coming week. I wonder if either package will be able to guide on a large, non-stellar object like the Sun, perhaps with a shorter focal length lens.
This leaves only one real question… How well does it work? Unfortunately that will have to wait for another day. In true astronomical tradition, the receipt of new astro toys invariably occurs when the weather precludes their use. In other words… I have clouds!
A writeup of the operation of the new autoguider will be another post, when the skies provide me a chance to use it.
Another new Moon weekend, another observing outing to Mauna Kea. With some shiny new astro equipment to play with I decided to load for photography instead of visual. Disassembling the photographic mount I realized it had not been taken apart in over two years, setup in the garage and used in the driveway. I did not expect to be alone, a few other local observers had indicated plans to get out this night.
As expected the Mauna Kea Visitor Information Station was a zoo. A dozen summit tour buses added to a heavy Saturday night crowd. The parking lot was full with even more cars parked along the road. Not a real problem, the tour buses use reserved spaces right in front of the building. They pull out about an hour before sunset, headed for the summit with their customers. We swoop in on the vacated parking spaces and set up our gear.
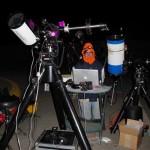
In addition to the VIS telescopes, there were quite a few local amateurs taking advantage of a moonless Saturday night. Cliff and Tony brought Cliff’s 24″ Dob, a two person job to move that ‘scope. Wayne brought photography gear. Mike was likewise set up for photography, planets instead of deep sky, using a Flea 3 and an ancient 10″ Celestron. Olivier brought his 19″ Pricilla, providing plenty of glass for visual astronomy while the cameras exposed for hours.
It was Malalo o Ka Po Lani, cultural night at the VIS, with a special lecture. This meant a large crowd, most of whom stayed to enjoy the perfect skies the mountain provided this night. They wandered around the telescopes asking lots of questions. While the photographic ‘scopes did not offer views through the eyepiece, there was still a lot of interest in the process. I chatted with many folks as I worked, fiddling with the complex equipment necessary to take photos of the sky.
It was quite the gathering of Losmandy G-11’s! Wayne brought two, Mike brought one to carry the old 10″ Celestron, I had mine setup for photography with the AT6RC. Add the three that the Mauna Kea VIS uses! A testament to these well-built mounts, some of which are two decades old.
The astrophoto gear was working nicely. There were a few issues to deal with at the beginning of the night, the usual new gear stuff. A few things I need to fix before next time… need to remount the guider so I can co-align it with the imaging ‘scope. I need to mount a real finder, and make it easier to hunt down the targets. But overall I was pleased, the new setup worked as I hoped it would.
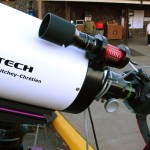
Another pleasant surprise was the ease of focusing with the AT6RC with a Bahtinov mask. I have been wondering about the stock focuser on the new ‘scope, how well does it handle the heavy DSLR camera. One lesson is that it locks the focus quite well, I noticed no drift each time I checked focus. Indeed, at one point I pulled out the 60D, swapped the focal reducer and adapter onto the 20Da and checked focus again, it was still perfect.
While my camera took exposure after exposure, I took in the views that big glass can produce. Bouncing back and forth between Cliff 24″ and Olivier’s 19″. No surprise for a spring session, galaxies were in rich supply. We viewed a lot of the showpiece objects, from Ursa Major to Virgo and Corvus.
This night was the type of night we hope for when planning an observing outing… Not too cold, no strong wind, and no clouds. Just a dark sky to delight the imagination all night long.