Earthshine
When you want to see the stars, find someplace dark

Peering into the dark with a camera
I have been watching the supernova nearly since it erupted around 23 Aug. We first viewed the supernova on 26 Aug using Cliff’s 24″ scope in the schoolyard of Waikoloa Elementary. I have since seen it about half a dozen times, as it brightened and peaked at around 10th magnitude in mid September. The supernova has since dimmed somewhat, now about 11.5 magnitude, but still quite easy to find with a small telescope. It is brighter than the host galaxy, M101.
Not a great picture. The galaxy was setting and I was shooting as it slid behind the shoulder of the mountain. All I could manage was a quick sequence of a dozen 30sec images. Still, you can actually see the galaxy and supernova. The image is much as it appears in a larger telescope around 14-20″ of aperture under a dark sky.

A nice image of Jupiter with the moons (left to right) Europa, Ganymede and Io. Taken early Sunday morning from Hale Pohaku. Conditions were quite nice, both for photography and simply observing by eyeball through the telescopes set up.
The telescope used is not mine, but belongs to fellow club member, Maureen. We had just collimated the ‘scope, aligning the optics for optimum performance. I wondered just how good the performance might be. The answer? Pretty good!
I used the Canon 60D to shoot the video. The ‘scope was a Celestron 9.25″SCT operating at f/10. The camera has a 640×420 cropped video mode that is ideal for this sort of use. Shooting at 60fps it generates very high quality video.
The frame is a stack of 900 frames selected from well over 1500 frames in the source video. The result is quite pleasing, particularly the moons. Three of the four large Jovian moons are visible. They appear as disks, with the larger Ganymede notably bigger than the smaller Io. The disk of Jupiter shows good color and cloud formations. Overall the result is excellent and shows the promise of using the DSLR to shoot planetary video. I will be experimenting with this method and expect even better results in the future.

A supernova, a comet, a new camera and a dark night.
I have had the Canon 60D for a while now. Since April in fact. It was my main carry camera in Alaska this summer. This was the camera used to produce the laser shots and videos that were published far and wide. But I have never used the camera on a telescope. A new Moon observing weekend is an opportunity to change that.

While my camera was busy shooting sequences, I wandered around and visited with the other folks enjoying the night. A few peeks through other scopes at favorite objects was about all the visual observing I did. There were a couple groups using cameras without telescopes to shoot stars capes under the dark sky. We traded hints as multiple cameras worked the night.
An orange glow in the clouds betrayed new lava flows on Kilauea. Even thirty miles away we could make out bits of a channelized a’a flow. The pair of binoculars I had brought became one of the most popular optical instruments around.
I was using the rig without any autoguiding, as a result guiding errors spoiled a number of exposures. I kept the exposures short, and shot bright objects. I have sequences to process of a lot of old favorites… M31, M42, a few open clusters like M11 and M38, the Pleiades and more. Just before dawn I even shot a sequence of the Tarantula Nebula skimming the slope of Mauna Loa. Two 8Gb SD cards filled and part of a third. I will be some time processing the many images taken through the night. There is even some video of Jupiter and Mars to process into high resolution planetary images.
There were three telescopes still operating when dawn appeared. Maureen, Cliff and myself watched as the sky grew bright and a thin crescent Moon rose above the slopes. Even then we spent a little time observing and photographing the Moon or Mars as the stars disappeared. We were still breaking down gear as sunlight swept the hillsides around us. Tired and yet elated we greeted the Sun.
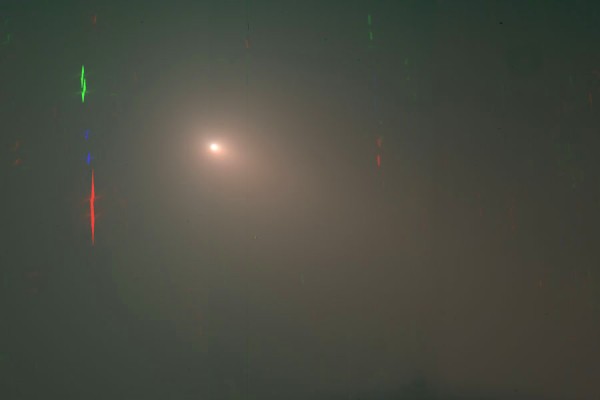
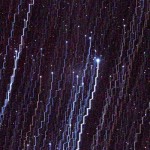
I am waiting for the Moon to leave the evening sky before shooting the comet again. In the meantime I am processing more of the material obtained earlier in the month. In this case a photo of Comet 103P/Hartley 2 taken October 6th with Keck 2 and DEIMOS. The image marks the first time I have attempted to take and process an image with a 10m telescope. Just a wee bit larger than the 76mm refractor I usually use to take astrophotos!
The image is notable for its complete lack of any interesting structure. There are no jets, shells or other inner coma detail visible. The tail is simply a general brightening to the southwest (lower right in this image).
The comet is moving very quickly across the sky, even more so with the high magnification lent by a large telescope. Even short exposures turn the stars into long streaks. In this case multicolor streaks as the camera cycles through the filters needed for a color image.
Visual astronomy is the practice of pushing our built in optical detectors to the limits of performance. Our eyes are surprisingly good optical instruments, and until the advent of film about a century ago were the only means we had of observing the universe. Even now, in the age of sensitive electronic detectors there are those who appreciate the view of the heavens through our own eyes.

The image tube operates by charging a grid to a high voltage inside a small vacuum tube. Incoming light (photons) strike this grid and create a shower of electrons that continue onwards to strike a phosphor screen at the rear of the tube. A single photon can create a shower of hundreds of electrons, a very large signal gain. The phosphor screen glows where struck by photons, creating a image of the amplified signal.
A bright image is seen on the screen of the object, hundreds of times brighter than the original. The image is green, as result of the phosphor, this amplification is a monochromatic process. There is some noise in the image, random “sparkles” called scintillation that result when electrons leave the charged grid in a random fashion.
The images shown here are taken with the Collins I3 eyepiece or I3piece. The device is a very nicely built unit that is about the same size as a modern high quality eyepiece. Actually it is much smaller than some of the large designer eyepieces seen on some telescopes. An internal battery means there are no cables resulting in a neat package. The intensifier has a standard 1.25″ or 2″ nose piece threaded to accept standard astronomy filters.
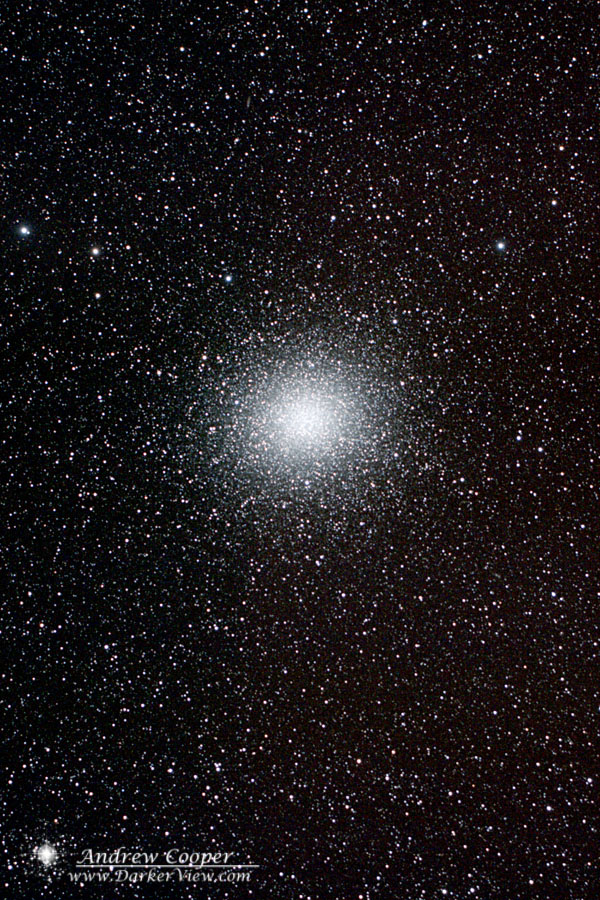
The image intensifier is not a panacea, there are some objects where the intensifier works well, and others where it does not perform. Globular clusters and planetary nebulae are quite dramatically represented in the intensified view. It is faint, low surface brightness objects like galaxies and extended nebulae that are often better appreciated with a normal eyepiece. Switching back and forth is generally a poor idea as using the intensifier decreases dark adaptation.

One place where the value of the intensifier is undeniable is in public outreach. The live views of bright galaxies show far more detail to the inexperienced observer that they would otherwise have missed in the eyepiece view. A spiral galaxy is clearly a spiral galaxy, even to a first time observer. In addition the intensifier can be used to provide views of faint objects under less that ideal conditions. Addition of a narrowband filter can increase the signal to noise and allow viewing of emission nebulae even with substantial light pollution from natural (e.g. the Moon) or artificial sources.
Unfortunately the Collins intensified eyepieces are no longer available from the manufacturer, though the website still appears functional. There is an equivalent product from BIPH which uses the same technology. At nearly four thousand dollars these devices are not for everyone. they can be used to good effect under the right conditions.
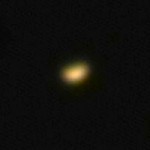
The photo does represent Mercury fairly well, at least the normal view you get in a telescope. As the innermost planet does not get very far from the Sun, it is typically seen quite low on the horizon. This leads to poor views seen through a great deal of atmospheric distortion.
What the photo does not show is the chromatic distortion, this was corrected during processing of the photo. The atmosphere will also break up the color, refracting the light when an object is low on the horizon. The processing software allows realigning the color planes, correcting much of the effect.
I mentioned in another recent post that astrophotography is an art of details. Dozens of little issues must be dealt with, failure to properly address even one item, and hours of work can be lost. Each technical issue must be understood, and a solution found through technique and experience.
The saving grace of modern astrophotography is that once all the equipment has been set up and the details under control, the process becomes automatic. The computer, telescope mount, and camera operating for long periods of time, often hours, with no human intervention. One of the critical functions to long exposure photography is an autoguider, a small, automated secondary camera that keeps the telescope and mount pointed at exactly the same point in the sky for the entire exposure.
The first hint of trouble was the display on the autoguider. I did not see this until I went to stop the series of exposures I had hoped was complete. The guider was displaying large guide errors each cycle, where I should see zeros, or at least small numbers, it had E’s, a bad sign with the venerable ST-4 autoguider.
Hoping for the best, but fearing the worst, I rolled the ‘scope back into the garage and setup the camera to take calibration frames. I would discover the truth later, after I got a few hours of sleep.
When I downloaded the memory card the extent of the problem becomes apparent. Much of the last sequence of photos is ruined. The guider clearly lost the star somewhere into the third exposure, reason unknown. What resulted was twelve exposures with ziz-zag star trails across them, well over an hour and a half of wasted exposure time.
All of the evening’s early exposures were fine, only the last sequence was ruined. Thus, the evening was not a total loss, and I do have some new material to process. Now to figure out what went wrong with the autoguider, probably just some small detail I missed.
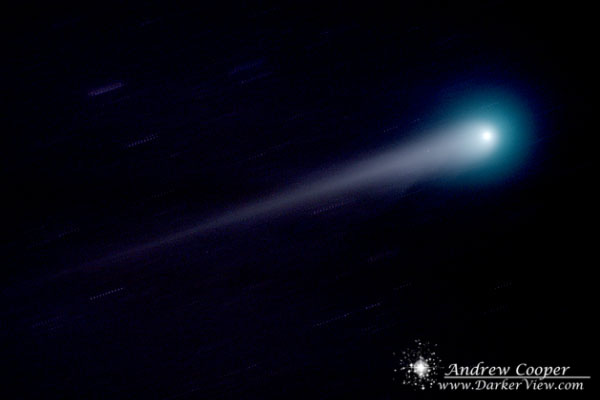
Another frame of Comet Lulin taken from the driveway. This one was taken on the evening of the 26th, a day after opposition, when the comet was directly opposite the sun in the sky. The interesting ion tail that was to the west of the nucleus has swung around behind the coma from our point of view. The frame was aligned on the comet as it moved and processed to suppress the streaked stars.