Hawaii’s W. M. Keck Observatory has successfully deployed a $4 million laser system that provides a marked increase in the resolution and clarity of what are already the most scientifically productive telescopes on Earth. The new laser was projected on the sky for the first time on the evening of December 1, 2015 and will allow scientists from around the world to observe the heavens above Maunakea in unprecedented detail.
The Keck 2 AO laser works the northern sky“The Next Generation Laser System is the third generation of lasers at Keck Observatory, which has been pioneering Laser Guide Star Adaptive Optics on big telescopes since 2001,” said Jason Chin, the project manager for the new laser at Keck Observatory.
The first Laser Guide Star Adaptive Optics system on a large telescope was commissioned on the Keck II telescope in 2004 and, among many other firsts, helped reveal the black hole at the center of the Milky Way – one the most significant astronomical discoveries. The second laser system was installed in 2011 on the Keck I telescope, propelling Keck Observatory’s lead as the premiere Adaptive Optics research facility in the world. To date more than 240 science results from these laser systems have been published in astronomical journals.
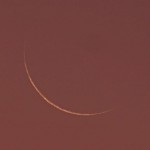
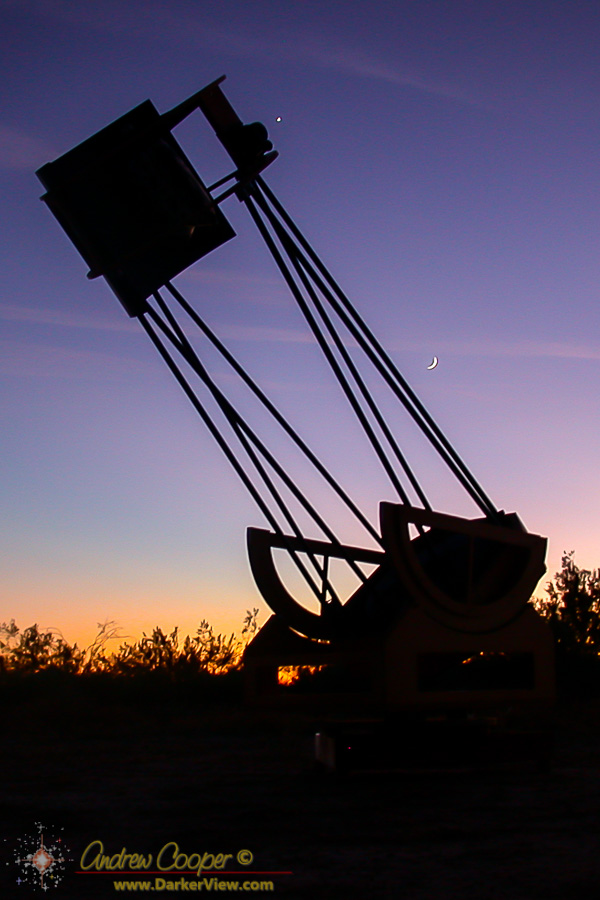
A very young moon over Waikoloa, this is only 26 hours after new, visible to the unaided eye as a sliver in the fading glow of sunsetNew Moon will occur today at 00:29HST.
The Keck 2 AO laser works the northern skyThe W. M. Keck Observatory in Hawaii has just been awarded the 2015 NASA Group Achievement Award for pioneering the Keck Observatory Archive (KOA) ten years ago, which has significantly increased the impact of Keck Observatory data. The award was received by Keck Observatory Chief Scientist, Dr. Anne Kinney at NASA headquarters on December 8, 2015.
“For the past 10 years, the NASA KOA team has boosted the science value of data acquired at Keck Observatory by providing the scientific community with open access to WMKO data,” said Mario Perez, Keck Observatory Program Executive at NASA Headquarters in Washington. “They helped set a standard that all new ground based observatories are adopting. For this, the NASA KOA team has earned the NASA Group Achievement Award.”
“We are very proud of this award as well as the KOA project itself,” said Hilton Lewis, Director of W. M. Keck Observatory. “This was the brainchild of Anne Kinney while she was at NASA and who I am happy to report recently joined Keck Observatory as our Chief Scientist. Thanks to her vision, data gathered by all instruments at Keck Observatory is available for everyone to use. The Keck Observatory telescopes are the most scientifically productive on Earth, responsible for gathering data used in about 300 peer-reviewed scientific papers per year – almost one per night. There are terabytes of valuable data collected over the last 20 years waiting to be mined.”
In 2004, NASA established a partnership with WMKO to acquire large volumes of data from a single instrument, the High Resolution Spectrograph (HIRES), for NASA science purposes. It is standard practice to make data from NASA’s space telescopes available to the world in a public archive, but in 2004 it was unheard of to do the same with data from a ground-based telescope. Kinney, then Director of the Astrophysics Division at NASA Headquarters, decided to start a visionary project of promoting public access to these data, and the project began by archiving NASA-acquired HIRES data.
The SBIG ST-i is a useful little camera, I have enjoyed using mine. I usually use the camera for autoguiding, but it can also be used for basic astrophotography and even some science. In preparation for using the ST-i with a group of students I had need to make a couple additional mounts. After I go to the effort of designing a simple solution to my problem I may as well share the solution.
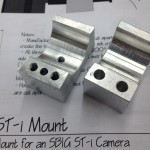
A simple mount for an SBIG STi camera for use in a piggyback setupThe ST-i camera is designed to slip into a standard telescope focuser in place of an eyepiece, as it is the same diameter at 1.25″. The camera can also be used in a “piggyback” style, mounted atop a telescope and fitted with a standard c-mount lens. Using a lens the camera will have a much larger field of view. The front of the camera is threaded for c-type 1″ threads to accomodate this. The SBIG guiding kit provides such a lens and a ring style mount. If you do not have the kit, or already have a suitable c-mount lens you still need a suitable mount.
I have included the mechanical drawing for the mount in the link above. I machined this from a block of aluminum. There is no reason it could not be made of wood or plastic to allow fabrication with whatever equipment is available. For wood you may need to make the block a little longer and use inserts for the threading. Plastic could be done pretty much as drawn.
The version I made was milled from a solid chunk of aluminum, but a good version could be easily cut from wood and assembled with brass inserts. The design could also be 3D printed without much loss in mechanical robustness.
To mount a c-mount lens you will need the adapter ring sold by SBIG to convert the 1.25″ filter thread found on the camera to the 1″ c-mount thread. Still, at $40 this ring is a lot less than the $350 guiding kit. Good c-mount lenses can be found from many sources for less than $100. You will need a focal length between 75 and 150mm for a nice image scale and as wide an f/ratio as you can find. The kit includes a 100mm f/2.8 lens which I find is quite useful in guiding my Televue 76mm or the AT6RC.
The annual Geminid meteor shower is one of the most reliable annual meteor showers. The shower is noted for a steady stream of bright meteors with rates of well over 100 per hour.
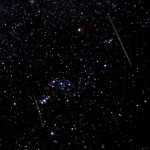
A pair of Leonid meteors streak through OrionFirst observed over 150 years ago this is a interesting meteor shower. The parent body for the Geminids is not a comet, but rather the asteroid 3200 Phaethon. It is somewhat of a mystery how this mostly rocky body gives rise to the debris stream needed to generate a meteor shower.
The shower peak is predicted for December 14th, at around 18:00UT (14Dec 08:00HST). For viewers in the central Pacific this favors the evening of Dec 13th into the morning of Dec 14th, starting around 8pm as Gemini rises in the east. The peak is broad, with near peak rates occurring a day either side of the maximum, thus allowing everyone with a dark sky to enjoy this event. Thus the evening of the 14th may also provide a good viewing opportunity.
Even from more southerly sites, this is an excellent stream of often bright, medium-speed meteors, a rewarding event for all observers, whatever method they employ. The peak has shown slight signs of variability in its rates and timing in recent years, with the more reliably-reported maxima during the past two decades (HMO, p. 171) all having occurred within λ⊙ = 261.5° to 262.4°, 2015 December 14, 01h30m–23h UT. Near-peak Geminid rates usually persist for almost a day though, so much of the world has the chance to enjoy something of the shower’s best, regardless of when the maximum actually happens. Mass-sorting within the stream means fainter telescopic meteors should be most abundant almost a day ahead of the visual maximum, with telescopic results indicating such meteors radiate from an elongated region, perhaps with three sub-centres. Further results on this topic would be useful. The 2015 peak arrives just three days after new Moon, so observing conditions are ideal. – IMO 2015 Meteor Calendar
As noted by the IMO calendar entry above, new Moon will be on the 11th, placing the peak just a few days after new, a thin crescent in the evening sky that will set early. This leaves a perfect dark sky to enjoy the meteor shower. In the islands Gemini will rise around 8pm, bringing the constellation Gemini and the shower radiant over the horizon and marking the start of the show.
Taking astrophotos or time lapse often involves leaving a camera out in the dark for long periods. Cameras are somewhat more robust than humans, tolerating the cold for a bit longer. As a result often the cameras are unattended while the human seeks shelter in some warmer place. This can result in the theft of the unattended camera.
A camera security block for unattended camera operationThis was recently highlighted when a camera was stolen from near the Keck 2 telescope last week. Left outside for a nighttime time lapse it simply vanished. We all commiserated with the victim in a Facebook conversation, we have all run the same risk and worried about this happening to us. I usually place the camera somewhere inaccessible to the public or somewhere remote enough that it is unlikely to be found. I still worry.
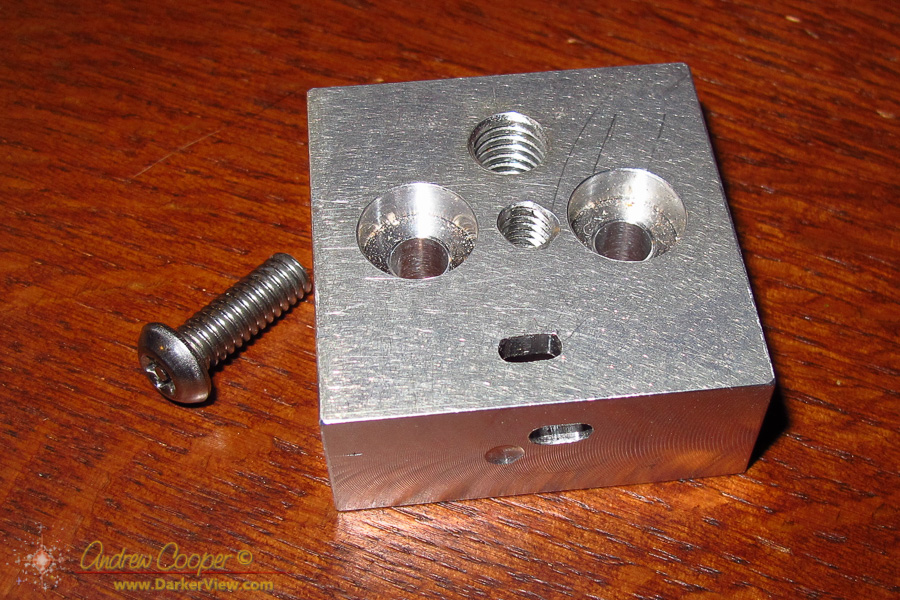
On the mountain is not the only place this risk exists. I have often left a camera operating for hours in my driveway at the front of my house attached to a telescope. In an attempt to make it somewhat more difficult to simply grab and run I designed a simple security device. A little block of aluminum with a slot that accommodates a standard computer cable lock.
Machined from aluminum the block took very little time to make and provides a great deal peace of mind. It is not impervious to a determined attack, but does prevent the camera from simply walking away. In place of aluminum it could probably be 3D printed if you do not have a machine shop available. With a little more patience it could be manufactured with simply hand tools.
The slot is the standard Kensington security slot, a 3mm x 7mm slot as found in almost all laptop computers. The locks are available from just about anyplace that sells computer accessories.
The screw I use is a tamperproof button head screw, one that requires a special tool to remove. A standard hex button head screw would probably work in most situations, it is unlikely that an opportunistic thief will have a set of allen keys handy.
The block can be used on a telescope, with the cable wrapped around a tripod leg. It can also be used on a tripod, a ¼-20 hole is tapped to allow the block to sit between the camera and the tripod head. The security cable can then be secured to anything available. Atop Mauna Kea there are many railings, guardrails and signposts that would provide a solid locking point. In nature there are fewer steel poles, but a tree trunk or something similar would also serve.
The design can be modified to suit ones needs, the mechanical drawing above shows the device in its simplest form. As you can see in the photo my prototype block includes two screw holes for the camera and a 3/8″ threaded hole for larger tripods. I also put a second lock slot on the bottom to have the option of having the lock stick out in a different direction.
Check the dimensions of your camera, tripod head or favorite adapter plate to insure that the lock will fit without interference. You can always adjust the dimensions or the mounting hole positions to accommodate your setup.
It may be the day after Thansgiving, but that did not stop the electrical contractors installing new streetlamps in Waikoloa Village.
The electrical contractors show off the new LED lights for our neighborhoodWe noticed the truck and crane setup mid-morning under the light across the street from our house. It was no surprise, the streetlights have been getting changed throughout the neighborhood over the last couple months. The new LED lamps are far better, with almost no glare seen from the side.
We are not sad to see the old low pressure sodium light go, it has been a nuisance. The poorly designed sodium lamp creating glare into our windows We had called to complain with the county, but nothing was ever done. The glare intruded on our bedroom window, a real issue, somewhat alleviated by the growth of our plumeria along the front blocking the light, a deliberate solution on my part.
The big question is whether the new LED light improves the astronomy situation from my driveway. The old sodium lamps along the street made it impossible to do visual observing, there was simply too much glare. The new lamps should darken the sky and create far less light directed at my driveway.
Even better, the lamps in question are C&W Energy Star Friendly® units with reduced blue emissions. Elimination of almost all of the blue light greatly reduces scatter in the atmosphere and is better for the observatories.
The view down the street from the driveway with the new LED lampsThis seems to be the case. I can see the light from our driveway where it is strong enough to cast shadows. Still, it is much darker than it was with the sodium lamps. The overall amount of light is way down, indeed the entire neighborhood is darker.
With the old light I was able to do astrophotography from the driveway using an LPR filter that blocked the 589nm of sodium light. The new lights will have a broader spectrum and be more difficult to block. On the other hand they send very little light upwards, possibly improving the situation. It will be interesting to see what the difference is. When the Moon is a few days further gone I will have to setup the camera and find out.
It may also be a good idea to check the old CloudCam images against new images as the replacement continues. It will be interesting to see if the emissions from the neighborhood are effectively reduced as seen from the top of the mountain.