Focus is one of the most frustrating problems when shooting in the dark. The number of astrophotos ruined by poor focus is legion. Worse, the problem is often not found until afterwards, when hours of effort have been wasted. Very slight errors in focus can spoil an otherwise great photo.
Taking photos in the dark creates a situation where the normal solutions do not work… Autofocus simply will not operate without enough light. Taking the lens off and attaching the camera to a telescope results in a completely manual focus. Simply focusing through the viewfinder is not accurate enough.
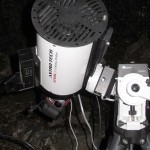
A Bahtinov focusing mask in use on the front of the AT6RC telescopeThe simplest method of focusing in the dark is to use the live view feature of the camera. By placing a bright star or distant streetlight in the view and magnifying you can achieve a reasonably good focus much of the time. This is not perfect, even the magnified image is a little mushy near ideal focus, making perfect focus difficult to judge. If you find yourself in an after-dark situation, without any special equipment along, this is the method to use.
Do remember to switch off the autofocus feature of your lens. Once you get focus set correctly you do not want to lose it the moment you touch the shutter button. Not that I have ever done that… Never? Well, perhaps maybe.
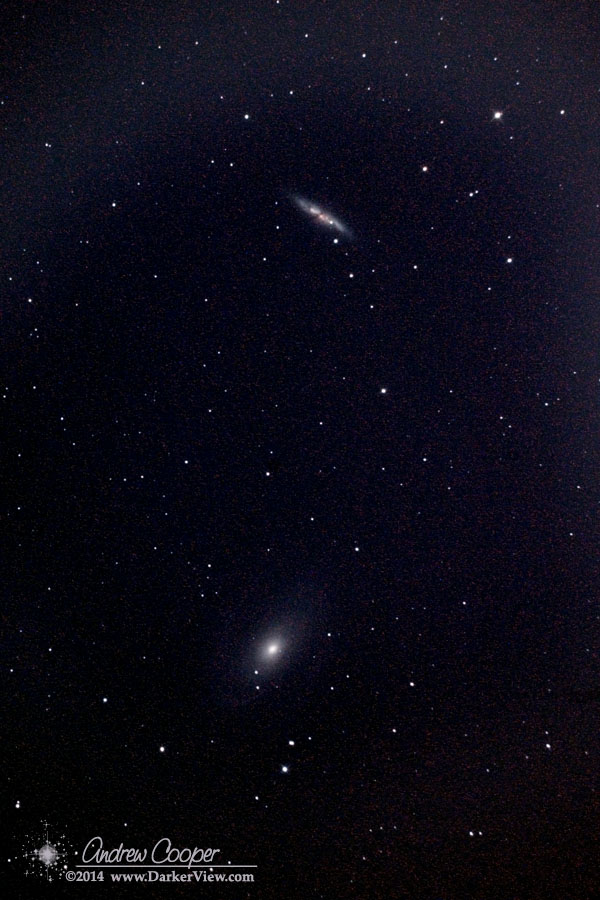
The brightest nearby supernova in may years is currently visible in the bright galaxy M82. I did want to photograph the supernova before it fades much more. It apparently reached a maximum brightness of magnitude 10.5 a few days ago and is starting to dim. But has so far only slid a few tenths of a magnitude.
So I tried to photograph a supernova, and Murphy came to visit.
The last week has seen me dealing with a sinus infection, which combined with terrible weather has kept me from setting up in the driveway for photography. Taking advantage of a few clear hours last night I did make an attempt. Things continued to go wrong.
A high thin haze would not go away, lit up by the light of a bright quarter moon it created high background and gradients in the imagery that would not calibrate out. I forgot to install the LPS filter, meaning that the low pressure sodium lighting of the village compounded the moonlight in creating a poor signal to noise and bad gradients. The autoguider would not behave. This was eventually solved by adjusting the tuning parameters in PHD guide. Not before ruining most of my exposures, I ended up throwing out 24 of 32 exposures. When I did get everything figured out and corrected, and the Moon had fianlly set, the clouds rolled back in.
The final eight usable exposures did result in a somewhat acceptable final product. It could have been so much better…
The galaxies M81 & M82 with SN2014J seen in the disk M82 at top
Another little lesson in astrophotography, one more in a very lengthy list… Do not use too short an exposure with the flat source.
Flat frames are used to calibrate out any uneven field illumination or dust in the field. This ever more important with the new camera, the larger, full frame sensor shows some vignetting at the corners. I use an electroluminescent source to do my flat frames, actually an old laptop back-light that has been re-housed in an acrylic frame. It provides an even illumination across the aperture of the telescope or lens I am using to acquire the flat field calibration frames.
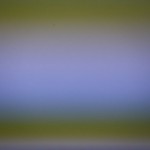
A bad flat field taken at 1/4000 sec with the EL back-light flicker interacting with the camera shutterWhat I have discovered is that the EL backlight flickers. This is too fast to see with the eye, but if the camera exposure is fast enough it will create issues. This shows up as horizontal structure across the field as the flicker interacts with the camera shutter.
I discovered the effect as I took flats the first time with the Canon 6D. I had the ISO set to 6400 which resulted in a 1/4000 sec exposure. Fortunately I looked at the last flat and saw the problem before I dismounted the camera from the telescope, it was pretty obvious. Once the optical setup is disturbed it is not possible to re-shoot the calibration frames.
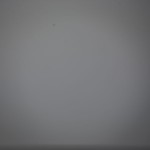
A proper flat field calibration frame, Canon 6D and AT6RC telescope.It took a few seconds of thought to realize what the problem was. I never realized an EL light flickers, or rather I had never thought about it. Given that EL lights are driven with a high voltage switching power supply, flicker should be expected. The switching frequency of the supply should be above the human threshold of hearing to avoid an annoying whine, at least 20kHz. It can not be too much higher than that or it would not have shown up in a 1/4000 second exposure.
Slowing the camera down removes the effect. As I could not change the aperture I simply reduced the ISO to minimum, this slowed the shutter speed to 1/15 of a second for the nice mid-scale exposure needed for flats.
The corrected flats reveal the usual things that a flat is takes to correct. The dark corners reveal the expected uneven field illumination. the dust doughnut reveals at least one notable speck of dust on the cover glass of the sensor. There is a dark band at the bottom of the frame which I believe to be shadowing from the edge of the mirror. Looking at the flat I realize I will need to be conscientious about taking flats with the Canon 6D.
I had set the alarm clock for 0230 to get up with plenty of time to setup and take comet photos. What greeted me was a sheet of cloud, an all to familiar sight lately. I did not reset the alarm and went back to sleep. A couple hours later I found myself lying awake again, realizing I would probably not fall back to sleep I got up to look outside. To my surprise Orion shown brightly over the street.
Is there enough time to setup and shoot before dawn?
I rushed the alignment, hoping to setup in less than half an hour. Things did not go smoothly… The EOS utility in the computer did not recognize the 6D, I need to update the drivers. A thin cloud stubbornly sat in front of Polaris, I think I got the polar alignment, the star was very dim on the polar ‘scope. Even when exposures seemed to be going smoothly I they were not. I find out later the auto-guider had moved itself to a hot pixel, probably when a bit of cloud passed through. In the rush I did not get a dark frame for the guider, most of the frames show small guide errors.
One not so bad bit of serendipity… The Hubble Space Telescope went right through one of the frames.
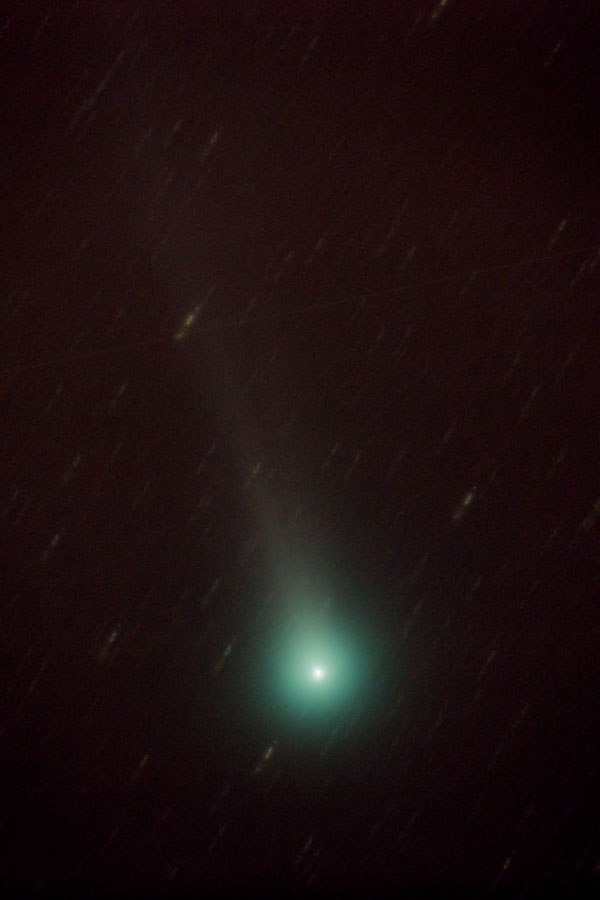
Despite all I did get an image of the comet. It should have been better, rushing astrophotography is not a good plan…
Comet C/2013 R1 Lovejoy on Nov 15, 2013. Canon 6D with the AT6RC and a 0.8x focal reducer. 12 x 60s at ISO 6400.
The Iris Nebula, NGC7023, in Cepheus, image taken at Oregon Star Party 2013, 10x60s+10x240s+10x480s TV76 and Canon 60D on a ZEQ25 mount and STi autoguider
So I shot M31… yet again. I admit I enjoy this target, it is just so much fun. I always think I can do a little bit better. It is color balance that has been my bugaboo lately, I have really been playing with my technique to achieve a decent color balance. Something aesthetically pleasing and something that bears at least a little resemblance to reality. I understand how objective these criteria are, but still… I try.
Be sure to click on the image to get the large version…
The Andromeda Galaxy, M31, taken 9Aug2013 at the Oregon Star Party, M32 and M110 are also visible, TV-76 with Canon 60D, 17x480s + 10x60s
The idea is to take a photo of a bright deep sky object and the surrounding region. The result should be an impressive starfield with something bright to give the image some punctuation. This does not always work.
In the previous image, Mirfak and Mellotte 20, the idea worked pretty well. Bright stars highlight a rich Milky Way starfield in Perseus. In this next image I processed the plan did not quite work as well. The target is the bright open cluster M39. At magnitude 4.6 I thought the cluster would appear brighter against the surrounding starfield. In this case the component stars are somewhat dimmer, thus the effect is not as dramatic.
There is still a lot of material to process from OSP, we shall see what worked and what did not.
M39 and surrounding region, TV-26 and Canon 60D, 10x10s + 10x60s + 10+240s @ ISO800
Mirfak is the brightest star in Perseus, punctuating a rich starfield in the northern Milky Way. The image was shot at Oregon Star Party 2013 with the TV-76 and Canon 60D…
The rich starfield between Mirfak (αPer) and σPer that makes up the core of the cluster Mellotte 20, TV-76 and Canon 60D, 10x10s + 10x60s + 7x240s @ISO800