
For much of the past couple decades I have worked at employers who had machine shops. I was regularly in those shops making parts for work, or on occasion after hours for myself. All of the little parts I need for the many projects that appear here on Darker View.
My current employer does not have a machine shop leaving me no way to make parts for telescopes, electronics projects, or even little repairs around the house. Neither do I have space for a machine shop in the house. Fortunately another, more recent solution is inexpensive and quite capable, additive manufacturing.
Traditional machining is subtractive manufacturing, you start with a hunk of metal, plastic, or wood, and cut away the parts you do not need to make the part you want. This is how I have done it for decades. Additive manufacturing is building a part up out of some base material. The most common form of this today is Fused Deposition Modeling, or more commonly called 3D printing.
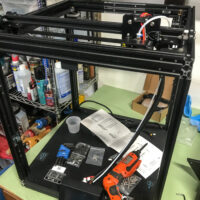
I have been fiddling with an older used machine for some time, but it proved to have quite a few problems. Needing to get operational, and wanting to make larger parts than the smaller machine could handle, I purchased a new printer, a Creality Ender 6.
For the last couple weeks I have been having fun, making parts and learning the finer points of printing plastic. Many lessons have been learned… Good 3D design is an art, slicing is black magic, bed leveling is a PITA, bed adhesion can be tricky, Elmer’s glue stick is fantastic stuff, PLA is fun to print with, TPU is even more fun, ABS is no fun at all.
My skills in traditional machining and experience with CAD have proven to be a good basis for using 3D printing. I am climbing the learning curve quite quickly, with very few mis-steps along the way. My first parts have proven to be well designed and quite usable.
Watching the printer lay down plastic is mesmerizing, the quick precise movements with the object slowly appearing below the nozzle. It is a slow process, with even smaller parts taking hours to complete. You need to keep an eye on the machine, to do this I re-deployed one of the little Wyze cameras to the side of the machine, hacking it for a closer focus and stationing it on the corner of the machine to allow me to watch the process from anywhere on my phone.
My first prints were a little project I had designed a while back, and turned out to be a fun and productive first project for the new printer, a small right angle finder for the Astrola telescope. Three parts, two in PLA and one in soft TPU, were made without much issue, only one big pile of spaghetti when a part failed to adhere to the bed well enough, another lesson learned.
The Ender 6 is a nice machine, with well thought out mechanics and quality components. It does suffer from a few small design deficiencies. Things like an inadequate cable clamp at the top of the hot end, or lack of internal lighting. These are quickly rectified, a couple parts downloaded from other users and printed off, then bolted into place. I could go further, a robust user community posts their ideas and design files online, 3D printers are ripe for customizations and user improvements.
With a fair number of parts completed in the last two weekends I am satisfied that the 3D printer will be able to make most of the little parts I will need for my various projects. A new skill, and a new technology for me, one that gets the job done. I have quite a few small parts needing printing, a few backlog parts needed to finish other projects, this 3D printer will be busy for a while.
