Minimal Cave Photography

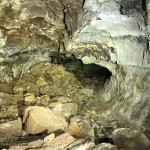
There are a lot of caves on this island. Much of the island of Hawaiʻi is riddled with lava tubes. Hiking or riding the trails or back roads of the island often offers a mysterious opening into darkness. Not that I explore too far, I am not a hard core spelunker. But I do often poke my head in to see what the cave has to offer.

Goat House Lava Tube
The interior of Goat House Lava Tube near Waikoloa, 15 second exposure painted with a flashlight
Often when I reach a cave I am not carrying the necessary equipment to explore or photograph the cave. There are a few things I always have with me… A camera of course, I am rarely found without one. There is always a good flashlight in my pocket, a bright little LED light with a lithium battery. These two things are all one needs to get a photo of a cave.

Unless the cave is quite small the camera flash will provide unsatisfactory lighting of the cave. The flash will also tend to light up nearby parts of the cave and leave anything at any distance poorly lit. I generally do not use a flash in a cave unless I am photographing small features close at hand.

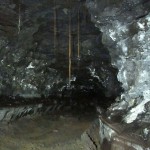
The technique is simple… Set the camera on a tripod, or a rock, and open the shutter for as long as the timer will allow, usually 15 or 30 seconds. During the exposure you paint the cave with light. Simply wave the light around in a random pattern, never letting the beam rest too long in a single place to evenly distribute the light. This simple method will allow even a large cave to be illuminated with a relatively modest light.

You will need to do this a few times and adjust your process to suit the situation. You can adjust the camera shutter timer or gain (ISO) to adjust the exposure. You can decide where to spend more or less time with the light if there are dark areas or hotspots in the image.

Kaumana Cave
A classic Hawaiian lava tube, the downhill side of Kaumana cave, 15 second exposure painted with a flashlight
There are a couple tricks… The further away sections of the scene will require more light, spend more time illuminating the furthest sections of the scene. If the light is located too close to the camera there will be few shadows to provide depth and texture to the scene. during the exposure step to the side a little or keep the light close to the cave floor so the low rocks cast shadows.

Focus can be difficult. Set the camera for a smaller focal ratio, perhaps f/5.6 or f/8 to keep a good depth of field. Hold the flashlight on a feature well into the scene and focus on that. Some trial and error may be needed to get a good focus.

It can be fun too! When exploring the lower end of Thurston Lava Tube I was all set up with the camera and tripod when a group of kids arrived. Curious as to what I was doing I showed them. During the exposure I had the whole group wave their lights around as we all stood behind the camera. The kids were amazed when the photo appeared on the LCD display, they had no idea you could light up a cave and take a photo with a bunch of little flashlights.

Mercury at Maximum Elongation

Today Mercury reaches maximum elongation, the furthest point it will reach from the Sun in the sky and the highest it will be above the sunrise for this morning apparition. The planet is easily visible as a bright, starlike object about 27° above the rising Sun as the twilight begins. Over the next couple weeks Mercury will slide back into the sunrise, heading for superior conjunction on April 25th.

Continue reading “Mercury at Maximum Elongation”

A Starry Dawn over Mauna Loa

A photograph of serendipity.

The photograph was planned… Somewhat. I knew there were some picturesque trees on the lava field along Saddle road. The plan was to shoot one of these trees silhouetted against the Milky Way and Mauna Loa. That was the plan. At least until the plan met reality.

Shot as planned the results were less than stellar. Actually they were rather boring. The rising summer Milky Way was spectacular, nothing else worked. The enormous bulk of Mauna Loa became a bump on the horizon from the low angle with the 14mm lens. The trees did not look like much against the dark.

Serendipity intervened… First a passing car lit the trees with dramatic results. Car headlights caught the trees at just the right angle to light up the right bits, a lucky bit of geometry and road alignment. Looking at the image on my screen I was intrigued… I repositioned the camera and shot again when another vehicle passed… This was working!

As I waited for other passing cars the shots deteriorated, odd glows across the frame. Were the headlights catching the big dome of glass at the front of the lens? Blocking the light from the headlights on the camera did not help. I pull out a flashlight to check the camera… Ack! The lens was fogging up!

Retrieving the anti-dew kit and a battery from the vehicle I secured a dew strap around the camera lens. At this point I wanted the shot and was willing to work for it. I was lucky again… I had thrown the dew gear in the car as a last moment afterthought.

It took time for the lens to warm and clear. As I waited dawn crept into the sky. I took a last few shots as the light increased and the stars faded. The dawn light added a nice shade of blue to the sky with a hint of peach to one side, another serendipitous bit that added to the photo. A last wisp of fog on the lens was just enough to create halos around Mars and the brighter stars.

Not a bad result! With a little skill and more than a little luck. The shot has been entered in the Hawai’i Photo Expo. Hopefully the jurors think the shot is as good as I think it is.

Milky Way Dawn over Mauna Loa
The rising summer Milky Way, Mars and dawn over Mauna Loa

Ka Lae – South Point

A windswept place of rock and water. A place where the few trees seem bent and twisted. A place with an ancient feel, where time has a different quality. The landscape is bleak, nothing at all like the tourist postcards of Hawaiʻi, open grassland with scattered copses of trees here and there. Look twice and the remains of history litter the landscape. A rubble of stacked stone betrays ancient Hawaiian settlements. Concrete foundations show the more recent remains of wars past or failed farms.

South Point Cliffs
The cliffs of South Point drop into a deep blue Pacific Ocean

Such is Ka Lae, the southernmost tip of land in the islands. A place where the land and sea meet the past. There is nothing beyond this point but thousands of miles of empty ocean.

This may be the place men first discovered these islands, by Polynesians sailing from the south on those daring voyages of discovery. Many of the most ancient archeological sites are here, on the southern tip of the island. This may be the coastline first sighted by Europeans, Spanish galleons certainly passed south of the islands for centuries prior to Cook’s later discovery of the islands in 1778.

Fishermen have come here as long as men have dwelt in Hawaiʻi. The steep cliffs drop into deep water. A place where the great pelagic fish come close enough to shore to catch without venturing to sea. Ahi, ono, mahi-mahi and other prize catches can be had from a pole at the top of the cliff. On any given day a dozen local fishermen can be found atop the cliff, each with a favorite spot.

The modern technique is to secure a plastic bottle or inflated bag to the line, allowing the wind to pull the line out from the cliff. In years past the fishermen would fish from a boat secured to the cliff by a line. Along the cliff are the remains of winches and ladders used to access the boats.

Continue reading “Ka Lae – South Point”

Postcard from the Universe – Pleiades

The Pleiades were not my primary target for the night, but that was setting and I was in no hurry to shut the gear down when there was a lot of dark remaining in the night. I glanced around the sky looking for a target appropriate for the field of view of the gear and just chanced to look at the star cluster.

Perfect…

Pleiades
The Pleiades, M45, a sum of 26 x 100s luminance frames and 5 x 100s RGB images assembled as an LRGB image, ST2K and 80mm APO

Hawaiʻi Photo Expo

Just sent in my entries.

A contest for local photographers, the Hawaiʻi Photo Expo is a full juried competition. A local contest, but a decent one, the entries will hang in the Wailoa Center gallery for a few weeks.

I sent in three entries, including two of the starscape shots I took over the last month. The third shot is from last year’s expedition from Juneau to Anacortes.

My chances of winning? I think my entries are fairly strong. Looking through the archives of past winners I feel my images are as good as anything there. I should be competitive at least, the rest is up to the standards of the jurors.

There are still a few days left to enter, the deadline is March 16th. Have any really good photos?

Airglow or auroral glow?
Airglow or auroral glow? An odd red glow in the photos during a strong geomagnetic storm.

The Moon and Jupiter

Tonight the Moon and Jupiter will be close. The Moon will rise first, at 13:04HST, about ten minutes ahead of Jupiter, placing the two well up in the eastern sky by sunset. The Moon will be quite large, 65% illuminated and about 6° from the bright planet. Tomorrow night the pair will still be seen together, about 11° apart.

With Jupiter this close to the Moon it is an excellent time to see Jupiter in the daytime sky. Look 6° northeast of the Moon for a bright pinpoint of light. 6° is 12 times the size of the Moon seen in the sky, north will be to the left seen as the pair rises above the eastern horizon.

The Gear

The current astrophoto setup in the driveway… The TeleVue 76mm atop the iOptron ZEQ-25 mount. The camera is currently the Canon 6D, providing a 5.35° x 3.57° field of view with a 3.52 arcsecond per pixel image scale.

Atop the main scope an SBIG STi provides auto-guiding. With a 100mm lens it has a 15 arc-second per pixel image scale. It is mounted with a custom mount machined for this setup.

The setup is intended to provide a high performance astrophoto setup with a minimum of fuss. This is about as far as I can reduce things without giving up performance. It is pretty portable, airline luggable at least. The whole setup fit in two suitcases for the trip to Oregon Star Party last summer.

The only real issue with this setup is the laptop. The big old 17″ HP Pavalion chews a lot of power, requiring an AC outlet to supply. I have my little Asus netbook configured to run the setup, a far more power efficient machine. With the netbook I can setup anywhere and shoot.

Cable management is a bit of a chore. A lot of separate cables must be routed to connect everything together. Much of the time I keep the setup assembled in the garage for deployment in the driveway. The cable tangle can be tamed with a handful of zip ties and velcro strips this way. A wheeled dolly allows the entire setup to be rolled out of the garage.

With this setup I have a capable astrophoto rig, capable of producing very nice material for processing. I just need a chance to get out and use it more often.

Astrophoto Setup
The astrophoto setup in the driveway.