Life of a Photo

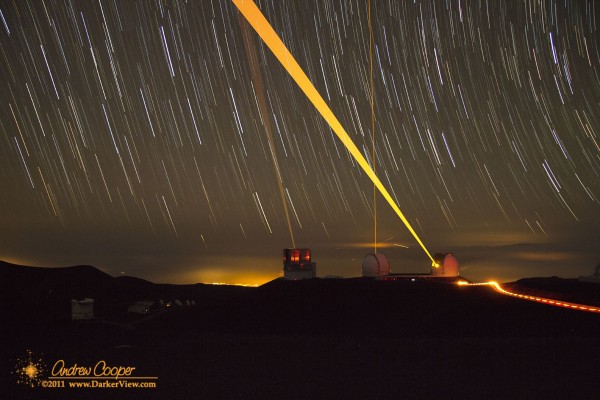
It took ninety minutes of sitting in the cold to get the shot. Every minute the camera took another exposure. Sitting on the summit ridge overlooking Keck, it was a very dark night with three lasers working the sky, Keck 1, Keck 2 and Subaru. The tripod was set up as close to the vehicle as I could get it to shelter the camera from the wind. Ninety minutes of shivering in the front seat of the truck, playing cribbage on my phone, and fervently hoping that the gusting wind was not shaking the camera enough to destroy the images.

The result was ninety frames on the memory card. When downloading the material I knew that my time spent in the cold at fourteen thousand feet had been worth it.

Material like this can be used a couple different ways. You can stack the images together to create a single shot equivalent to one exposure 90 minutes long. Taking single long exposures is problematic on a digital camera, a leakage signal called dark current will swamp the image. Better to take many short exposures and add them together in processing.

You can also play the images sequentially, creating a few seconds of video. In this case I assembled all ninety images as nine seconds of video when played at ten frames per second.

I found that the best single frame was assembled from only 23 of the original images. Keck 2 changed targets during the session, creating a confusion of beams over the telescopes when I added all ninety images. The 23 frame version is the definitive version that has been widely distributed. During this slice of time the Keck 2 laser was aimed at the galactic center in Sagittarius, the beam aimed right over me and the camera.

I released the photo as a PR photo for Keck, only fair as I had been on the mountain to work that night, taking the photo before driving down from the summit in a Keck vehicle. The PR folks have used the photo for a number of press releases and observatory literature including the 2011 annual report. You can even download it from the Keck website photo collection.

This particular photo can now be found on websites across the net, has been featured in the Honolulu Daily Star, West Hawai’i Today and other local papers. It has also been used for numerous professional presentations by Keck affiliated astronomers and staff.

I understand that this month it is in Hana Hou! the inflight magazine for Hawaiian Airlines. (Somebody get me a copy. Please! I am not flying anywhere in the next month.) Not the first magazine appearance, you can also find the shot in an issue of Astronomy magazine.

It can be a lot of fun seeing an image I created become something of an iconic image of the observatory.
Three Lasers
Three lasers in operation, Subaru, Keck 1 and Keck 2, 23 x 4min with a Canon 60D

Using the Nifty Fifty

Some photo instructors advocate using only a fifty millimeter fixed focal length lens as a creative exercise. A nice idea for an exercise, but I really did not want to do this while on an extended trip along the Alaskan and British Columbia coast by boat.

Workshop
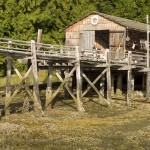
A workshop at Lagoon Cove, British Columbia
I did not get a choice in the matter.

Looking to pack light I had taken only three lenses to accompany the Canon 60D that would travel with me. This set included a Canon EF-S 17-85mm f/4-5.6 IS USM Lens, a 70-200mm f/4 L series telephoto, and a 50mm f/1.8. The 50mm was almost left behind, I grabbed it on a whim while packing realizing that it took up very little room.

It was a few days into the trip when trouble appeared. I began to get occasional errors when using the 17-85mm, the camera complaining about a lens communication error. After a day this became a serious issue, the camera refusing to take photos with the lens. The other lenses worked fine, thus I was sure the trouble was in the lens, not the camera.

Tools
A set of tools awaiting use in the workshop at Lagoon Cove
Sitting down and experimenting, I discovered that the issue only occurred if I was attempting to stop down the lens, used wide open I had no problem. During a series of gray and dark days, this proved little issue, I just set for aperture priority and continued to shoot, with some loss of creative control.

A couple more days and even that solution failed, the lens just jammed up entirely, with the aperture stop about halfway closed.

I was down to the the telephoto and the 50mm… Time to get creative.

The 50mm lens is interesting. It is small. It feels like you have forgotten to put a lens on the camera. It is sharp! The lens may be the cheapest lens Canon sells, just over $100, but there is nothing to complain about in the performance, crisp and sharp photos from corner to corner. It is fast. The very fast f/1.8 ratio allows for photos in low light conditions as well as providing a wonderfully shallow depth of field when you want it.

Hardware
Cans of nails in the workshop at Lagoon Cove
I really missed the flexibility of a zoom and the 17mm wide angle in the close confines of the boat. The ability to go from wide to a moderate 85mm telephoto in a flash was a major issue when something popped up unexpectedly, something that happens on a boat in the wilds of Alaska.

I did have my little Canon G11 along, giving me some capability with a zoom lens. But I really wanted to shoot with the DSLR and the higher photo quality offered by the big lens and larger sensor when the photo really mattered.

On an APS-C camera like the Canon 60D there is a 60% crop factor, converting a 50mm to a mild telephoto. With a fixed focus I had to control the field through positioning myself instead of adjusting the camera. I do wonder if I got better shots as I had to become more involved and plan the shot?

I did take some great shots with the 50mm. Going through the 1,800+ photographs from the cruise I am quite happy with a number of them. An unintentional creative exercise, but a successful one.

Carnival

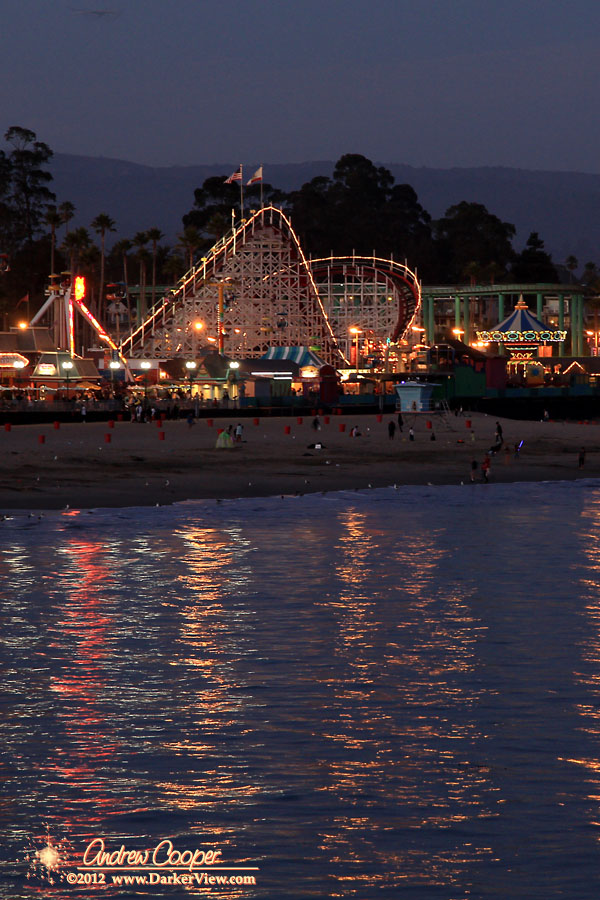
This was no run down operation, hanging on to faded glory. The rides and buildings were all in good repair, all of the bulbs lit, with fresh paint and empty trash bins. Even on a weekday night there were lines at many rides, screams and cheers echoing through the night air.

Santa Cruz Boardwalk
The roller coaster and rides along the boardwalk at Santa Cruz

Miniature Effect

What to do while waiting for your plane? Fiddle with the camera?

My camera was already in-hand and I had almost an hour to wait for boarding. I may as well explore some of the little used functions and hidden menus the camera has to offer. Thus I took a few photos of a plane debarking and boarding on the open flightline of the Kona airport, playing with the camera settings. I didn’t realize just how much photos of a jet taken in black and white really do conjure up memories of vintage jet travel in the 60’s.

The Sandpit
One effect that I was somewhat surprised to find was the miniature effect.

The miniature effect is just a bit of photographic fun. Something that can be used quite creatively in the right circumstance. I have been aware of the effect for some time, recently I had come across the effect in a number of online photos, and some great timelapse videos.

Continue reading “Miniature Effect”

Diablo Range

Mt. Hamilton and Lick Observatory are located in the middle of the Diablo Range overlooking San Jose and San Francisco. From this high peak the sunsets reveal a beautiful view of the rest of the range when rich light mixes with haze and smog from the city.

Diablo Range
Looking north through the Diablo Range at sunset from the summit of Mt. Hamilton

A Dummy Battery Adapter for the Canon 20Da

Another quick project to solve a little equipment issue. I realized I had a problem the morning before I was planning to spend a night shooting astrophotos up on the mountain. The batteries for my 20Da are old and do not hold a charge, no way I was going to be able to use the camera through the night.

The Regulator Installed
The regulator circuit installed inside the battery shell and connected to the existing contacts
The camera is an older model that remains quite valuable to me as it has been adapted to shoot astrophotos. The 20Da model differed from the standard 20D in having live focus and a re-tuned red cutoff filter that allows the glowing red of nebulae to reach the sensor. After seven years I still use the camera regularly.

I have the AC power supply for the 20Da, this is what I have been using for some time now. Shooting astrophotos in the driveway allows access to AC power. For field use this will not do, I need to operate fully from battery power. The camera batteries that I do have for the camera are now at least six years old, and do not hold enough charge to last.

Without AC power available I needed something that could plug into one of my 12V field battery packs. I really did not want to cut up the existing AC power supply to create a version to be used with an external battery. Plus, Canon used odd, proprietary connectors on the supply. (I really hate it when they do that!) I can not even use parts of the AC supply without modification.

With only a few hours available I came up with a plan. A little digging showed I had all of the needed components on-hand. Off to the work bench!

Continue reading “A Dummy Battery Adapter for the Canon 20Da”

Shooting Timelapse

Shooting Timelapse
The G11 clamped to a piece of construction gear to shoot a time lapse of sunrise atop Mauna Kea
A few projects have been completed, but more are in work. I continue to accumulate material for new video projects.

Sometimes I specifically plan to shoot a scene. Other times I simply take advantage of what opportunities present as go about the usual business of life. Driving home the light and clouds catch my attention. I stop along the road, setting up the camera and shooting 20 minutes of time lapse. This will become ten seconds of video, clouds sweeping past the summit of Mauna Kea in late afternoon light.

I have located several more pieces of music appropriate for soundtracks. It is the music I start with, building the video around the soundtrack. With music in hand I can plan, visualizing the finished video, deciding what further scenes I need to go out and shoot.

Keep a camera handy.

Dress Rehearsal for Venus Transit

It was a full dress rehearsal. Both telescopes, two cameras, the entire streaming rig set up on the lanai. No less than three computers with cables all over the driveway! Surprisingly enough, everything went pretty well!

Sol 2Jun2012
The Sun on June 2, 2012
If you had been watching the Keck Transit of Venus stream, you would have been looking at a live image of the Sun for several hours. The seeing from my driveway was pretty poor, but there is a nice collection of smaller sunspots across the disk.

Everyone wandering by the house noted the telescopes. I gave peeks to our mail-lady and a couple young women who stopped by, intending to read me a bible verse or two (that was fun;)

Two technical issues were key today… Using thirty feet of active USB extension cables to run the streaming camera remotely, no problem. Co-aligning the two telescopes to aim at the same point, no action needed, aligned from the start. I had thought I might need to shim the mount for the piggyback ‘scope. I was also able to play with the streaming camera further. The Baader film filter gives a blue-white image. Adjustment of the camera white balance will restore a little yellow cast. I do not have much problem with the white, but a hint of yellow will allow people to instantly realize they are seeing the Sun. The same reason I adjust my processed photos for a golden orange hue.

We are all swapping gear around to get the set-up ready. Chris was nice enough to loan me a Canon T-ring and some Baader film. I built a battery pack and some sun-finders for several telescopes. Last night I picked up a whole solar rig from Cliff for delivery to Olivier. Olivier lent a 40mm eyepiece to Keck for the public telescope that will be setup at HQ. The list goes on…

I was not the only one doing a dress rehearsal. So far today I have been on the phone to other folks setting up and using a sunny Saturday to check gear. Some of the guys over on Maui even posted a video of their test run. I should have thought to do the same thing! Will have to time lapse the summit setup.

Photographing the Transit of Venus

With the Transit of Venus looming on the calendar, a discussion of solar photography is in order. Taking good photos of the Sun is not that difficult, but can be aided with a little information. There are some unique challenges in solar photography.

Solar Filter
A solar filter mounted on a refracting telescope
The one obvious problem is dealing with the sheer intensity of the Sun. An intensity that can easily damage a camera if placed behind unfiltered optics. A proper solar filter is the easiest way to reduce the light to a safe level.

A solar filter will also produce the most pleasing images of the Sun. Indirect techniques like projection can be used. But for good solar photos, a proper filter in front of your optics is the single best method.

Solar filters for optics are constructed with a thin film of metal such as aluminum or stainless steel vacuum deposited on a substrate. This substrate is usually glass or a thin mylar film. The resulting filter allows only a small fraction of the light through, about 0.01% or 1/10,000 of the unfiltered value. Importantly, the filter blocks the ultraviolet and near infrared part of the spectrum as well. The result is a safe filter than can be used on a telescope or telephoto camera lens.

Sufficient magnification is needed if details of the Sun’s surface are to be well recorded. A few hundred millimeters focal length, found in common telephoto lenses will produce a reasonable solar image. The image will still be fairly small. To fill the sensor requires more. For an APS-C sized sensor (Canon T2i, 60D, 7D, Nikon D5000, D3200 or similar) a telescope with 1,000mm focal length will create an image filling a good portion of the image.

Image sizes for APC-C Sensors


Focal Length     Image Size (arcmin)
100mm   760×510
400mm   190×128
800mm   95×64
1000mm   76×51
1500mm   51×34
2000mm   38×25

The table to the left shows the resulting images sizes, in arc-minutes, given various focal length lenses, on an APC-C sized sensor. Recall that the Sun is about 30 arcminutes across as seen in our sky. With 100mm the resulting image is 510 arcminutes from top to bottom in the frame. This is 17 times the width of the solar image, a pretty small image indeed. With 400mm this improves to about 4, thus the Sun will reach about 1/4 the height of the image. At 1000mm this is about ideal, the Sun will reach more than halfway across the frame.

1500mm will just fit the solar image. While this may seem ideal, there is an issue. A small amount of drift will put part of the Sun out of the image, cutting off part of the disk. Sizing the image to fit in the frame with a good margin will allow some drift, while still giving a good image scale.

If you have a full frame camera (Canon 5DMkII, Nikon D800, etc.) a larger image can be used to fill the larger sensor, thus a longer focal length can be used. A telescope with 2000mm focal length will produce an image 17mm across, neatly fitting in the area of a full frame sensor.

Few compact cameras can boast a lens that will zoom far enough to produce an image of the Sun filling the frame. For these cameras another technique can be used, afocal photography. This can also produce good images, but will require experimentation to find the right combination of telescope, eyepiece and camera to produce a correctly sized image.

Solar Framing
The full frame solar image with about 1000mm of focal length and a Canon 60D
If you want to calculate the image scale for your optical combination, lens and camera, I suggest downloading the CCD Calculator from New Astronomy Press. You can enter the optical parameters and see exactly what the resulting image will look like with a sample image of the Sun, Moon or other selected objects.

Another issue is resolution. Our atmosphere usually limits the practical resolution to about one or two arcseconds, blurring any finer detail through atmospheric distortion. This can be much worse in the daytime with solar heating of the ground and air around the telescope. Thus the limit for resolution will be reached with about 1000mm focal length and a modern 10-15 megapixel camera. Any further magnification beyond about 1000mm will simply result in magnifying the blur. There are techniques for overcoming this (image selection and stacking), but if you know how to do that, you already know what you are doing.

Just a bit of summing up… You need a proper solar filter or other method of safely reducing the solar intensity. A long telephoto (400mm or more) will produce a reasonable solar image. A small telescope with about 1000mm of focal length is ideal for photographing the entire disk of the Sun with a DSLR camera.