Aiming a telescope at the Sun is deceptively difficult. You can not use a optical finder for risk of eye damage. Unit power finders, like a Telrad, are of little use as you can not see the projected image. Telrads can also be damaged by sunlight. In a pinch you can simply use the shadow of the telescope, positioning for a minimum shadow. This at least gets you close.

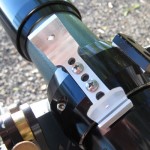
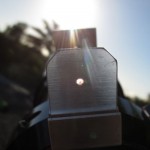
There are many plans for Sun Finders posted to the web. Most use a shadow or projected point of light. The version I built is no exception, using a pinhole to project a point of light on a translucent screen. The trick is to make such a device simple and accurate.
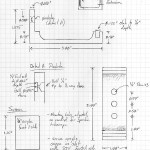
With simple metal working capability a Sun Finder like this one can be made from sheet metal, or machined from solid aluminum. I chose the latter as I had the capability. This design uses a pinhole that projects a similarly sized dot of light at the rear of the finder. The front face or the finder, through which the pinhole is drilled, creates a shadowed area for in which the projected dot can be seen.

This design is based on an aluminum extrusion, a 3″ x 1.5″ channel. This save a good deal of machine work in creating the finder. As much of the machining is done along the length, a number of finders can be made at the same time. I made six finders from a seven inch scrap of extrusion out of the shop scrap pile.

To keep the device simple there is no adjustment in aiming. If the finder is mounted reasonably well, the dot of light will be on the screen. The first time out it is necessary to first get the Sun in the field of view. You can then mark the position of the projected dot with a permanent pen (Sharpie or similar). After that aiming is simply a matter of positioning the dot on the mark. If the mark is made on the smooth side of the acrylic screen it can be easily erased and re-marked if necessary.
Done, a simple and reliable Sun Finder to work with just about any small telescope.

