The GoPro HD Hero 2 for Diving

I know, I am late to this party. Not unusual, I do not often jump on the latest tech. I still use an iPhone 3GS, only three models back. It was, as usual, my wife who bequested this latest toy upon me. Without her I would be hopelessly out of date.

The GoPro HD Hero 2 camera is interesting to us as it comes with a standard waterproof housing good to scuba depths. The price was right, Deb picked it up as a Costco special.

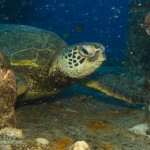
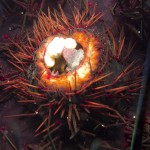
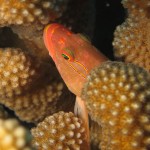
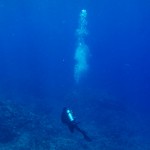
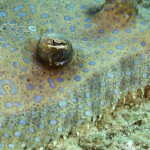
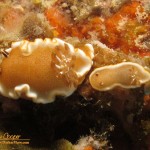
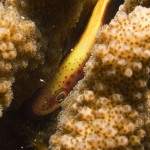
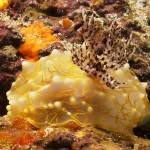
Thus I attached it to the top of my usual rig to give it a try on a dive or two. As it turns out, it is a good thing I had my regular camera along, there are some issues with a stock GoPro underwater.

The first obvious issue is focus, as I had heard the camera will not focus properly underwater with the standard dome port. The solution to this is to get a flat port.

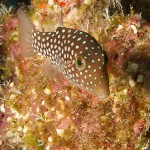
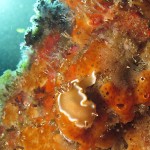
The more concerning issue is the burned out highlights visible in the video below. This is not unusual in a camera using a typical exposure algorithm designed for daylight above water. Underwater the red light is gone, absorbed by the water. This lack of red creates a tendency for the camera to overexpose the green or blue.

The usual solution is to set a slight under exposure in the scene using exposure compensation. However, the Hero 2 has no exposure compensation control. There are a couple possible solutions… Commonly available is a red filter for the flat port camera. Will this solve the burnouts? Another possibility lies in using a less saturated color profile as available in the new firmware.

While there were issues with the image, the sound seems pretty good for being in a case, much the same as what I hear when diving. The real test would be to dive with a few whales around to see how well it records whalesong. Alas, the humpbacks headed north a couple months ago. I miss the whalesong soundtrack on our dives. A pod of dolphins perhaps?

I plan to set up the GoPro as a stand alone camera and video rig for diving. Just the camera, an Ultralight handle and arm I have on-hand, plus a video light, which I also have on-hand. I just need to manufacture a tray for the setup, another hour in the machine shop. This should make a compact, lightweight dive or snorkeling camera rig.

I can think of a few other interesting uses for the camera, it has some nice timelapse facilities I need to test. Just the camera to use on the top of a boat. The camera does not do low light, just too small a sensor and lens. Still, there are quite a few things it should do well, a fun addition to the kit.

Star Struck

For the W. M. Keck Observatory 20th anniversary I did a short video. The idea was to create a teaser that could be run at the start of many of the events.

It is surprising how much work can go into a 90 second video. With a very short time span to work with you have to pack a lot of visuals in quickly. The basic material was mostly historical images of the observatory construction, a few bits from local photographer Ethan Tweedie, recycle a couple bits from Keck in Motion add a few science images and pau!

Digging through the library archive with Peggi was a great look into Keck’s past. At one point we had dozens of photo albums scattered across the top of the cabinets and I notes that we were making a mess of her library. She replied in no uncertain terms… “This is great, this is what a librarian should be doing!”

If you have not already seen the vid enjoy!

Star Struck from Andrew Cooper on Vimeo.

Top of the Front Page

I got pleasant surprise walking past the newspaper box on my way to lunch. The Honolulu Star-Advertiser published one of my photos across the top of the front page!

Star Advertiser Front Page 20130312
My laser night panorama on the front cover of the Honolulu Star -Advertiser
I do not usually buy a copy of the Star- Advertiser, I made an exception today. Debbie Goodwin is working with the folks at the newspaper to get publicity for Keck Week. In the process sent them one of the photos I had provided her.

This is not actually one photo, but a panorama assembled from several shots. It was a nice night, if very cold, the first light of dawn just visible on the eastern horizon. Overhead the laser competed with the light of a bright moon. We were doing tests of the newly commissioned Keck 1 laser when I had a chance to get up on the roof and take some photos. Over the radio I begged Heather to lower the bottom shutter on Keck 1 so I could see the telescope inside the dome. I then took about 15 thirty second shots spanning the full view from our roof.

As cold as it was to shoot, it was also a pain to assemble, I worked on this one for hours to get it right. Only about 180° is shown on the newspaper, the original is a full 360°. The result was worth the effort, for your viewing pleasure I have re-posted the full version below. Click on the image to get a larger version…

Laser Panorama
A moonlit panorama from the roof of Keck during a night of laser engineering

Out to the Lava… Again

It was another hike out to see the lava. Not that I really need an excuse to make this hike. This time it was to take a friend along. I have worked with Olivier for several years, between the two of us we do much of the physical maintenance on the Keck adaptive optics systems. Shortly he will be departing the island for another opportunity. Before he leaves he wanted to cross off one more item from his bucket list, seeing the lava close up.

The ocean entry at Kupapaʻu
Unlike last time we found the ocean entry was going strong, lava pouring into the sea very near where we saw nothing in December. There were multiple small entries spread along hundreds of yards of sea cliffs. On the west end of a shallow bay, we could get a decent look from promontories on the east end, upwind of the acrid plumes. Right below us was one particularly good font of lava, in reach of a modest telephoto lens.

It was still completely dark, the light of the full moon masked by the clouds. The waves were lit by the crimson glow, occasionally surging against the cliffs and hiding the lava from view. The glow also illuminated the billowing clouds of steam rising above each rivulet of lava. The scene is surreal, something that is both unexpected and somewhat difficult to believe. This is something that is outside our usual daily experience.

Pāhoehoe
An active pāhoehoe breakout at Kupapaʻu
After spending some time at the ocean entry we searched inland for a breakout we could approach more closely. A slight glow to the north indicated a possible breakout, but I had no idea if it was close or miles away. With hope we headed for the glow and got lucky. It was only about a quarter mile to the breakouts. Several lobes of lava were advancing over the slightly older flows. Dropping our gear well back from the active lava cameras were deployed. This is what we came to see and photograph, lava as close as the heat would let us get.

Olivier Martin
Olivier hiking over the lava at Kupapaʻu
For two hours we shot the breakouts. As usual, the flow would crust over, just to break out and advance again. The changing flow would provide ever different photo opportunities as the light of dawn slowly waxed. It was a cloudy day, small showers moving through, softening the dawn light and making the hot glow stand out all the more. The photos and video capture the scene, but do poor justice to the sound. The crackle of the cooling crust, raindrops hissing on the hot surface, low resounding cracks from deep in the rock under our feet.

With the day well begun we headed back to the ocean entry to shoot a few more frames in the early light. We sat on rock that was fairly warm under us, shooting the lava pouring into the waves. Relaxing a bit, digging a few bites to eat from the pack, we talked of cameras and lenses, of life on the island, a last bit of camaraderie with someone I might never meet again. We sat and just enjoyed this spectacle of raw nature. This was why we came, there is some risk in just being here, but the experience is worth it.

2012 in Photos

For your viewing pleasure, here are some of the best photos from Darker View assembled into a gallery. New Year is a time for reviewing the year past. I have enjoyed the last year, with the photos to prove it. I hope that 2013 brings you the chance to collect your own gallery of photos and memories.

Postcard from the Universe – Orion Nebula with the EOS-M

The first astrophoto taken with the EOS-M. Considering the trouble it is to manually trigger the exposures without proper camera control, I am surprised I stuck it out to take 40+ subs. Since 30 seconds was the longest I could program the camera for I simply maxed out the ISO and took a lot of subs plus a dozen darks. There is still way too much noise in the resulting frame. Still, the ISO 12,800 frames are not all that bad, better than I expected. If this camera had remote control it would be a decent little astro camera. Longer subs and a lower ISO would deliver decent results.

NGC1976 The Orion Nebula
The Orion Nebula with and EOS-M, 40x30s exposures @ ISO12,800, AT6RC and 0.8x focal reducer, a set of 12x4s exposures used to reveal detail in the core.

Astrophotography with the EOS-M

In the few days I had the camera I was determined to acquire some astrophotography test shots with the EOS-M camera. Even if it meant getting up at 3am to have some dark sky after moonset. It would have been easier a few days before, but a Pacific storm system had provided several days of overcast with occasional rain. This particular morning was just about perfect, clear skies, decent seeing and no wind to bounce the telescope around.

Astrophoto Setup with the EOS-M
Astrophoto setup with AT6RC, SBIG STi autoguider and the EOS-M camera
For testing I used the same setup I often use with my Canon 20Da or 60D. An Astro-Tech 6″ (150mm) Ritchey–Chrétien telescope riding atop a Losmandy G11 mount. A 0.8x focal reducer has T-thread at the rear allowing a Canon EOS lens adapter. To attach the EOS-M I used the Canon M Mount to EOS Mount adapter. An SBIG STi autoguider completes the setup.

The result is an f/7 optical system with 1080mm focal length. This gives a field of view of about 72×48 arc-minutes (1.2 x 0.8 degrees) on the sky when using a camera with an APS-C sensor.

Continue reading “Astrophotography with the EOS-M”

Canon EOS-M

DSLR cameras have been the design of choice for professional and serious amateur photographers for over a decade, ever since the era of digital photography began. Big lenses and big sensors made the most of what light was available offering the best possible photographic performance. This performance is a huge jump over what the smaller lenses and sensors of compact cameras offer. A performance gain that makes carrying such a large camera worthwhile.

A DSLR is big because of the demands of the available technology. The swinging mirror directs light into optical viewfinders and phase detection focus sensors. Over the last couple years a new type of camera has appeared, taking advantage of advances in technology to dispense with the bulky swinging mirror design. Fast, high resolution electronic viewfinders and better focus technology allow this transformation. Engineers can create a camera far smaller while keeping the large sensor and interchangeable lens. Better yet, getting the lens closer to the image sensor allows a smaller, lighter, less expensive lens without sacrificing performance. Enter a new paradigm of camera that offers much of the performance of a DSLR in a compact design.

Canon EOS-M
The Canon EOS-M with the 22mm f/2 kit lens
All of the major players have now released their own spin on the mirror-less design. Panasonic and Olympus jointly released compatible designs under the Micro Four-Thirds standard. Sony has released their NEX system and Nikon the Nikon 1 system. A number of lens makers, Zeiss, Tamron, and Sigma now make lenses for these cameras. Canon was the last to release an entry into this new market segment.

Continue reading “Canon EOS-M”