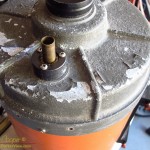
It looked horrible! The paint was coming off everywhere with heavily corroded aluminum underneath. Most of the screw heads were small balls of rust, with hopefully enough remaining to fit a screwdriver to and remove. For a precision optical instrument this small telescope was not very encouraging.
Looking at what remains of the paint on an old Celestron C8 orange tube telescopeOn the bright side the optics looked to be in decent shape. While there was some dirt and mold on the corrector, the primary looked almost perfect. Not bad considering the condition of the metal parts. Maybe, just maybe, this telescope is salvageable.
The telescope in question is an old orange tube Celestron C8. Thousands of these little telescopes were manufactured in the 70’s and 80’s. It was the C8 that set the standard for amateur telescopes at the time. The C8 is still in production forty years later, but the tubes are no longer painted orange as they were originally. Compact, yet offering decent performance, these telescopes were well regarded and hold a special place in the memories of many amateur astronomers. I have seen these little orange telescopes at dozens of star parties, even bolted to the side of huge professional telescopes for use as finders.
I have always enjoyed learning about the history of astronomy, it is a science whose roots can be traced continuously back to the dawn of human history.
One of my Facebook friends is a bit of an old telescope nut, even more so than myself, regularly posting photos of historic observatories and in particular old refactors. I too have a soft spot for these historic instruments, going out of may way to visit Greenwich Observatory in London, to drive up Mt. Hamilton to see the beautiful old refractor at Lick Observatory, or flying across the country to see one of William Herchel’s telescopes on display at the Smithsonian.
Ovidiu Cotcas recently posted a link to a fun research paper analyzing the telescope optics of Cassinni’s telescopes. These instruments were state of the art in the mid-1600’s, a period when the first telescopes were being used to provide the first good look at astronomical objects, revolutionizing our understanding of the universe. Only five decades after Galileo astronomers across Europe were attempting to build ever better instruments to provide views of the planets that had only recently been nothing but moving lights in the heavens. These early telescopes showed that planets were worlds, opening a whole new realm to observation and study.
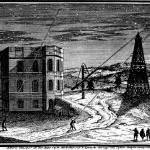
Paris Observatory in the times of Cassini during the late 1600’s showing the very long focal length refracting telescopes of the day. Credit: Wikimedia CommonsPrior to the invention of the achromatic doublet in 1758 the main limitation of refracting telescopes was chromatic error. A single lens is also a prism, focusing the different colors of light at different focal lengths. The only solution to this was to make objective lenses with very long focal lengths. Today’s telescopes use compound lenses of two or three elements in the objective with different types of glass. This combination of lenses can be cleverly arranged to cancel out chromatic error resulting in an achromatic lens.
The long focal lengths of those first singlet lens telescopes appear absurd by modern standards, huge instruments with long tubes suspended from masts or with the objective lenses mounted upon tall towers while the observer and eyepiece were at ground level. Telescopes were thirty or even a hundred feet long. Unlike today’s convention of referring to a telescope’s aperture, telescopes were referred to by focal length. Cassini’s primary instruments had focal lengths of between 17 and 40 feet, with one having the incredible focal length of 150ft! As familiar as I am with using small telescopes I shudder at the challenges of aligning and aiming such an instrument, much less tracking a target across the sky.
In Arizona, during the heat of summer we would head for the mountains. We knew dozens of fire roads and meadows where a telescope could be set up under the stars among the cool forest pines. When the weather chilled, we headed to the low desert, our favorite site was Sentinel, Arizona. A desolate volcanic field just off Interstate 8 between Gila Bend and Yuma. It was still cool at night, a beautiful place to enjoy the desert skies…
Deep Violet at Sentinel, Arizona for the 2015 Pierre Schwarr Star Gaze
A six-inch f/5 telescope designed to allow maximum portability. A simple travel telescope that can go anywhere, small enough to fit in an airline carry-on bag while leaving room for clothing. Large enough to provide good views of celestial targets.
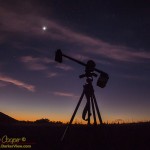
Makaʻiki under the stars for the first time at Hale Pōhaku on the side of Mauna Kea
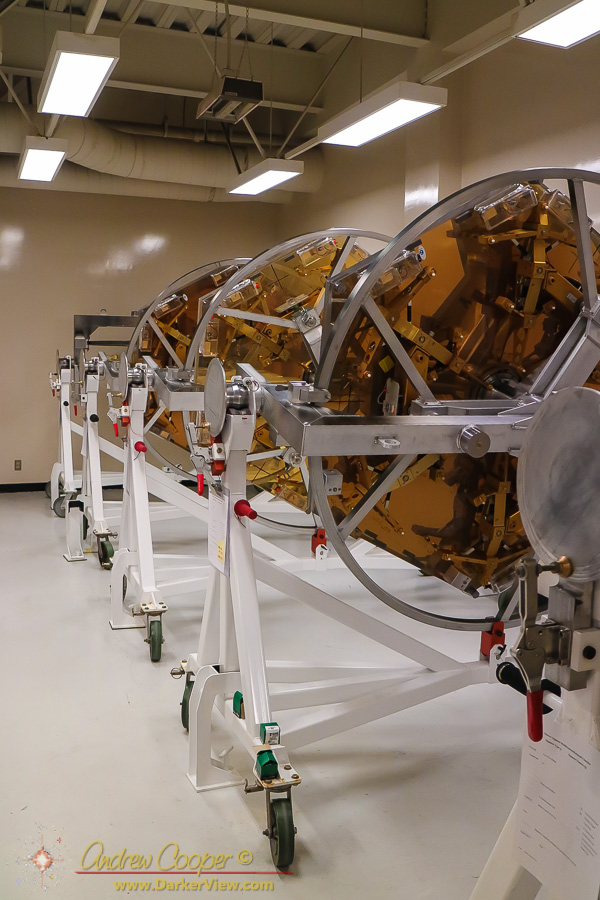
I call the design Travel6, for obvious reasons. The actual telescope I have dubbed Makaʻiki, or simply “little eye” in Hawaiian. While 6″ may seem big to some, by the standards of amateur telescopes it is quite small. By the standards of the telescopes I work on it is downright miniscule.
Still, a 6″ telescope is quite capable in the right hands, able to give pleasing views of many celestial objects. The design is an RFT, or rich field telescope. A low power, wide angle eyepiece will result in a field rich in stars.
Like all good telescopes the design is based on ideas borrowed from other telescopes I have seen. In this case the basic design is from a very similar telescope by Brett Schaerer he named WikiKea, a telescope I had a chance to examine at Oregon Star Party a couple years ago. He incorporated a clever focus mechanism into that ‘scope that got my attention. This is a design I liked, I would have to build one for myself sometime.
Of course I had no plans for the ‘scope, just a couple photos. The first task was to draw up a complete set of plans, only then would I be able to understand all of the design issues. I have posted the full mechanical plans for the telescope at the link above. These plans should be enough for anyone with a little workshop savvy to duplicate the telescope.
The design shown could be notably simplified if one chose to do so. I have enough parts left over to build a second scope, and may consider a refined design the second time through based on the lessons of the first pass.
First light is complete… It works very nicely, the images of rich star fields and sweeping nebulae are worth the hours of work it takes to complete the fabrication of a telescope.
Makaʻiki under the stars for the first time at Hale Pōhaku on the side of Mauna KeaThe telescope is Makaʻiki, a new 6″ travel scope. Hours of design, cutting and drilling, sanding and spraying paint. There is nothing particularly hard about building a telescope, but it always takes more work that you remember from the last.
As usual the most difficult part of assembly is the last. Installing and aligning the optics. Adjustment of the secondary mirror for the correct position takes an hour of mucking about with allen keys, a Cheshire eyepiece, and a laser collimator. Get it centered, get the tilt right, correct placement of the secondary is critical for good performance of the telescope.
The final step is first light, the traditional ceremony when a new telescope is aimed at the sky for the first time. My traditional first light target is M42, the Great Orion Nebula. An old friend and telescope maker, Bob Goff, often stated he would like to tour this nebula in spirit after he died. I do not know if he made it, but I remember him each time I commission a new telescope and peer at the beauty of this nebula.
Given the time of year I had to get up before dawn for a view of this nebula. Driving uphill from the village I could see Orion rising above the dark shadow of Mauna Kea. In the predawn darkness I set up near Hale Pohaku for my first light checks. Set up is a bit grandiose for this telescope, there is not much to it. Open the tripod, set the scope on top, take the covers off and aim at the sky.
The first object to focus in the telescope was M42, the nebula appearing quite nice at low power. The 40mm eyepiece gives a 3.3° field at about 19x, wide enough to comfortably fit the entire nebula region in the field, from NGC1980 to NGC1981. From there I wandered about the sky… M1, M78, M79, M41, M35 made for a nice sampling of objects.
Higher powers shows that collimation can be a bit touchy in the ‘scope, not a surprise given the single strut design.
There were also three bright planets in the dawn. The brilliant Venus is shining near its maximum brightness right now, showing a nice crescent in the telescope. Mars is still too far away to show much of anything and Jupiter was still quite low in the brightening dawn, the moons barely visible.
First Light complete I knew that the effort to create a new telescope was worth it. Makaʻiki performs as designed. With a sense of satisfaction I headed uphill for breakfast and to join the crew for a day on the summit.
The secondary mount is often one of the most complex pieces of a telescope build.
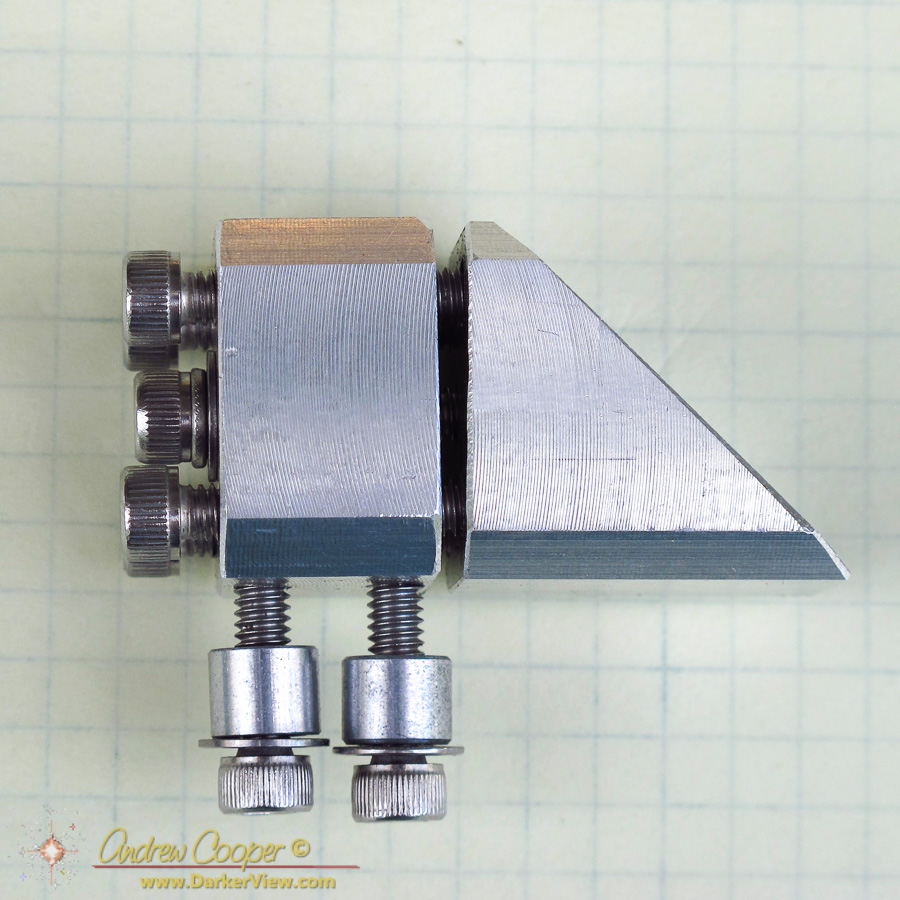
Side view of the Travel6 secondary mount
The mount must be small, not blocking any more light than the secondary mirror. It must be adjustable to allow tip, tilt, and centering of the secondary mirror. it must be rigid, able to hold the adjustment precisely once the telescope optical alignments are made.
Thus I have put together a new design for myself, to be used in the 6″ travel ‘scope under construction. The design is simple and robust, a pretty solid little device using the lessons I have learned across the years. It draws upon ideas from many other secondary mounts I have seen.
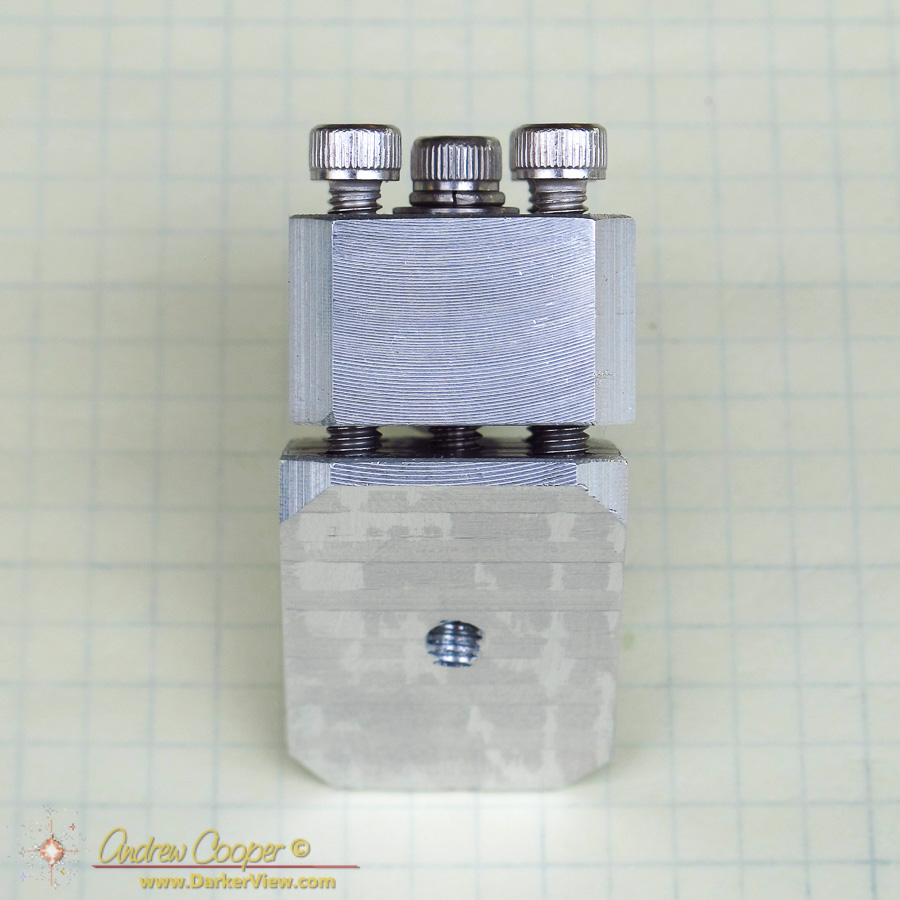
Rear view of the Travel6 secondary mount
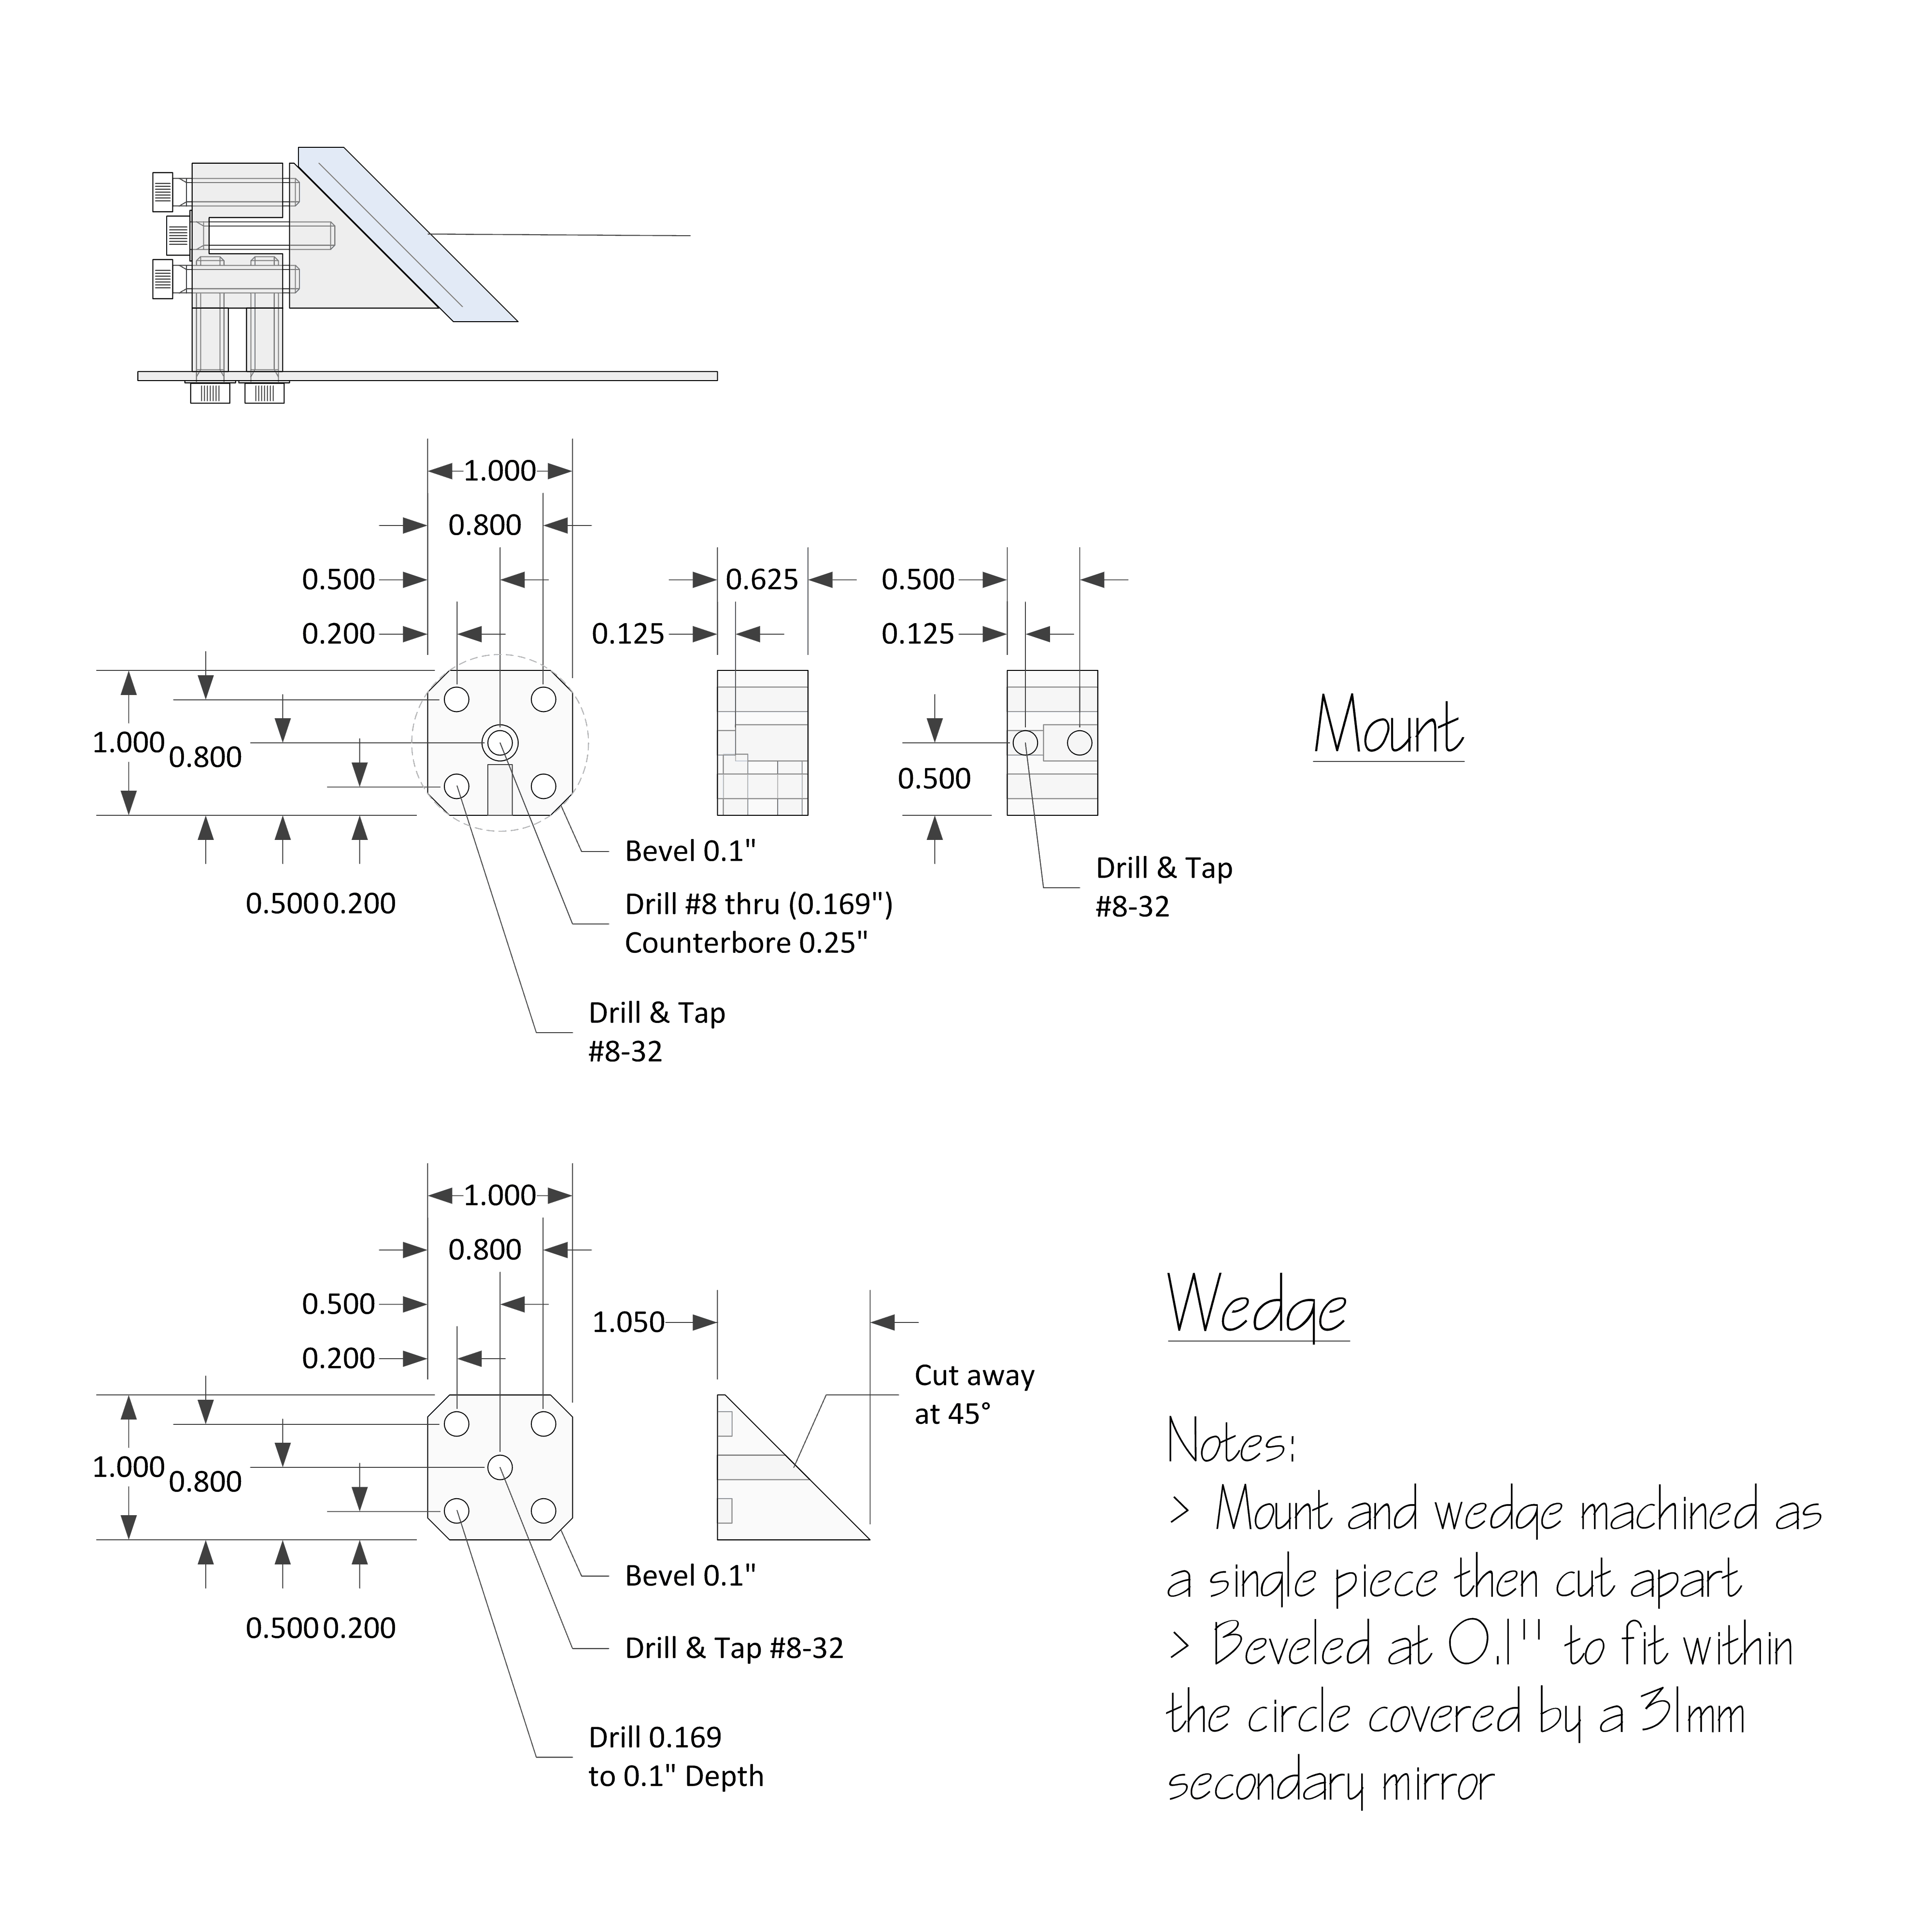
The body is square as this is easier to clamp during each of the manufacturing operations. The square is as large as possible to provide a stable mount, with the corners beveled just enough to stay behind the secondary.
The mount shown here is designed for a 31mm minor axis diagonal mirror. Thus the body of the mount is one inch square with 0.1″ beveled off each edge. This could be scaled up or down for another size diagonal mirror. The overall length of the entire mount is as short as possible. A bar of aluminum was cut to size and beveled first. A four inch bar yielded two complete mounts. I left the machined surfaces a bit rough to break up the smooth surfaces, better to hold paint and to avoid reflections.
There are four adjustment screws here. This allows for a simpler adjustment scheme than a three screw arrangement. With three screws adjustments are often made using all three screws at once. A four screw scheme allows the screws to be adjusted in pairs to effect moves in one axis at a time.
Mechanical drawing for the Travel6 secondary mount
I have made mounts with spring loaded screws in the past. They are easier to adjust, no need to loosen and tighten opposing screws. But they are not as rigid, the careful adjustment more likely to drift. This mount uses pusher screws that must be loosened and tightened in pairs.
Shallow pockets are drilled into the rear of the wedge for the tip of each adjustment bolt. this prevents any rotation of the wedge as long as the adjustment bolts are tight.
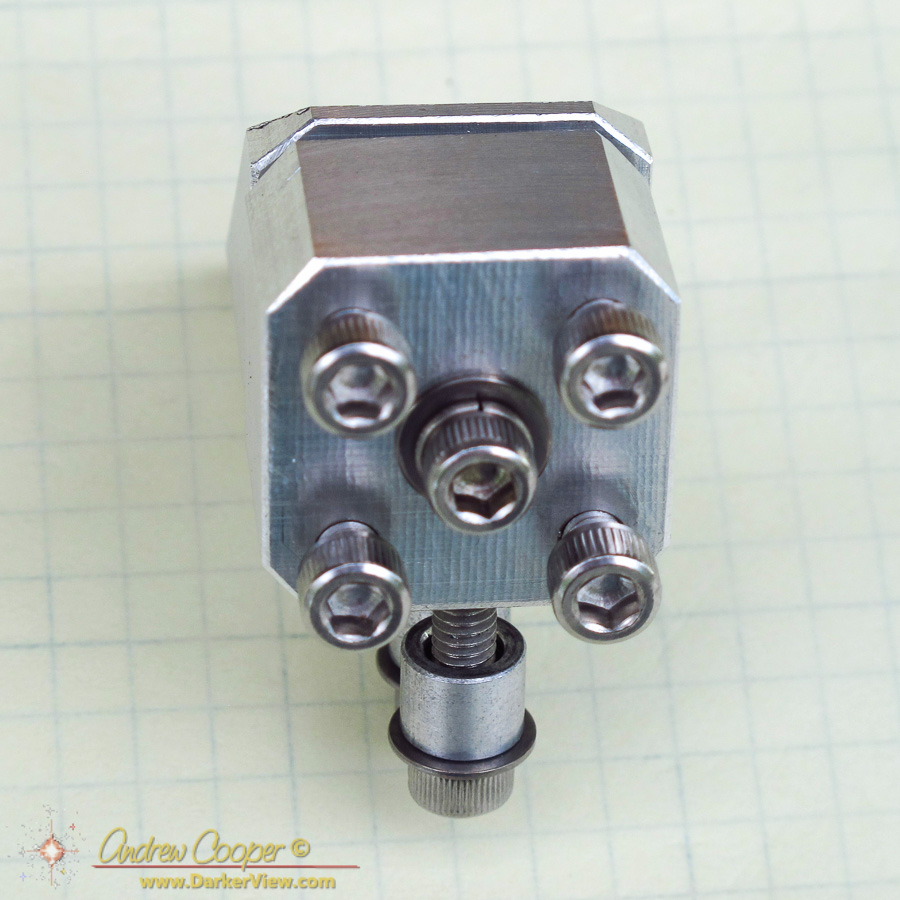
Top view of the Travel6 secondary mount
Vertical adjustments will be made by adjusting the height of the standoffs used to mount the secondary, or perhaps by shimming with a washer or two. The two mounting screws will sit in slotted holes allowing the secondary to be aligned with the focuser.
The center screw sits in a counterbored hole, only a small section of the shaft near the head is constrained. This allows it to tip slightly and allow the adjustments. A split lockwasher keeps some back tension during adjustments.
The secondary will be attached with RTV adhesive. The corners of the mount line up with the edges of the secondary making alignment quick and simple. All that is needed is a coat of flat black paint on the sides to prevent odd reflections in the optical path.