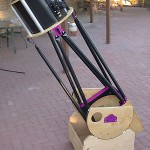
No project is ever completely done, even one “finished” decades ago… My 6″ f/5 RFT is the current incarnation of my first telescope, Primero. Built into an 8″ irrigation pipe this ‘scope is a rich field ‘scope that is just fun to use. And yes, I worked on this telescope again.
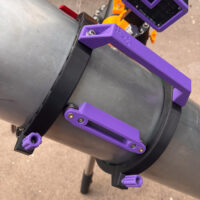
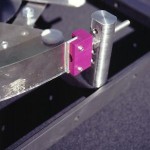
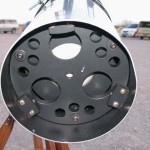
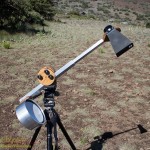
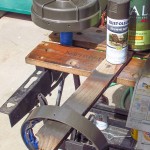
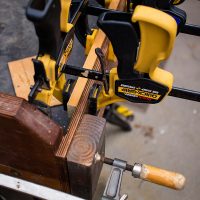
A set of new 3D printed tube rings for Primero, the 6″ f/5 RFT
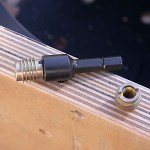
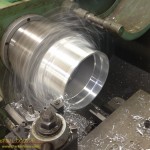
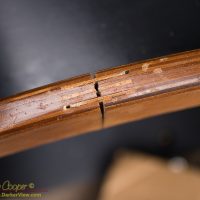
One feature I have always meant to change is the tube rings. Simple aluminum straps that I kept loose enough to allow the ‘scope to be rotated to keep the eyepiece at a convenient angle for viewing. The issue is that in use the tube would constantly slide down through the rings throwing the mount off-balance.
I finally got around to fixing that. A set of 3D printed rings along with a stop mounted to the tube that prevented this sliding, keeping everything centered and balanced. The rings are attached to each other by the two dovetails and a handle forming a cage.
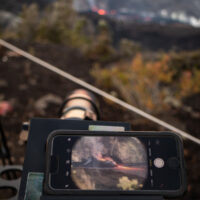
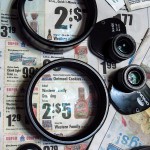
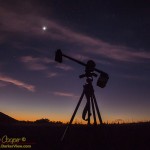
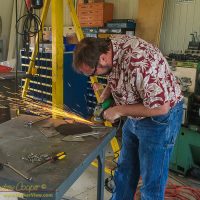
A couple weeks ago at the volcano I let quite a few folks take imagery of the lava using the afocal technique, simply holding the phone up to the eyepiece. This works rather well as the phone uses a lens much like the human eye, about the same aperture.
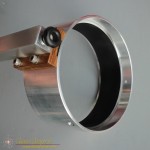
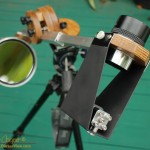
Shooting afocal with an iPhone and the TV-76mm ‘scope
The only real issue is holding a phone in just the right spot. Folks wanted video, but holding the phone steady is a real challenge. I had thought of making something to do this many times, last weekend I did it.
A session of playing around in 3D CAD resulting in a couple bits of clever plastic printed with the 3D printer… Done.
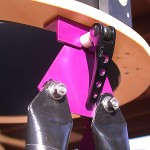
There are commercial solutions for this available, quite a few actually. But most of these are intended to adapt to a single phone, using some sort of clamping arrangement that you have to setup for a particular phone. I envisioned something that was more universal, quickly adapting to any phone.
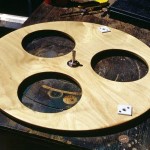
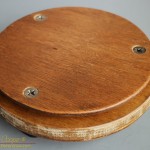
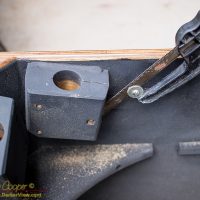
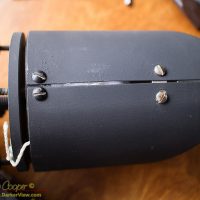
The method I chose was a sliding magnetic platform that holds the phone. Just a simple shelf actually, set the phone on it and slide until you get it lined up. The base piece is printed with a recess into which a steel plate is set. The slider has three 8mm x 2mm neodymium magnets to securely grab the steel plate.
It took a bit of work to cut and file the steel plate to neatly fit the base, a bit of inlay work. Otherwise making the piece is quite easy. The only design issue is that this adapter is setup to fit a single eyepiece, a Televue Panoptic 27mm, and cannot be easily adapted to others.
The 3D CAD files are linked below. I have included the SCAD source file to allow tinkering with the design, possibly adapting to a different eyepiece. Both parts should be printed with support on, the pockets for the glued bits will have to be cleaned out, the resulting rough surfaces just right to recieve epoxy.
At the Keanakakoʻi Overlook I was able to test the adapter with a variety of different phones, both iPhone and Android, graciously lent to me for my experimentation. OK, the owners may have wanted a few lava photos. There was no difficulty using the adapter other than a moment or two needed to line up the camera with the exit pupil of the eyepiece. The result was more than a few smiles.
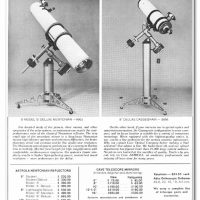
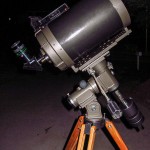
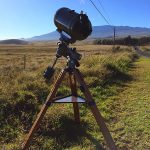
Restoring the 8″ Cave Astrola has me again looking at these classic telescopes. Reading the history of Tomas Cave and Cave Optical. Looking at the old advertisements and remembering things long thought forgotten. I may never have owned one before, but the Astrolas still had an impact upon me years ago.
My Astrola is now operational, with final assembly and collimation completed a week ago. So far I have used it for several evening sessions of observing from the driveway. The result is several pages of notes in the observing log, wandering through nebulae, clusters, and binary stars in Orion, Canis Major, and Puppis.
Cave Optical Advertisement 1970, from Phil HarringtonWhen I was just starting my journey in astronomy the Cave Optical advertisement in each month’s Sky and Telescope was something to inspire dreams in a young teenager. In many ways those dreams have never been forgotten.
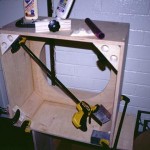
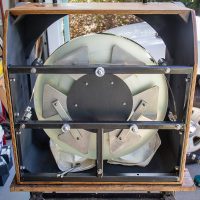
Gluing the mirror box for Deep Violet, and 18″ f/4.5
The 18 point mirror cell, built to the plans from Barry & Kriege
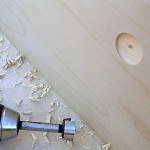
The primary mirror support strap
The ground board with center pivot and teflon pads in place
Drilling a pocket to accommodate a carpet pad in the side of the rocker box
Deep Violet fully assembled and nearly ready for dark
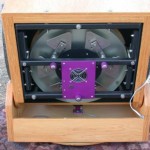
Looking at the mounted mirror cell and primary mirror
Deep Violet at Sentinel, Arizona for the 2015 Pierre Schwarr Star Gaze
Looking in the rear of the tube at the mirror cell
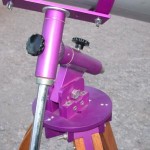
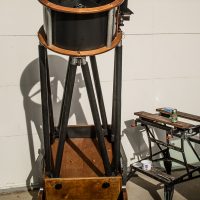
Detail of the tripod head, latitude adjustment and the RA and declination axis
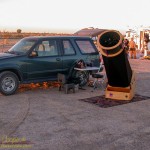
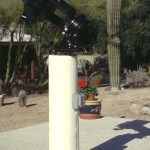
Primero setup at Jarnac Observatory among a friendly crowd of other telescopes
Stripping and cleaning the 14×100 binoculars
A completely disassembled Celestron Cometron telescope
Detail of the upper truss tube with the lever type latch
Detail of the brass threadserts used to hold the lower truss clamp
A 12.5″ dobsonian telescope after the refit
Machining the mirror cell from a piece of scuba tank
The mirror cell prior to installing the primary mirror with the focus knob at the back of the strut
A very standard design for the mirror mount
A front view of Makaʻiki ready to observe
Makaʻiki with the main strut extended for use
Makaʻiki under the stars for the first time at Hale Pōhaku on the side of Mauna Kea
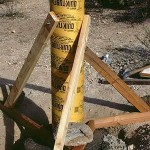
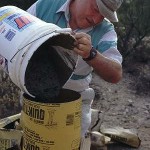
The forms for the pier upright filled and leveled
Bill Lofquist pouring concrete into the upright part of the pier
The completed pier with a telescope atop
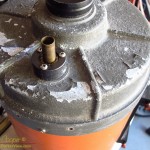
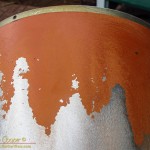
Looking at what remains of the paint on an old Celestron C8 orange tube telescope
The orange paint just crumbles away under a few sweeps of a power sander
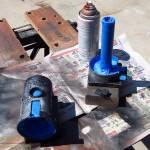
Parts of the mount prepped and taped for painting
Paint drying on the front and rear castings of the old orange tube
A restored Celestron C8 on a similarly restored TeleVue Renaissance mount.
The C8 set up along the old Saddle Road for Mercury Transit
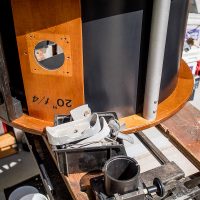
Re-assembling the secondary cage on the 20″ Obsession. The truss tube clamps still need to be cleaned up and re-installed, same with the focuser.
Grinding the heads off a few screws
The rusted hardware removed from a 20″ Obsession telescope
Opening up the truss tube clamps by widening the slot with a hacksaw.
A fix for the secondary mount
A failed plywood joint
Clamping the rocker box of a 20″ Obsession
Installing the primary mirror. This is a Galaxy Optics 20″ f/4. Oddly enough Sky Hudek, the son of John Hudek, the owner of Galaxy is a good friend and dive buddy.
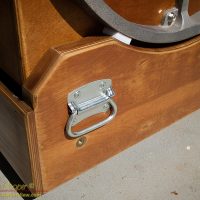
Trunk handles added to the rocker box to make picking it up and loading it in a vehicle easier. They are mounted just high enough to avoid the wheelbarrow handles when installed.
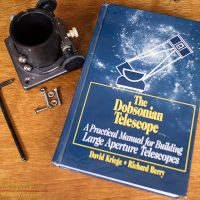
My copy of The Dobsonian Telescope by David Kriege and Richard Berry
20″ f/4 Obsession #004 fully assembled for the first time in over a year. Ready for alignment and use!
A six-inch f/5 telescope designed to allow maximum portability. A simple travel telescope that can go anywhere, small enough to fit in an airline carry-on bag while leaving room for clothing. Large enough to provide good views of celestial targets.
Makaʻiki under the stars for the first time at Hale Pōhaku on the side of Mauna Kea
I call the design Travel6, for obvious reasons. The actual telescope I have dubbed Makaʻiki, or simply “little eye” in Hawaiian. While 6″ may seem big to some, by the standards of amateur telescopes it is quite small. By the standards of the telescopes I work on it is downright miniscule.
Still, a 6″ telescope is quite capable in the right hands, able to give pleasing views of many celestial objects. The design is an RFT, or rich field telescope. A low power, wide angle eyepiece will result in a field rich in stars.
Like all good telescopes the design is based on ideas borrowed from other telescopes I have seen. In this case the basic design is from a very similar telescope by Brett Schaerer he named WikiKea, a telescope I had a chance to examine at Oregon Star Party a couple years ago. He incorporated a clever focus mechanism into that ‘scope that got my attention. This is a design I liked, I would have to build one for myself sometime.
Of course I had no plans for the ‘scope, just a couple photos. The first task was to draw up a complete set of plans, only then would I be able to understand all of the design issues. I have posted the full mechanical plans for the telescope at the link above. These plans should be enough for anyone with a little workshop savvy to duplicate the telescope.
The design shown could be notably simplified if one chose to do so. I have enough parts left over to build a second scope, and may consider a refined design the second time through based on the lessons of the first pass.
Every astronomer has a first telescope, mine is a 6″ f/5.1 Newtonian I first built as a teenager. As life progressed I was forced to dismantle the telescope and it dwelt for a time as a pile of parts in a box. Eventually I had an opportunity to rebuild the telescope, but as both my technical capability and my financial means had increased I was able to do a substantially better job.
Primero setup at TIMPA outside of TucsonThe result is the instrument you see to the right, Primero, or simply ‘first’ in Spanish. The original mirror was used but little else from that first telescope was reused. A completely new mount, a new tube and all new fittings. The only purchased parts are the focuser, the Telrad and the secondary mirror. Several parts of the mount were removed and reworked from a previous mount, this includes both the bearings, shafts, counterweight and saddle. The entire tripod, tube, mirror cell, spider and secondary holder were produced by hand for this scope.
The optical design of the telescope is standard Newtonian with a f/5.1 primary mirror of 6.0 inches giving a focal length of 777mm. The mirror was hand ground when I was a teenager and thanks to expert help during figuring is an excellent mirror.
The RFT design is deliberate and has proven to be a good choice, particularly with modern eyepieces that perform so well in short focal length scopes. With a 35mm Tele-Vue Panoptic eyepiece the scope provides a 22x image with just over a three degree field.