A different use for amateur astrophotography gear.
An amateur CCD camera can do more than take pretty pictures. There is no reason why any decent telescope, however small, and a CCD camera can not be used to do real science, or real engineering in this case.
The goal of the night was to perform proper photometry on the laser returns with independent equipment. We want to quantify the performance of the Keck adaptive optics laser systems. We launch two powerful lasers into the sky, one from each telescope, to allow analysis of the atmospheric distortions through which the telescope is observing. Using the data the system can correct for this atmospheric distortion and create much sharper images of distant stars and galaxies.
The lasers pass through a layer of sodium atoms about 90km (55miles) above the ground. There the 589nm yellow light excites these sodium atoms creating a glowing beacon, what we call the laser return. This return is what we look at to analyze atmospheric distortion. A brighter return allows better data and better performance of the system.

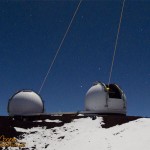
Both the Keck 1 and Keck 2 lasers in operation under the light of a nearly full Moon
Amateur astrophotography gear is perfectly capable of doing this task. A portable telescope, a proper CCD camera, combined with care to acquire calibrated images. All that I needed to add to the setup was a photometric V filter.
It was a perfect night for it, clear, dry and cold. Best of all, there was no wind to bounce the telescope around and chill anyone working outside. The winds are nearly constant atop at 14,000ft peak, calm nights are unusual, I was lucky indeed.
I setup the telescope atop a crust of ice and snow. The snow was convenient as it allowed me to set down gear on a cleaner surface than the gritty volcanic cinder underneath, keeping everything quite a bit cleaner. The altitude and cold made setup and breakdown a slow, laborious process, and added unique difficulties. I had to be very careful moving the heavy gear, so as not to slip on the icy snow. When I went to move the telescope tripod I found it frozen into the snow and cinder! I had to heave hard to break it free.
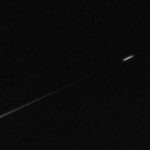
The laser return can not be seen with the unaided eye, it is generally around 9th or 10th magnitude. A good pair of binoculars or a small telescope make it easy to detect. A small yellow ‘star’ just beyond the end of the visible beam. About 90km (55miles) above sea level the beam passes through a naturally occurring layer of neutral sodium atoms.

K2 laser return 90km above the telescope
While the first two hours of the night were very dark, a bright Moon, 90% illuminated, rose about 20:32. Combining a nearly full Moon with the remaining snow cover, created a beautiful scene. A view that just begged to be photographed. Of course, I was unable to resist. I filled an 8Gb card and kept shooting!
I was prepared for regular photography as well as astrophotography, with two cameras and two tripods available. With my Canon 60D I shot several time lapse sequences of the lasers operating. Even after finishing the photometric work and packing the telescope away, I continued to do photography for another hour. I found a nice vantage point on the Subaru access road, where I could see both telescopes and yellow beams. From there I shot two more time lapse sequences and took a few shots with my little G11. I was pleasantly surprised at the decent shots the G11 was producing under moonlight, not the best conditions for a compact camera.
I have what appears to be excellent photometric data. I still need to do the reduction of the data to photometric magnitudes. Time to pull out the textbook and review the proper procedure.

