Cropping the Photo

You never frame a photo properly when taken. This is a lesson I learned long ago… In the sometimes frantic process of shooting the photo, you rarely have a chance to frame the subject correctly. That moment when the whale surfaces, or the bear looks right at you, there is little time to adjust the photo for best impact, you just shoot.

IRTF
The moon setting over the NASA Infrared Telescope Facility (IRTF), note how the imposing feeling is created by placing the telescope high in the image
The lesson that you take from this, and hopefully apply when shooting, is to shoot a bit wide in order to allow yourself flexibility in the processing. Zoom out a little, knowing that you will crop away some of the image in processing. A wise photographer understands this, the hard lessons one learns along the way. It is much later when you sit at the computer and can truly look at the photo that you can evaluate how best to arrange the subject.

Rotation is also an issue, many photos are taken handheld, often hastily in the moment. These will have small errors in rotation. Do not even mention shots taken from a pitching boat! A modest crop of the photo will also allow correction on the image rotation.

The choice of crop is critical, it is the first step in my processing of the photo. Either the crop works, or move on to the next photo in the folder. Almost all photos can be improved by cropping in a little, to cut away the extraneous areas and to concentrate the viewer’s attention on the primary subject. Much of the time I will throw away 10-25% of the photo, not cropping a lot, just tightening up the composition.

Adobe LightRoom acknowledges this fact of photography, the crop and rotate tool is on top, first on the left of the processing tools. Crop it in, perhaps straighten the rotation, then you know if the photo is worth any further effort.

The art is in choosing the crop… How much to crop. How to position the major elements. This decision is an aesthetic choice of the photographer, and as with many such choices, there is no single best answer. There are some rules that can help. These are rules that can help, but are not ironclad, they can be broken if the composition calls for it.

Continue reading “Cropping the Photo”

Cropping Choices

Almost all the photos shown here on Darker View are cropped at a 2:3 ratio. The reason for this? I like it. And perhaps I am used to this ratio. It is very traditional, having been used for many applications for decades, including the venerable 35mm photographic film.

Cropping Ratios
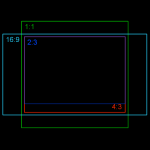
Common cropping ratios
A cropping ratio is simply the ratio of the dimensions in the image, height and width. if the print on the wall is 24 x 36 inches, it has a ratio of 2:3. This is calculated using the smallest common denominator… Remember that term from learning fractions in grade school? The images here on Darker View are usually 600 x 900 pixels, also a 2:3 ratio.

Any number of cameras produce images with a 2:3 ratio, including APS-C sensor DLSR’s like my Canon 60D. The ratio is by no means universal. Many cameras use a 4:3 ratio, most compacts do, including my Canon G12. Other ratios are popular, HD video is 16:9, spurring a rise in popularity of this wider format.

I have read a little about the choice in cropping, the argument regular rages in photographic circles. One article in particular got my attention, the author extolling the virtues of a square crop, a 1:1 ratio. Perhaps I am in a rut, and need to explore the use of other cropping ratios. I use 1:1 on occasion, usually for astrophotos. Perhaps I should experiment with other ratios more often.

Laurent's Hermit Crab
Laurent’s hermit crab (Calcinus laurentae) peers out from under a shell