One of the major problems in underwater photography is the loss of color as you descend. The water filters out the red end of the spectrum, creating the blue world all divers are familiar with.
Visually this is a problem, divers are unable to appreciate the beautiful colors of marine life without using an artificial light source. Most divers carry lights, even on daytime dives, for this reason. It can be quite dramatic to turn on a light and watch brilliant reds and yellows appear where there was little color without the light.
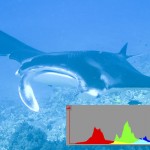
Photographically it is even more challenging, a strobe can light up nearby objects, revealing the colors. For more expansive scenes even the most powerful strobes fail, resulting in photographs heavy in greens and blue, with very little red. For some photos, the blue works, a “true” representation of what was seen. Often the blue does not work, the resulting photograph is an unattractive blue tinged with green, that no amount of fiddling in Photoshop will salvage.
One method in dealing with the loss of color balance is to simply take the loss further, convert the image to a black and white photograph. This is a technique you will see used in underwater photography quite often. By removing the distraction of color, the viewer is able to focus on the subject. The same reason so many modern photographers eschew color, even in an age when wonderful saturated colors are easily reproduced.
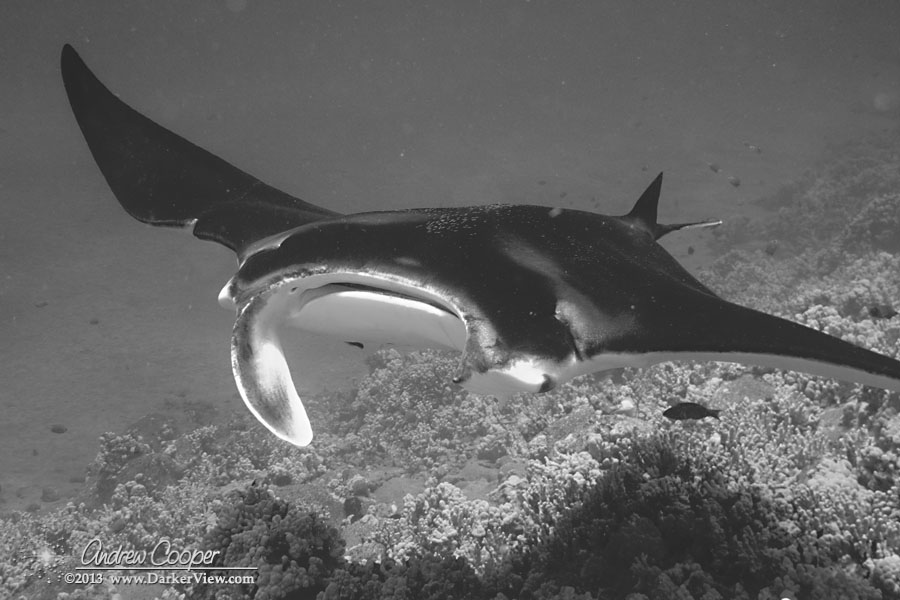
I recently photographed a manta at a depth of about forty feet, creating a photo that clearly exhibits this dilemma. A nice photo in an unattractive shade of blue. No amount of color tweaking resulted in a satisfactory version, I was simply unhappy with what should be a decent photograph. It was when I simply removed the color that I had a photo I felt worth publishing.
The problem now is how to remove the color from the image. Converting a color photograph to black and white is something that seems trivially simple, but in reality is quite complex.
You should not simply desaturate the image to create a black and white image. Doing so discards much of the fine tonal information in the image, often resulting a flat and uninteresting image. When removing the color attention must be pair to what channel, red green or blue, from which the tonal information is to be extracted. The proper answer may be to extract information from all three channels in some weighted manner.
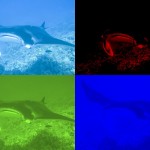
To more fully understand the situation it may be useful to individually examine the channels of the original image.
In the image at right, each of the color channels are broken out. The image was prepared in Photoshop from the raw image with each channel displayed at exactly the same scaling. What quickly becomes apparent is the overexposure of the blue and the underexposure of the red. Comparing to the histogram shown in the previous image this is exactly what we would expect to see.
The over and underexposure is completely normal with a color digital camera. The blue heavy light creates problems for the camera in finding the correct exposure, there is no good answer for a camera designed to be used under balanced light sources.
What can be taken from this… Green looks to provide reasonable information across much of the range. The red, while somewhat underexposed, does provide tonal information in the highlights that is missing in the green. Inspection does not show much information in the blue that needs to be retained, for this image the green and red information appears usable, neatly spanning the full dynamic range of the image.
Black and White Tool
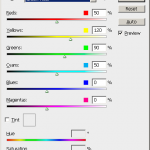
Photoshop does provide a Black and White conversion tool. What you see when opening the GUI is a full set of mixing controls to select the weighting of the channels when converting the image to monochromatic. Using the sliders it is now possible to select which channel provides the tonal information used to create the black and white version.
Sliders are not only provided for the three basic channels, red, green and blue. But also for the intermediate channels, combinations of the basic color channels, yellow, cyan and magenta.
The tool also provides a number of presets that cover many of the common situations you might encounter. For the manta shot the “Green Filter” preset appears to be a good solution for the image. This filter uses primarily the green and red channels, with no blue information used in the final output.
This is the method, with the green filter preset, was used to produce the version I was most satisfied with and is shown at the end of this article.
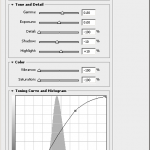
Toning
Another powerful tool for conversion to black and white is the HDR Toning tool. In contrast to the black and white conversion tool discussed above this tool allows use of a a wide range of toning options to make the conversion. This includes full control of the toning curve.
As with the Black and White Tool is is probably best to start with one of the supplied presets. A number of monochromatic output presets are provided, with Photorealistic probably the best starting point. From there fine adjustment of the parameters should give a good final output.
I have used this tool with excellent results, the toning curve a powerful tool giving excellent control of the tonal range in the final output.
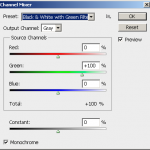
Channel Mixer
The channel mixer is the original black and white conversion tool in Photoshop. It provides what is essentially a simpler version of the current Black and White conversion tool. Only three sliders are provided, red, green and blue.
Set the tool output to “Gray” to select a monochrome output from the mixing process. A total value is provided, if this exceeds 100% you are saturating a highlight somewhere.
Again you may start with a preset. For underwater the preset that makes the most sense is probably the “Black & White with Green Filter” which takes all of the information from the green channel. Depending on what you see in the histogram you might want to mix some information from one of the other channels into the output.

Gradient Map
A simple tool for conversion is the gradient map. The tool creates a simple mapping of the color information to another scale value. Gone are all of the sliders used to mix the various color channels.
One feature of this tool is that you do not need to create a gray scale image. It is possible to map into any pairing of colors, not just black to white. Perhaps you wish to map from red to blue? You can use brown and gold for a sepia effect or get creative and create something unique.
Plugins
Beyond the built-in conversion utilities, you may also explore a number of excellent conversion utilities available as Photoshop plugins. These tools are built specifically for the conversion process and provide expanded functionality. Probably the most powerful of these is Silver EFX Pro available from Nik software for $149.
The basic operation of these plugins is much the same as the tools discussed above. Attention must be paid to the color channels used to provide the tonal information. As discussed above this is critical for underwater photography where the color balance is so strongly biased to the blue. Both plugins mentioned offer the ability to control the channel mix.
A nice feature of Silver EFX is the ability to mimic the response of various black and white films. The software has profiles for some of the classic and well respected emulsions of the past, these can be applied to the process.
The Result
Black and white images evoke a distinct response from many viewers. We often associate a monochrome image with specific feelings, or even nostalgia. Used correctly the effect can enhance a photo, creating more impact than a colorful image of the same subject. As a method of recovering an otherwise good underwater image, conversion to black and white is an excellent trick to keep in your toolbox. As long as you do it right.
