What to do while waiting for your plane? Fiddle with the camera?
My camera was already in-hand and I had almost an hour to wait for boarding. I may as well explore some of the little used functions and hidden menus the camera has to offer. Thus I took a few photos of a plane debarking and boarding on the open flightline of the Kona airport, playing with the camera settings. I didn’t realize just how much photos of a jet taken in black and white really do conjure up memories of vintage jet travel in the 60’s.
The miniature effect is just a bit of photographic fun. Something that can be used quite creatively in the right circumstance. I have been aware of the effect for some time, recently I had come across the effect in a number of online photos, and some great timelapse videos.
The effect works best with photos taken from some height, as if the viewer were looking into a diorama or model railroad set. By creating a false depth-of-field illusion it gives the impression of everything being much smaller, even when applied to a real scene. While it can be effective in a single photo, the effect is quite dramatic when applied to timelapse video. Check out the videos posted here for some excellent examples of the miniature effect in action.
A little research quickly reveals the answer… There are plugins available for Photoshop and other popular photo editing software packages. But it turns out the effect can be performed with manual editing functions reasonably well. It is just a matter of selecting a gradient mask and applying a significant amount of blur to simulate a shallow depth-of-field.

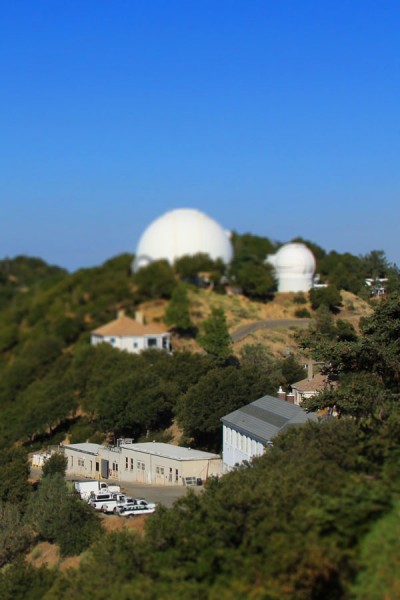
Picking a photo of Lick Observatory I took recently I applied the instructions given. It took more than a bit of experimentation, but the instructions work, creating the desired effect in the photo.
The size and steepness of the gradient is critical, and will have to be adjusted as appropriate for each scene. The gradient can be linear, using the Reflected Gradient of Photoshop. It can be radial if the photo calls for a central area to be in focus. A region can also be selected with the use of a very large feather for better control of the sharp and “out of focus” regions.
The amount of blur was less critical, and can likewise be adjusted as appropriate to the photo. I found that the Photoshop Lens Blur function gave a more pleasing effect than Gaussian Blur. Likewise the advice to bump up the saturation creates a more model like, plastic effect. I also applied a fair amount of sharpening, almost to the point of over-sharpening to increase the impact.
Given the simplicity of the processing needed, there is no reason the effect can not be set up in a script (called an Action in Photoshop). This opens the door to timelapse with the miniature effect applied, much like the sample videos linked above.
Instructions for Photoshop…
- Select the Quick Mask mode
- Select the gradient tool and select a Reflected Gradient
- Start in the area to be kept in focus and draw a line upwards for much of the photo
- Return to normal mask mode
- Apply Lens Blur to the photo using the gradient mask created in the first steps
- Increase the saturation to accentuate the model feel of the photo
- Apply a substantial sharpening function using Unsharp Mask or Sharpen Edges
With the method in hand it is time to use it. Perhaps something to do whilst traveling? I suspect a little time lapse is just the thing to kill time while waiting for boarding, something I will have to do a few times in the near future.


This is so cool! I have a Lumix Z19 that has the “toy” feature in its menu. It shoots video also. I will try and see if it can do the “toy” effect while in the recording mode. Enjoyed the soundtrack!