Driveway Astrophotography and Comet Garradd

Finally, a night where… A) The sky is clear. B) The wind is not howling through the palm trees. C) I am not exhausted by working the summit. D) I do not have to get up early the next morning.

A + B + C + D = Astrophotography from the driveway!
Comet C/2009 P1 Garradd
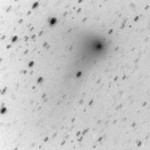
Comet C/2009 P1 Garradd on 29 March 2012 showing both tails, sum of 50 x 1 min exposures CoolSNAP ES and 180mm f/2.8 lens
Thus, under a very pretty sky, I rolled the photo rig out of the garage and spent some time getting everything back together. I was not in a hurry, time to let a bright crescent Moon set a little and my primary target rise a little. The target at the top of the list? Comet C/2009 P1 Garradd.

The comet is nicely placed in Ursa Major, transiting late in the evening, available for several hours of exposures. And expose I did, with the auto-guider locked on the a dim star beside the comet, the shutter open for well over two hours. I was shooting my Canon 20Da and the AT6RC, a combination that framed the comet nicely.

It will take a while to get the resulting images processed. In the meantime I did a quick process on a set of images taken with the wide field/finder CCD camera. The results of which can be seen at the right. I also shot a few quick images of the M95 area with the CCD to capture SN2012aw.

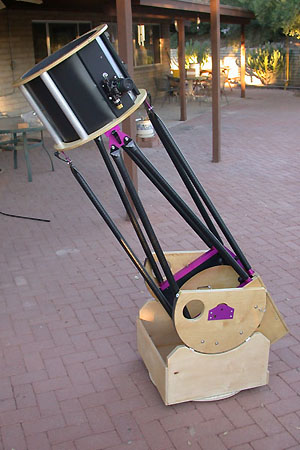
Deep Violet, an 18″ f/4.5 Dobsonian

In April 2001 I realized a dream that had been many years in the dreaming and a year in the making, a large aperture dobsonian.

Deep Violet
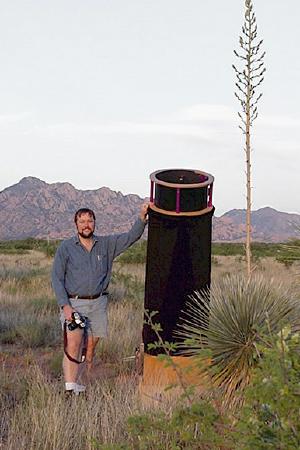
Deep Violet set up near the Dragoon Mountains in Southern Arizona
The decision process that eventually settled on the 18″ f/4.5 design was a long one. As a very active amateur I had had many opportunities to examine other scopes. To see where they excelled or where they fell short. With this experience I eventually decided on a list of requirements.

  • The scope had to have sufficient aperture to take advantage of the dark skies available near Tucson. I wanted to see spiral arms in galaxies.
  • The design was to be visual only. No drives, but provisions for an equatorial platform at a later date.
  • The mount would be a no compromise rigid structure, capable of allowing good optics to perform at their best.
  • The scope had to fit through a standard doorway.
  • The scope had to fit in the cargo compartment of a Ford Explorer Sport without dropping the seat for safety during transport.
  • The eyepiece must not be an excessive distance above the ground, allowing use while standing on the ground much of the time. (But then, I’m 6’2″ tall)

Over a decade of engineering experience has taught me that a well defined set of specifications can make all the difference at the end of a project. With these design goals in mind the plan then progressed rapidly.

Continue reading “Deep Violet, an 18″ f/4.5 Dobsonian”

Rebuilding a 12.5″ f/5 Truss Tube Dobsonian

12.5" Dobsonian
 
Some time ago my friend Bill Lofquist bought a dobsonian telescope from Roger Ceragioli. Roger had built the ‘scope to provide a home for a beautiful 12.5″ f/5 mirror he had made. The mirror is gorgeous, as is typical for Roger who is one of the best opticians I know. I have an APO triplet of Roger’s that is a prized possession.

Mechanically the scope had a few problems. The truss tubes were attached with separate hardware top and bottom, so that setup required over 20 minutes of sorting through screws and futzing with eight separate truss tubes waving around the whole time.

The elevation bearings had been set about 1/8th inch off from each other leading to a side to side twist when the scope was moved in elevation. This was not a major problem when using the scope visually but would make the use of digital setting circles impossible as DSC’s require orthogonal axis in the scope.

The ground board was a bit undersized, making the scope prone to tipping when used at low elevation.

The rebuilt scope is essentially finished with the usual tweaking and small adjustments remaining. Things are coming out very well and a few of the changes are worth passing along to the ATM community. In the sections below I will concentrate on practical details in hope of conveying some of the finer points in telescope making.

Continue reading “Rebuilding a 12.5″ f/5 Truss Tube Dobsonian”

Violet Haze, A 90mm f/13 Apochromat

Violet Haze
Violet Haze, a 90mm f/13 apochromatic telescope
I had wanted a high quality APO refractor for some time. Mostly for photographic use. Opportunity presented itself when Roger Ceragioli offered me a 90mm telescope he had finished the year before and was willing to sell. Working for the Steward Mirror Lab, Roger normally grinds very large optics, things like secondaries for six to eight meter telescopes. But as a hobby he makes somewhat smaller telescopes. This particular lens set had won him a merit award at RTMC in 2002. I had previously seen this telescope and after some negotiation we settled on a price.

The lens triplet is exquisite, providing absolutely perfect airy disks at high power. The photo below shows an example of the out of focus image of Antares taken with the telescope. Pulling out my copy of Suiter’s Star Testing Astronomical Telescopes shows nearly identical images for the ideal diffraction pattern. No wonder the ‘scope won a RTMC merit award.

Photographically it has proven to be almost perfectly free of color, corrected across the spectrum. There do not seem to be any detectable UV or IR halos around bright stars. This is partly a result of good design, and aided by the long focal length of f/13. No field flattener is required, with pinpoint stars across the focal plane.

Continue reading “Violet Haze, A 90mm f/13 Apochromat”

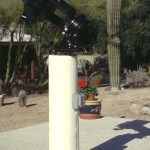
A Backyard Telescope Pier

Complete Pier
The completed pier with a telescope atop
Have you ever wanted to have a place to set up your scope easily in the backyard? with instant polar alignment? no tripod legs in the way? Even for someone with little handyman experience a pier is an easy weekend project that can be completed for around $60. Add the cost of a wedge for your scope, about $125-$400 new, less used, and you have a usable pier. A few bags of concrete, a little rebar and a sonotube will do the job. I know, we ATM’s usually use sonotube for telescope tubes, but this is what it is really meant to do, cast concrete.

A pier is also the first step in a real backyard observatory, build the pier first, then a building around it. The process shown here works for any pier and can be scaled as needed for larger scopes. The pier shown in the photos is intended to hold an eight inch SCT.

The plans and photos shown here have been used for several piers here in the Tucson area and have been refined with the experience. Feel free to improve on what is here, and if your idea works well send photos!

Continue reading “A Backyard Telescope Pier”

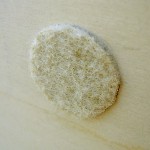
Improved Rocker Box Pads

A small design detail in a dobsonian telescope is a method to restrain the mirror box in the center of the rocker box, to keep it from sliding side-to-side in the elevation bearings.

Rocker Box Pad
A standard carpet pad embedded into the wall of the rocker box
A common solution is to use a couple carpet pads to provide a lateral support that keeps the wood from rubbing. The pads do not add any friction that would keep the scope from tracking smoothly at high power. These pads are available in most hardware stores in both sheet form as well as pre-cut circles, usually one inch in diameter.

I have had trouble with these pads in Deep Violet. They do not stay put! Sometimes when inserting the heavy mirror box into the rocker I would catch a pad and simply shear it away from the wood. I ended up using a larger pad and using small wood screws to secure it instead of the adhesive.

Continue reading “Improved Rocker Box Pads”

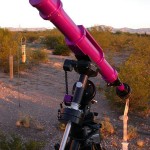
Primero

Every astronomer has a first telescope, mine is a 6″ f/5.1 Newtonian I first built as a teenager. As life progressed I was forced to dismantle the telescope and it dwelt for a time as a pile of parts in a box. Eventually I had an opportunity to rebuild the telescope, but as both my technical capability and my financial means had increased I was able to do a substantially better job.

Primero
Primero setup at TIMPA outside of Tucson
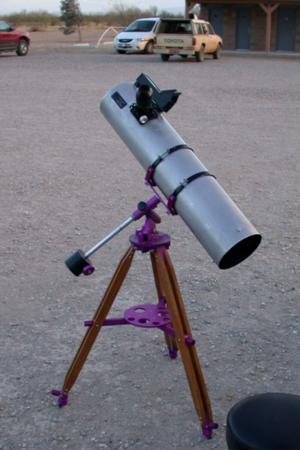
The result is the instrument you see to the right, Primero, or simply ‘first’ in Spanish. The original mirror was used but little else from that first telescope was reused. A completely new mount, a new tube and all new fittings. The only purchased parts are the focuser, the Telrad and the secondary mirror. Several parts of the mount were removed and reworked from a previous mount, this includes both the bearings, shafts, counterweight and saddle. The entire tripod, tube, mirror cell, spider and secondary holder were produced by hand for this scope.

The optical design of the telescope is standard Newtonian with a f/5.1 primary mirror of 6.0 inches giving a focal length of 777mm. The mirror was hand ground when I was a teenager and thanks to expert help during figuring is an excellent mirror.

The RFT design is deliberate and has proven to be a good choice, particularly with modern eyepieces that perform so well in short focal length scopes. With a 35mm Tele-Vue Panoptic eyepiece the scope provides a 22x image with just over a three degree field.

Continue reading “Primero”

Afocal Photography

When doing any sort of public astronomy, showing folks the beautiful sights available to a telescope, I often hear the question “Can I take a photo of that?” The person asking the question is usually holding the ubiquitous compact digital camera. They are often surprised when my answer is “Yes”.

Afocal Photography
Taking a photograph of the Moon using afocal photography

It is indeed possible to manage hand held shots of bright astronomical objects by simply holding the camera up to the eyepiece. There are a few tricks to making it work, but nothing that can not be demonstrated in a minute or two. The resulting photographs can be quite pleasing, definitely worth showing to friends and family along with the rest of the Hawai’i vacation shots.

The method of positioning a camera with a lens in front of an eyepiece is called afocal photography, or sometimes digiscoping. Afocal has been around for a while, but was not considered a practical photographic method by most. The advent of common digital cameras without removable lenses has changed this.

Continue reading “Afocal Photography”

Keck in Motion Scene Guide

I have been getting a few questions about the video. To answer a few of them I have compiled a guide to the scenes. Some quick explanations to what you are seeing, information on the camera used as well as the exposure information.

The video is a combination of two techniques. Many scenes were filmed as standard video then accelerated during editing to allow the motion to become clear. Examples of this are scenes of telescopes slewing and the interferometer delay lines moving.

Slower subjects, such as clouds or the stars moving across the sky, were photographed as time lapse. Here a large number of still images were taken. These are then processed and converted to video using Photoshop CS5 before loading into the video editing software, Adobe Premiere Elements. To construct the time lapse sequences sometimes required thousands of separate images, quickly filling memory cards and exhausting batteries. After dark it is long exposure time lapse that is used, with individual exposures often 15 seconds to one minute long.

Continue reading “Keck in Motion Scene Guide”