Minimal Cave Photography

There are a lot of caves on this island. Much of the island of Hawaiʻi is riddled with lava tubes. Hiking or riding the trails or back roads of the island often offers a mysterious opening into darkness. Not that I explore too far, I am not a hard core spelunker. But I do often poke my head in to see what the cave has to offer.
Goat House Lava Tube
The interior of Goat House Lava Tube near Waikoloa, 15 second exposure painted with a flashlight
Often when I reach a cave I am not carrying the necessary equipment to explore or photograph the cave. There are a few things I always have with me… A camera of course, I am rarely found without one. There is always a good flashlight in my pocket, a bright little LED light with a lithium battery. These two things are all one needs to get a photo of a cave.

Unless the cave is quite small the camera flash will provide unsatisfactory lighting of the cave. The flash will also tend to light up nearby parts of the cave and leave anything at any distance poorly lit. I generally do not use a flash in a cave unless I am photographing small features close at hand.

The technique is simple… Set the camera on a tripod, or a rock, and open the shutter for as long as the timer will allow, usually 15 or 30 seconds. During the exposure you paint the cave with light. Simply wave the light around in a random pattern, never letting the beam rest too long in a single place to evenly distribute the light. This simple method will allow even a large cave to be illuminated with a relatively modest light.

You will need to do this a few times and adjust your process to suit the situation. You can adjust the camera shutter timer or gain (ISO) to adjust the exposure. You can decide where to spend more or less time with the light if there are dark areas or hotspots in the image.
Kaumana Cave
A classic Hawaiian lava tube, the downhill side of Kaumana cave, 15 second exposure painted with a flashlight
There are a couple tricks… The further away sections of the scene will require more light, spend more time illuminating the furthest sections of the scene. If the light is located too close to the camera there will be few shadows to provide depth and texture to the scene. during the exposure step to the side a little or keep the light close to the cave floor so the low rocks cast shadows.

Focus can be difficult. Set the camera for a smaller focal ratio, perhaps f/5.6 or f/8 to keep a good depth of field. Hold the flashlight on a feature well into the scene and focus on that. Some trial and error may be needed to get a good focus.

It can be fun too! When exploring the lower end of Thurston Lava Tube I was all set up with the camera and tripod when a group of kids arrived. Curious as to what I was doing I showed them. During the exposure I had the whole group wave their lights around as we all stood behind the camera. The kids were amazed when the photo appeared on the LCD display, they had no idea you could light up a cave and take a photo with a bunch of little flashlights.

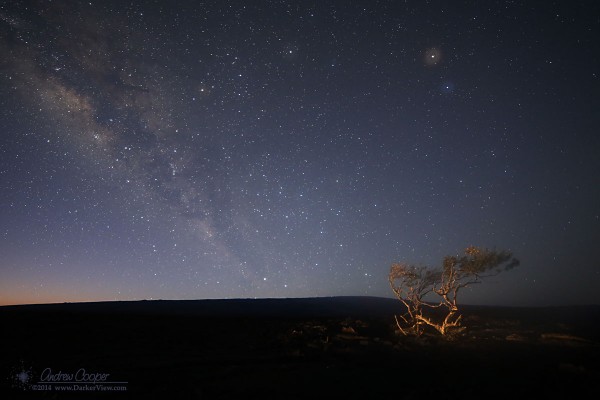
A Starry Dawn over Mauna Loa

A photograph of serendipity.

The photograph was planned… Somewhat. I knew there were some picturesque trees on the lava field along Saddle road. The plan was to shoot one of these trees silhouetted against the Milky Way and Mauna Loa. That was the plan. At least until the plan met reality.

Shot as planned the results were less than stellar. Actually they were rather boring. The rising summer Milky Way was spectacular, nothing else worked. The enormous bulk of Mauna Loa became a bump on the horizon from the low angle with the 14mm lens. The trees did not look like much against the dark.

Serendipity intervened… First a passing car lit the trees with dramatic results. Car headlights caught the trees at just the right angle to light up the right bits, a lucky bit of geometry and road alignment. Looking at the image on my screen I was intrigued… I repositioned the camera and shot again when another vehicle passed… This was working!

As I waited for other passing cars the shots deteriorated, odd glows across the frame. Were the headlights catching the big dome of glass at the front of the lens? Blocking the light from the headlights on the camera did not help. I pull out a flashlight to check the camera… Ack! The lens was fogging up!

Retrieving the anti-dew kit and a battery from the vehicle I secured a dew strap around the camera lens. At this point I wanted the shot and was willing to work for it. I was lucky again… I had thrown the dew gear in the car as a last moment afterthought.

It took time for the lens to warm and clear. As I waited dawn crept into the sky. I took a last few shots as the light increased and the stars faded. The dawn light added a nice shade of blue to the sky with a hint of peach to one side, another serendipitous bit that added to the photo. A last wisp of fog on the lens was just enough to create halos around Mars and the brighter stars.

Not a bad result! With a little skill and more than a little luck. The shot has been entered in the Hawai’i Photo Expo. Hopefully the jurors think the shot is as good as I think it is.

Milky Way Dawn over Mauna Loa
The rising summer Milky Way, Mars and dawn over Mauna Loa

Hawaiʻi Photo Expo

Just sent in my entries.

A contest for local photographers, the Hawaiʻi Photo Expo is a full juried competition. A local contest, but a decent one, the entries will hang in the Wailoa Center gallery for a few weeks.

I sent in three entries, including two of the starscape shots I took over the last month. The third shot is from last year’s expedition from Juneau to Anacortes.

My chances of winning? I think my entries are fairly strong. Looking through the archives of past winners I feel my images are as good as anything there. I should be competitive at least, the rest is up to the standards of the jurors.

There are still a few days left to enter, the deadline is March 16th. Have any really good photos?

Airglow or auroral glow?
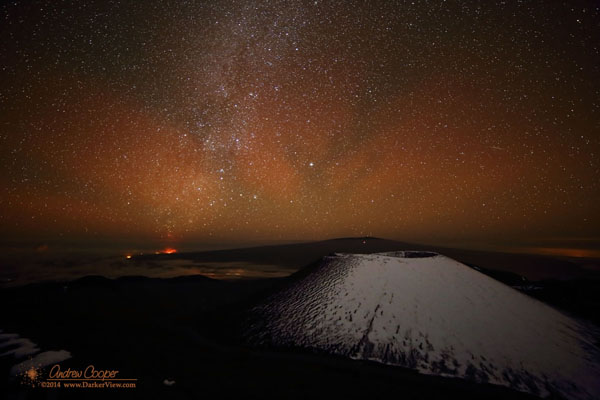
Airglow or auroral glow? An odd red glow in the photos during a strong geomagnetic storm.

Shootout at the Corral

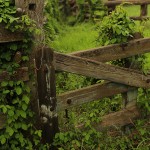
The corral is one of the relics of ranching that litter the Waimea countryside. Just a short detour off my daily commute, I have long noted the photo potential of the place. A foggy day offered an interesting opportunity to shoot the corral, enough that I missed my usual turn to take advantage of the even, subdued light offered by a grey afternoon.

Arriving I noted that recent rains had transformed the brown grass into a verdant green. Vines had appeared to cover the old fence posts in foliage. This was a good day to go shooting.

Photography is an art that has to be constantly practiced. You need to shoot, shoot some more, and critique the results with a stern eye. I have better gear than I have ever had, it helps. Still, the magic is up to the photographer, not the camera. A practiced eye, composition and creativity, any camera can shoot a great photo in the right hands.

I did get some good shots. But did I get any great shots? I am always my own worst critic.

Sending My First Takedown Notice

Occasionally I use the Google image search function to see if any of my photos are being used on other websites. Yes… It is something to do when insomnia strikes.

Earlier this month I found quite a few of my photos being used on an very obnoxious site. The same page also contained numerous images from the West Hawai’i Astronomy Club website. I will forgo including the URL or link here, no need providing them one more incoming referral. Suffice it to say that the entire website was constructed of stolen or scraped material, the sole purpose of which is to serve as search engine bait. Once on the website clicking on anything generated pop-ups, pop-unders, a slew of ads. This was not innocent infringement, this is a business built on theft of intellectual property.

A little sleuthing revealed that the site was located on a hosting service out of the Netherlands, WorldStream.nl. As this site is not within the US a DMCA takedown notice is not legally enforceable. However, European law is pretty good with respect to copyright, the hosting provider should take a notice of infringement seriously. Thus I sent an email off to the listed customer service address…

Continue reading “Sending My First Takedown Notice”

Staying Late at Work

The plan was simple. Stay on the summit after work to do some nighttime scenic photography.

I was hesitant in going up after suffering my recent ear infection. The ear is vastly better, no problems with clearing the ear for several days. After two weeks absence the list of things I needed to get done on the summit was getting lengthy and urgent. Yet I worried a bit about going up. An idea… Take my own vehicle. If I have trouble I can go at my own pace without holding up the rest of the guys. If the trouble is serious I can abort and head back down.

If I did bring my own vehicle I could get in a little photography along the way. I had not really had a chance to try out the Rokinon 14mm f/2.8 lens I had bought specifically for starry sky work. Why not stay late, watch sunset and take a few photos after dark? There is snow on the summit, the weather looked promising, the Moon would not rise until after 10pm, all good things.

The plan worked as envisioned. A good day getting stuff done. Actually a rather hectic day. The filter wheel problem of TRICK found and eliminated, the heater circuit at least looked at, I think the problem is still there. Warping data recorded for a segment in Keck 2 for the refurbishment project. Some wiring on TBAD completed, still more to do. An issue with the Keck 2 interlocks that popped up during the day was dealt with. Yes, a very good day.

A minimal dinner of instant ramen, and some paperwork accomplished while waiting for sunset.

Into the cold dark I go… The combination of the Canon 6D and the fast 14mm lens is impressive. This gear will really allow me to step up my game. I was able to shoot great material under very dark conditions. Photos that had been just out of reach for me until now. It will take me a couple days to go through and process the material, but a first look is very pleasing.

Only one problem… What is this red stuff showing up in my photos? Normal airglow is green, but this is crimson red and has very distinct structure? The idea of aurora crosses my mind, almost immediately dismissed as I am standing at 20°N latitude. I step away from the camera and the light for a bit. With some effort I can convince myself that I am seeing red in the sky, at least in the darker areas away from the Milky Way. But it is fleeting, and perhaps just an overactive desire to see something.

I get home and just out of curiosity I check the planetary Kp index… What?!? We have a Kp=6 geomagnetic storm in progress! Beautiful aurora photos are being posted from the upper midwest. Reports of aurora from across much of the United States. There is certainly a dramatic storm in progress. Perhaps this is a low latitude auroral glow!

There are some references to auroral glows detected at all latitudes during strong geomagnetic storms. Is this what my camera is detecting?

It is a nice photo. You can see the glow from the lava lake at Halemaʻumaʻu, the winter Milky Way, and a research laser shining straight up from the atmospheric lab atop Mauna Loa.

Airglow or auroral glow?
Airglow or auroral glow? An odd red glow in the photos during a strong geomagnetic storm.

Getting Focus Right

Focus is one of the most frustrating problems when shooting in the dark. The number of astrophotos ruined by poor focus is legion. Worse, the problem is often not found until afterwards, when hours of effort have been wasted. Very slight errors in focus can spoil an otherwise great photo.

Taking photos in the dark creates a situation where the normal solutions do not work… Autofocus simply will not operate without enough light. Taking the lens off and attaching the camera to a telescope results in a completely manual focus. Simply focusing through the viewfinder is not accurate enough.

Bahtinov Mask
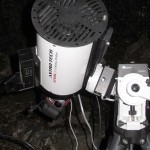
A Bahtinov focusing mask in use on the front of the AT6RC telescope
The simplest method of focusing in the dark is to use the live view feature of the camera. By placing a bright star or distant streetlight in the view and magnifying you can achieve a reasonably good focus much of the time. This is not perfect, even the magnified image is a little mushy near ideal focus, making perfect focus difficult to judge. If you find yourself in an after-dark situation, without any special equipment along, this is the method to use.

Do remember to switch off the autofocus feature of your lens. Once you get focus set correctly you do not want to lose it the moment you touch the shutter button. Not that I have ever done that… Never? Well, perhaps maybe.

Continue reading “Getting Focus Right”

Capturing the Mountian Shadow

A high quality pan-tilt-zoom camera on the roof of the observatory at an altitude of 13,630ft? Just too much fun. I have found myself logging into the camera at sunset to enjoy the view, or keeping the video in the corner of my screen through a Hawaiian blizzard. I have even forwarded images to a local television station when they requested views of a white Christmas in Hawaiʻi. Yes, they used them for the evening news!

Weather Mast
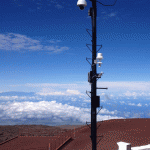
The Keck weather mast with a sonic anemometer at top, MastCam, and the housings for the temperature, humidity and barometric pressure sensors.
This camera can do more… The camera is an Axis Q6044-E dome style security camera. The camera contains a small Linux computer with a huge array of scripting and control options. Combined with a 720p HD camera, reasonably decent optics, and an accurate PTZ mechanism the camera is quite capable.

To make the best of this wonderful toy I need some tools. To that end several Python programs have been written, including a camera scheduler. This program takes a text file with a schedule and captures images at the programmed time and date. All of this was easy to implement in Python, all of the necessary ‘net protocol support is available in the libraries.

The schedule file can contain any number of separate schedules for multiple sequences. At the specified time the program insures the camera is set properly, moves the camera to the correct position and captures the image. Each sequence is saved to a unique directory and given a sequential name suitable for compiling time lapse video. Add a simple GUI to allow images and status to be monitored and the program becomes a very useful tool.

There are now multiple sequences running… Photos of the summit ridge at each sunset, the shadow of the GPS antenna every day at noon, the Kohala mountain every day mid-morning, the TMT construction site several times a day, and more.

Continue reading “Capturing the Mountian Shadow”

A Flooded Camera

When diving with a camera you understand the situation…  It is not a question of if you flood the camera, it is a question of when you flood the camera.

Pipe Dreams
The author diving the intake pipes at OTEC, photo by Pete Tucker
Yes, I flooded a camera this weekend.

Just 15-20ft down on a dive off the old Kona airport, I went to turn the camera on and saw something that made my heart miss a beat.  The camera case was half full of water.  Nooooo!

As we were just starting the dive I popped to the surface and drained the case.  I knew that the damage was already done, salt water and electro-optics simply do not mix. Re-seating the rear hatch I dive again, the leak has stopped.

Continuing the dive without a camera was painful. I dive to shoot, not being able to take photos takes the color out of the dive. At least nothing special wandered by, no 14ft tiger shark or underwater humpback sighting, that would have been excruciating.

The leak appeared to be on the rear hatch, I could see a trickle originating on the top right corner. Some small debris in the seal? A slight kink in seating the seal. Later examination shows nothing wrong, I will probably never know.

The memory card appears to be just fine, I read out the few shots that were on it.  This includes the photo of the folks drying coffee on the old runway.  I simply marked the card so I know which one it was in case there are questions about the reliability later.  The camera battery also appears to have survived the immersion, need to use it a through a couple cycles to be sure.

Otherwise the camera is an expensive desk ornament.

As Pete said after the dive… “Insert $400 to play again.”

Fortunately there is EBay… Inserting a mere $200 has a used G12 on it’s way for me to play again.  It appears the the G12 is old enough that used cameras are very available and the prices are falling.  I may want to pick up another one.  This is why I use a few hundred dollar camera underwater, not a few thousand dollar camera, it will happen again.  In the meantime Pete is currently assembling a Canon 5D MkII underwater rig.  Not me.