Category: Photography
Tools
Workshop
Abandoned
Aurora Borealis
This trip to Alaska offered an opportunity that I had not experienced on previous trips due to the confluence of two conditions… I would be visiting later in the year than usual, it would actually get properly dark. When visiting Southeast Alaska in June and July the amount of darkness is dramatically limited by long summer days. The second condition is even less easily arranged… Our Sun is near the peak of its eleven year solar cycle. This results in more solar activity including large sunspots and energetic solar flares.
Put the two of these factors together and there is a good possibility of seeing the Aurora Borealis.
It is only a possibility, not a certainty by any measure… This was not a trip to the far north, where the auroral circle usual sits. If one were to travel north of Fairbanks into the true arctic one is almost guaranteed to see the aurora during solar max. I would be traveling between Juneau and Anacortes, from 58 to 48 degrees north latitude. At these latitudes it would take a strong geomagnetic storm to bring the aurora south into view. The chances of such a strong storm were relatively good, we are currently experiencing an active Sun near solar maximum, averaging a decent storm every month or two. In any case the odds were a bit better than seeing the aurora at home in Hawai’i.
At least there would be no light pollution to deal with, significant outposts of civilization are sparse along the route we would be traveling. One complication would be weather… Of the twenty days I would spend in northerly latitudes, about half were clouded over, thus the odds of seeing a good auroral display were modest, maybe even unlikely.
We got lucky.
Inside Passage
It took 3 hours to fly to Juneau, it took 18 days to get back.
The video is done. Shot with a Canon 60D, a Canon G11 and an iPad, the video documents the voyage from Juneau to Anacortes I took last month. Bears, whales, dolphins, and a whole lot of water. It was a great trip, I can only hope I convey a little of the experience in the video.
Compressing 1,800+ photos and dozens of video clips to three minutes is an interesting exercise. This is compounded by the thousands of timelapse exposures that needed to be assembled. It went surprisingly quickly this time, a mere three evenings of work. (As long as you classify evening as getting to bed before 2am.) Either I am getting better with the tools, or I just got lucky when it came to fitting the thing together.
I have produced several videos about these voyages by boat through the wilds of the Pacific Northwest. How do you keep each video from looking just like the last? This time I changed it up stylistically, opting for a much more driving soundtrack coupled with the frenetic pace of timelapse.
Does it work? I will await your judgement.
Inside Passage from Andrew Cooper on Vimeo.
Life of a Photo
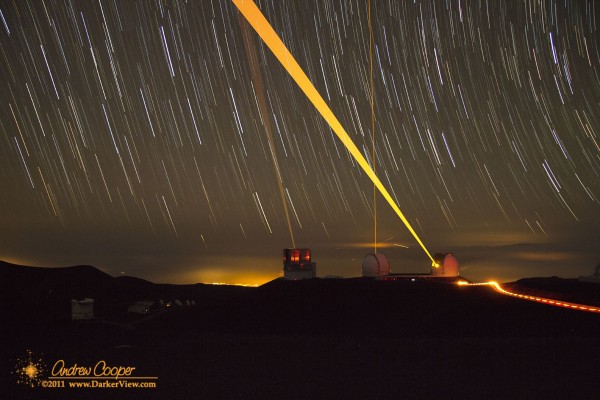
It took ninety minutes of sitting in the cold to get the shot. Every minute the camera took another exposure. Sitting on the summit ridge overlooking Keck, it was a very dark night with three lasers working the sky, Keck 1, Keck 2 and Subaru. The tripod was set up as close to the vehicle as I could get it to shelter the camera from the wind. Ninety minutes of shivering in the front seat of the truck, playing cribbage on my phone, and fervently hoping that the gusting wind was not shaking the camera enough to destroy the images.
The result was ninety frames on the memory card. When downloading the material I knew that my time spent in the cold at fourteen thousand feet had been worth it.
Material like this can be used a couple different ways. You can stack the images together to create a single shot equivalent to one exposure 90 minutes long. Taking single long exposures is problematic on a digital camera, a leakage signal called dark current will swamp the image. Better to take many short exposures and add them together in processing.
You can also play the images sequentially, creating a few seconds of video. In this case I assembled all ninety images as nine seconds of video when played at ten frames per second.
I found that the best single frame was assembled from only 23 of the original images. Keck 2 changed targets during the session, creating a confusion of beams over the telescopes when I added all ninety images. The 23 frame version is the definitive version that has been widely distributed. During this slice of time the Keck 2 laser was aimed at the galactic center in Sagittarius, the beam aimed right over me and the camera.
I released the photo as a PR photo for Keck, only fair as I had been on the mountain to work that night, taking the photo before driving down from the summit in a Keck vehicle. The PR folks have used the photo for a number of press releases and observatory literature including the 2011 annual report. You can even download it from the Keck website photo collection.
This particular photo can now be found on websites across the net, has been featured in the Honolulu Daily Star, West Hawai’i Today and other local papers. It has also been used for numerous professional presentations by Keck affiliated astronomers and staff.
I understand that this month it is in Hana Hou! the inflight magazine for Hawaiian Airlines. (Somebody get me a copy. Please! I am not flying anywhere in the next month.) Not the first magazine appearance, you can also find the shot in an issue of Astronomy magazine.
It can be a lot of fun seeing an image I created become something of an iconic image of the observatory.
Using the Nifty Fifty
Some photo instructors advocate using only a fifty millimeter fixed focal length lens as a creative exercise. A nice idea for an exercise, but I really did not want to do this while on an extended trip along the Alaskan and British Columbia coast by boat.
Looking to pack light I had taken only three lenses to accompany the Canon 60D that would travel with me. This set included a Canon EF-S 17-85mm f/4-5.6 IS USM Lens, a 70-200mm f/4 L series telephoto, and a 50mm f/1.8. The 50mm was almost left behind, I grabbed it on a whim while packing realizing that it took up very little room.
It was a few days into the trip when trouble appeared. I began to get occasional errors when using the 17-85mm, the camera complaining about a lens communication error. After a day this became a serious issue, the camera refusing to take photos with the lens. The other lenses worked fine, thus I was sure the trouble was in the lens, not the camera.
A couple more days and even that solution failed, the lens just jammed up entirely, with the aperture stop about halfway closed.
I was down to the the telephoto and the 50mm… Time to get creative.
The 50mm lens is interesting. It is small. It feels like you have forgotten to put a lens on the camera. It is sharp! The lens may be the cheapest lens Canon sells, just over $100, but there is nothing to complain about in the performance, crisp and sharp photos from corner to corner. It is fast. The very fast f/1.8 ratio allows for photos in low light conditions as well as providing a wonderfully shallow depth of field when you want it.
I did have my little Canon G11 along, giving me some capability with a zoom lens. But I really wanted to shoot with the DSLR and the higher photo quality offered by the big lens and larger sensor when the photo really mattered.
On an APS-C camera like the Canon 60D there is a 60% crop factor, converting a 50mm to a mild telephoto. With a fixed focus I had to control the field through positioning myself instead of adjusting the camera. I do wonder if I got better shots as I had to become more involved and plan the shot?
I did take some great shots with the 50mm. Going through the 1,800+ photographs from the cruise I am quite happy with a number of them. An unintentional creative exercise, but a successful one.
Carnival
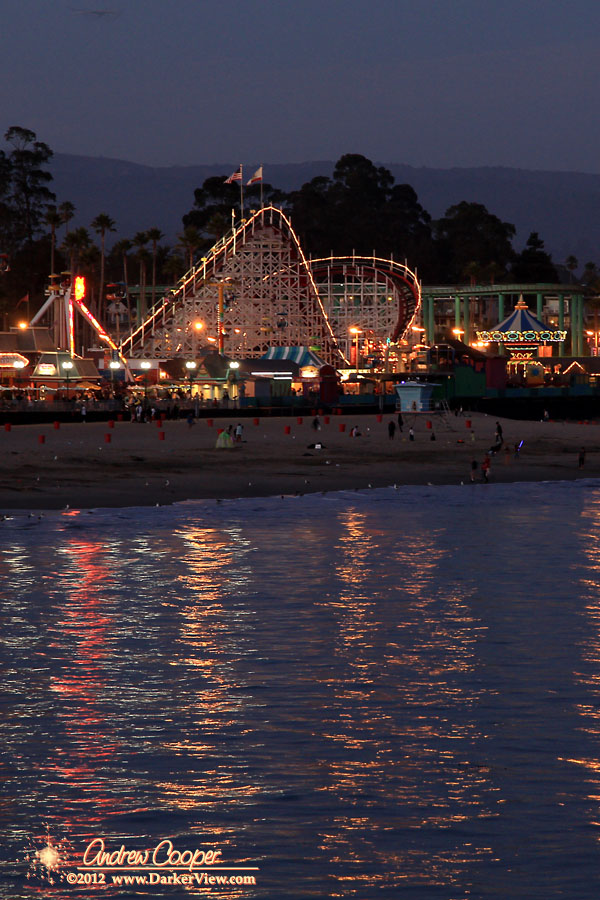
This was no run down operation, hanging on to faded glory. The rides and buildings were all in good repair, all of the bulbs lit, with fresh paint and empty trash bins. Even on a weekday night there were lines at many rides, screams and cheers echoing through the night air.
Miniature Effect
What to do while waiting for your plane? Fiddle with the camera?
My camera was already in-hand and I had almost an hour to wait for boarding. I may as well explore some of the little used functions and hidden menus the camera has to offer. Thus I took a few photos of a plane debarking and boarding on the open flightline of the Kona airport, playing with the camera settings. I didn’t realize just how much photos of a jet taken in black and white really do conjure up memories of vintage jet travel in the 60’s.
The miniature effect is just a bit of photographic fun. Something that can be used quite creatively in the right circumstance. I have been aware of the effect for some time, recently I had come across the effect in a number of online photos, and some great timelapse videos.

