The Great Nebula of Orion is a beautiful object, the brightest nebulae in the sky. It is also quite easy to photograph, making it somewhat of a standard target. I, like many astrophotographers, use the nebula as something of calibration target to check new equipment and processes.
This shot was taken with a Canon 6D and a TV-76mm telescope, a combination I want to work with this summer. I also changed up my processing flow a bit, re-ordering the steps, to achieve better calibration. The result is a more neutral color tone in the original, I can then saturate the image to taste for display or printing. Th original might be a bit closer to true color. Of course, “true color” is a bit of an illusion in astrophotography, where everything is relative.
M42, The Orion Nebula, Canon 6D and TV-76mm, 16x240s+10x60s+10x15s @ISO6400
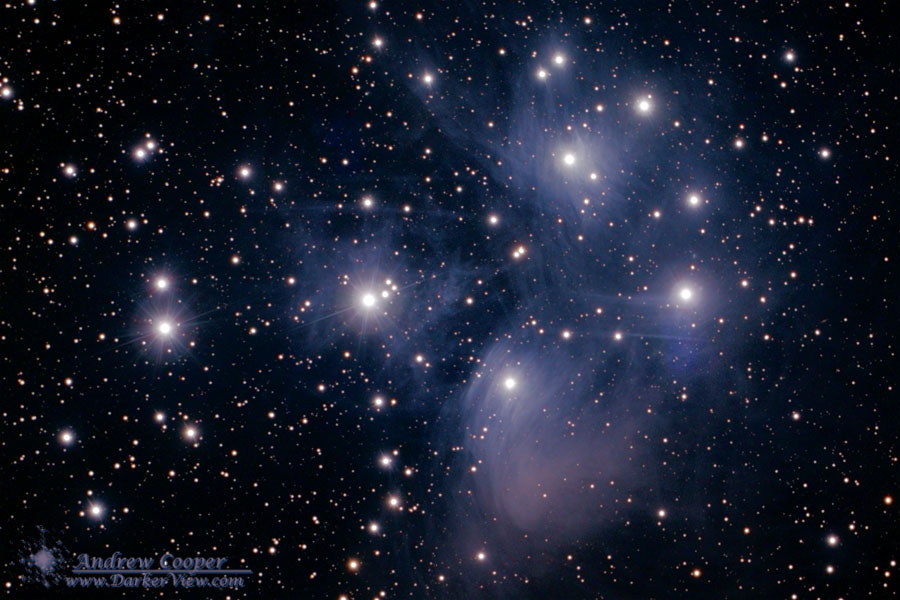
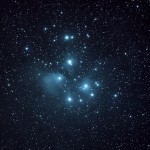
The Pleiades were not my primary target for the night, but that was setting and I was in no hurry to shut the gear down when there was a lot of dark remaining in the night. I glanced around the sky looking for a target appropriate for the field of view of the gear and just chanced to look at the star cluster.
Perfect…
The Pleiades, M45, a sum of 26 x 100s luminance frames and 5 x 100s RGB images assembled as an LRGB image, ST2K and 80mm APO
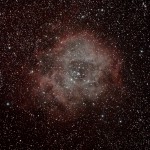
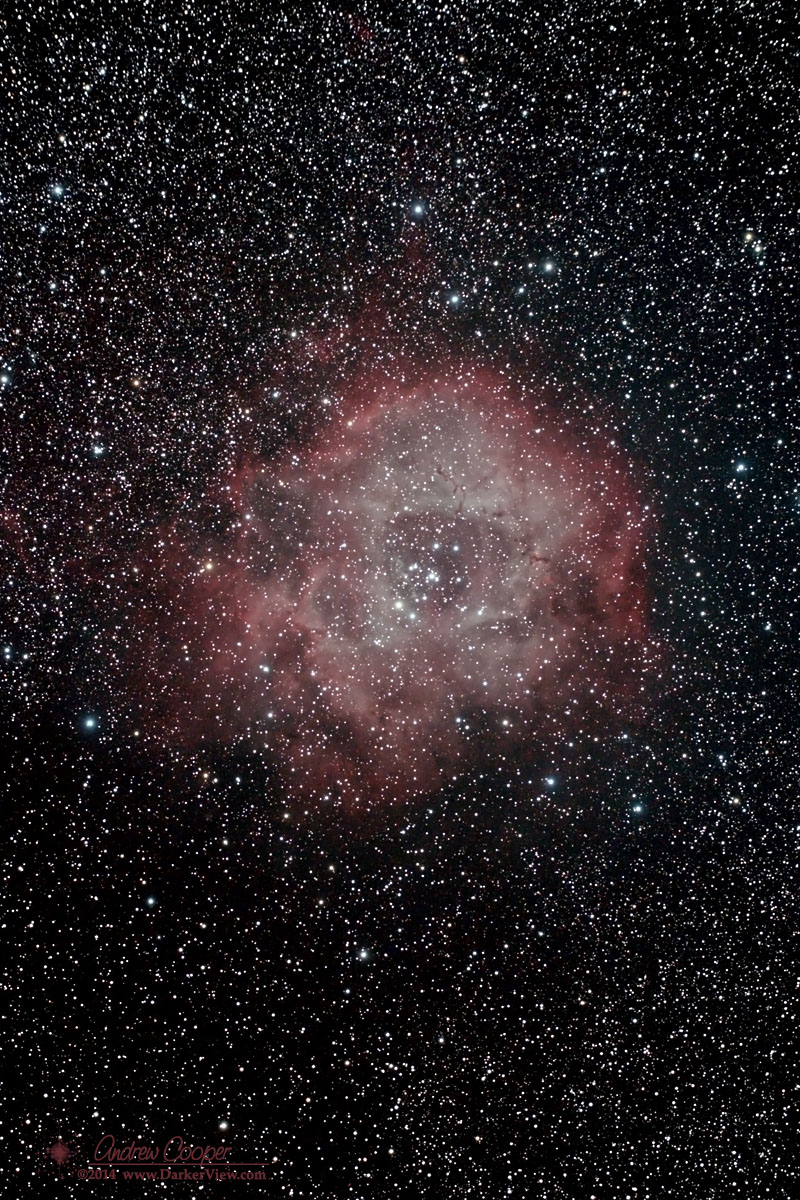
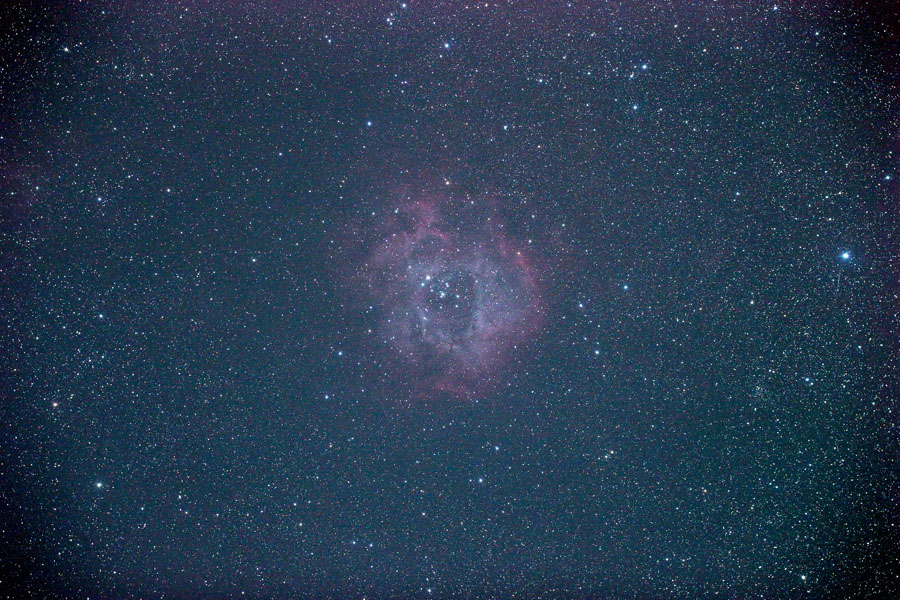
For my first pass on the Rosette I used about an hour of data. Ten four minute exposures, ten one minute exposures and ten 15 second exposures. The stack is designed to capture a wide dynamic range by using several different exposure lengths. Multiple images taken at each exposure to reduce the noise inherent in long exposure astrophotgraphy. All of this data is aligned and stacked to produce the final image.
The first pass at the Rosette nebula with one hour of data, 10x240s+10x60s+10x15s @ISO6400When looking at the result it was apparent that I had not been successful in reducing the noise far enough. More exposure time was needed. The shorter exposures were not the problem, I needed more of the longer four minute exposures to reach the faint nebulosity.
The next night I acquired and shot again, another 24 exposures on the Rosette, another 1.6 hours of exposure. A planned astrophoto outing to the MKVIS at 9,200ft elevation offered a chance to get even more high quality exposures. This time I got 30 more exposures, another two hours of total exposure time.
Combining all 3.8 hours of exposure resulted in a notably nicer image. The noise in the fainter sections of the image is pleasantly reduced. It should be with 54 four minute exposures used.
I need to do some sort of systematic comparison of the data gathered in my driveway versus the data obtained at the MKVIS up on the mountain. Having a series of exposures taken with the same gear, on the same target, and at the same time of night just a few days apart should allow a reasonable comparison. I was unable to expose any longer at the VIS despite the colder temperatures (the camera was about 10°C colder). How much better is the VIS? Can I get data nearly as good without packing up the gear and heading up the mountain?
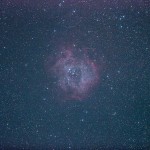
The Rosette Nebula, NGC2237, NGC2238, NGC2244, NGC2246, Canon 6D and TV-76mm, 54x240s+10x60s+10x15s @ISO6400
The plan was to do some astrophotography Saturday night. The weather forecast forced a re-schedule, a winter storm arriving Saturday afternoon, Friday it was to be.
The Pleiades, M45, with the Canon 6D and TV-76mmThe timing proved to be excellent, Mauna Kea providing glorious skies Friday night. Clouds hovered over the side of the mountain on arrival, but there was no worry. These were the sort of clouds that would vanish with the daylight. Anxious tourists wanting to see through the telescopes repeated the same question, will the clouds go away? I answered the questions with the relaxed assurance of experience of years on Mauna Kea, and continued to set up the gear. The clouds didn’t even last as long as I expected, dissipating as the sun settled into the horizon.
Setting up at the Mauna Kea VIS means a crowd of people. Hundreds of tourists that have come to enjoy a dark Mauna Kea Sky. I was joined by Raymond, a Hilo amateur also looking to take some photos. We setup side by side in a parking space just off the patio where the VIS was setting up their telescopes for the night. We would be in the center of the crowd for a while.
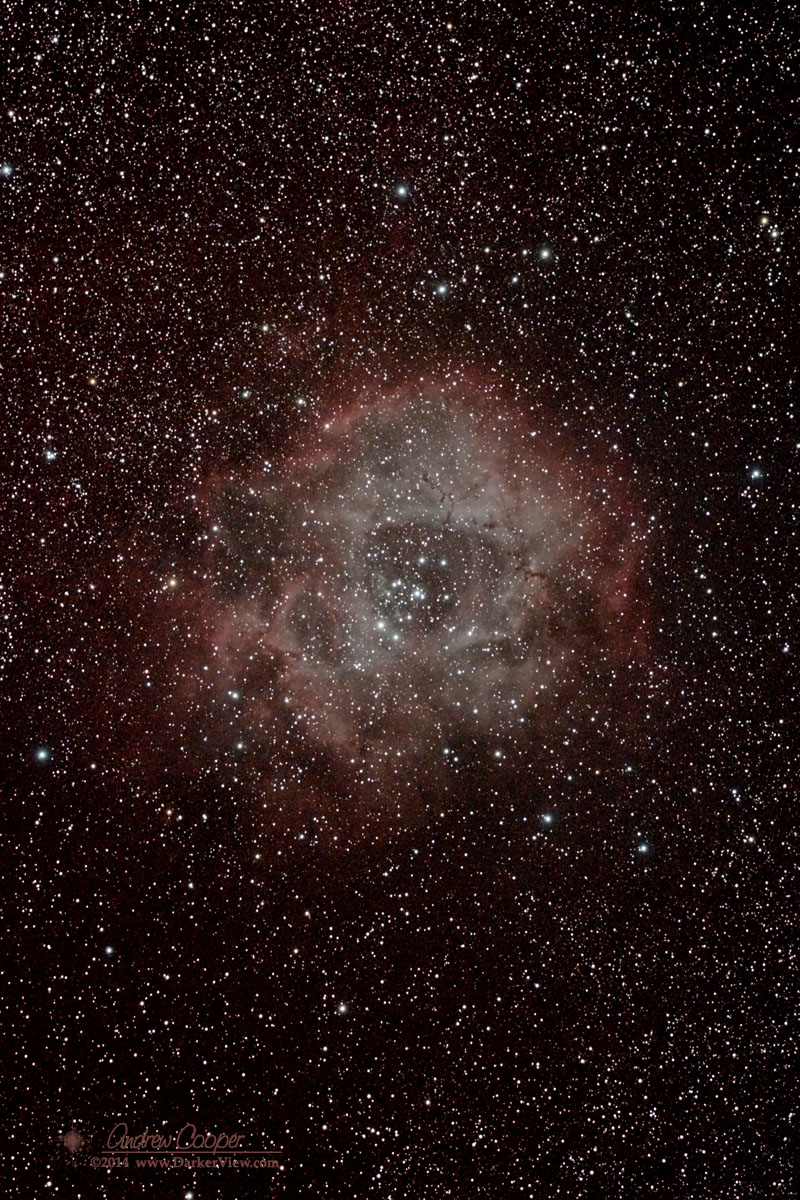
A result from Saturday night. About an hour of integration all told… Good color, very nice stars, good detail. While encouraging, I really need more time on this one, there is too much noise in the fainter regions of the nebula. I can get more data and add it to the stack to continue to improve the result. From up on the mountain I should be able to use longer exposures with darker skies. Colder conditions will reduce the dark current in the camera, also aiding in longer exposures.
A single unprocessed subframe of the Rosette Nebula, Canon 6D and TV-76mm, 240s @ ISO6400Compare the processed shot with the single subframe I published yesterday. The final shot is a stack of 10 x 4min, 10 x 1min, and 10 x 15s frames, 30 frames for just under an hour of exposure. Also needed is another 10 x 240s dark frames and 10 flat field frames to use for calibration. This takes another hour, but was done after the telescope was rolled back into the garage and I went to bed.
The Rosette Nebula is a large star forming region just east of Orion in the constellation of Monocerus. It is quite large, the main body seen in the photograph is well over a degree across. The dark region in the center is about the size of the Full Moon
The Rosette Nebula, NGC2237, NGC2238, NGC2244, NGC2246, Canon 6D and TV-76mm, 10x240s+10x60s+10x15s @ISO6400
A single unprocessed subframe of the Rosette Nebula, Canon 6D and TV-76mm, 240s @ ISO6400After solving the little equipment issues, waiting out weeks of bad weather and waiting for the Moon to go away, I finally had a nice photographic night. Setting up at sunset I shot until the Moon rose. Most of the targets I have shot before, Orion, Rosette, Markarian’s Chain. I also shot Melotte 111, an object that has always intrigued me. The full frame camera and the TV-76 has a wide enough field to capture this very large and nearby star cluster.
I want to use this combination camera and telescope with a very wide field to work over the dark nebulae of the Summer Milky Way. With 384mm focal length the full frame camera gives me over 5.35° x 3.56° field of view. The beehive also lent itself to the wide field, another large object that was worth a stop to shoot.
Aside from one little equipment issue to start, more an operator education issue, the gear worked great. Note to self… Must turn off camera WiFi before the camera will link to the computer via USB. I am currently using APT to control the camera, a very impressive bit of software. The auto-guider worked perfectly, frame after frame nearly identical. I can slideshow through dozens of sub-frames and not see any difference, no drift!
A single sub-frame of the Rosette Nebula is shown to the right. The Rosette is an emission nebula with most of the light emitted at the wavelength of Hα 656.28 nm. My Canon 6D is stock, no astrophoto modifications. Despite an IR cutoff filter that blocks much of the Hα light the camera captures a fair amount of the nebula. Perhaps I should get a 48mm Hα filter for the camera to shoot from the driveway.
With everything working so well I really need to haul the rig up to Hale Pohaku for a night of imaging under darker skies than I get down at 1000ft. Next weekend is dark-of-the-Moon weekend. Need to plan an outing?
It will take a bit to process the results of the night. As usual, keep an eye here on Darker View for the finished photos.
Focus is one of the most frustrating problems when shooting in the dark. The number of astrophotos ruined by poor focus is legion. Worse, the problem is often not found until afterwards, when hours of effort have been wasted. Very slight errors in focus can spoil an otherwise great photo.
Taking photos in the dark creates a situation where the normal solutions do not work… Autofocus simply will not operate without enough light. Taking the lens off and attaching the camera to a telescope results in a completely manual focus. Simply focusing through the viewfinder is not accurate enough.
A Bahtinov focusing mask in use on the front of the AT6RC telescopeThe simplest method of focusing in the dark is to use the live view feature of the camera. By placing a bright star or distant streetlight in the view and magnifying you can achieve a reasonably good focus much of the time. This is not perfect, even the magnified image is a little mushy near ideal focus, making perfect focus difficult to judge. If you find yourself in an after-dark situation, without any special equipment along, this is the method to use.
Do remember to switch off the autofocus feature of your lens. Once you get focus set correctly you do not want to lose it the moment you touch the shutter button. Not that I have ever done that… Never? Well, perhaps maybe.
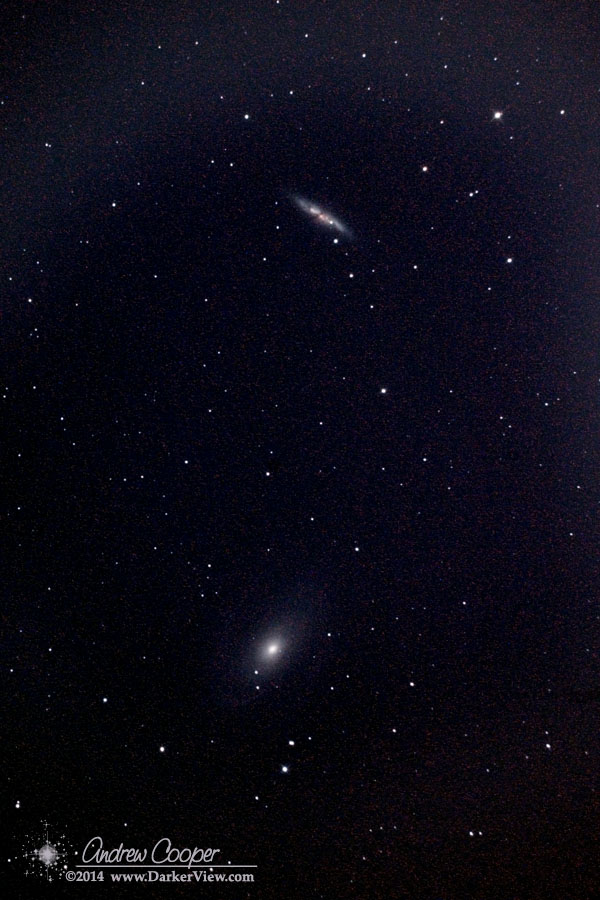
The brightest nearby supernova in may years is currently visible in the bright galaxy M82. I did want to photograph the supernova before it fades much more. It apparently reached a maximum brightness of magnitude 10.5 a few days ago and is starting to dim. But has so far only slid a few tenths of a magnitude.
So I tried to photograph a supernova, and Murphy came to visit.
The last week has seen me dealing with a sinus infection, which combined with terrible weather has kept me from setting up in the driveway for photography. Taking advantage of a few clear hours last night I did make an attempt. Things continued to go wrong.
A high thin haze would not go away, lit up by the light of a bright quarter moon it created high background and gradients in the imagery that would not calibrate out. I forgot to install the LPS filter, meaning that the low pressure sodium lighting of the village compounded the moonlight in creating a poor signal to noise and bad gradients. The autoguider would not behave. This was eventually solved by adjusting the tuning parameters in PHD guide. Not before ruining most of my exposures, I ended up throwing out 24 of 32 exposures. When I did get everything figured out and corrected, and the Moon had fianlly set, the clouds rolled back in.
The final eight usable exposures did result in a somewhat acceptable final product. It could have been so much better…
The galaxies M81 & M82 with SN2014J seen in the disk M82 at top
Another little lesson in astrophotography, one more in a very lengthy list… Do not use too short an exposure with the flat source.
Flat frames are used to calibrate out any uneven field illumination or dust in the field. This ever more important with the new camera, the larger, full frame sensor shows some vignetting at the corners. I use an electroluminescent source to do my flat frames, actually an old laptop back-light that has been re-housed in an acrylic frame. It provides an even illumination across the aperture of the telescope or lens I am using to acquire the flat field calibration frames.
A bad flat field taken at 1/4000 sec with the EL back-light flicker interacting with the camera shutterWhat I have discovered is that the EL backlight flickers. This is too fast to see with the eye, but if the camera exposure is fast enough it will create issues. This shows up as horizontal structure across the field as the flicker interacts with the camera shutter.
I discovered the effect as I took flats the first time with the Canon 6D. I had the ISO set to 6400 which resulted in a 1/4000 sec exposure. Fortunately I looked at the last flat and saw the problem before I dismounted the camera from the telescope, it was pretty obvious. Once the optical setup is disturbed it is not possible to re-shoot the calibration frames.
A proper flat field calibration frame, Canon 6D and AT6RC telescope.It took a few seconds of thought to realize what the problem was. I never realized an EL light flickers, or rather I had never thought about it. Given that EL lights are driven with a high voltage switching power supply, flicker should be expected. The switching frequency of the supply should be above the human threshold of hearing to avoid an annoying whine, at least 20kHz. It can not be too much higher than that or it would not have shown up in a 1/4000 second exposure.
Slowing the camera down removes the effect. As I could not change the aperture I simply reduced the ISO to minimum, this slowed the shutter speed to 1/15 of a second for the nice mid-scale exposure needed for flats.
The corrected flats reveal the usual things that a flat is takes to correct. The dark corners reveal the expected uneven field illumination. the dust doughnut reveals at least one notable speck of dust on the cover glass of the sensor. There is a dark band at the bottom of the frame which I believe to be shadowing from the edge of the mirror. Looking at the flat I realize I will need to be conscientious about taking flats with the Canon 6D.
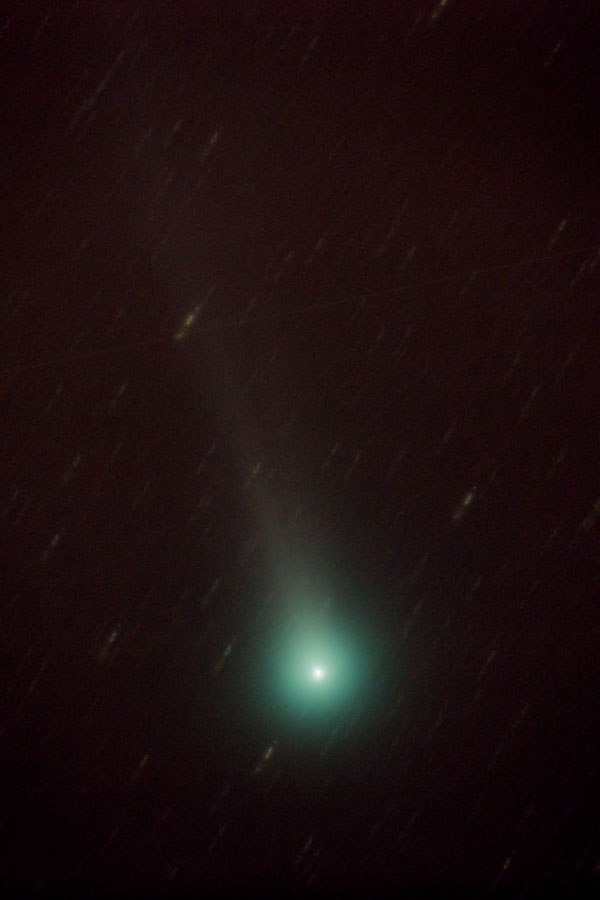
I had set the alarm clock for 0230 to get up with plenty of time to setup and take comet photos. What greeted me was a sheet of cloud, an all to familiar sight lately. I did not reset the alarm and went back to sleep. A couple hours later I found myself lying awake again, realizing I would probably not fall back to sleep I got up to look outside. To my surprise Orion shown brightly over the street.
Is there enough time to setup and shoot before dawn?
I rushed the alignment, hoping to setup in less than half an hour. Things did not go smoothly… The EOS utility in the computer did not recognize the 6D, I need to update the drivers. A thin cloud stubbornly sat in front of Polaris, I think I got the polar alignment, the star was very dim on the polar ‘scope. Even when exposures seemed to be going smoothly I they were not. I find out later the auto-guider had moved itself to a hot pixel, probably when a bit of cloud passed through. In the rush I did not get a dark frame for the guider, most of the frames show small guide errors.
One not so bad bit of serendipity… The Hubble Space Telescope went right through one of the frames.
Despite all I did get an image of the comet. It should have been better, rushing astrophotography is not a good plan…
Comet C/2013 R1 Lovejoy on Nov 15, 2013. Canon 6D with the AT6RC and a 0.8x focal reducer. 12 x 60s at ISO 6400.