Hodgepodge
When you want to see the stars, find someplace dark

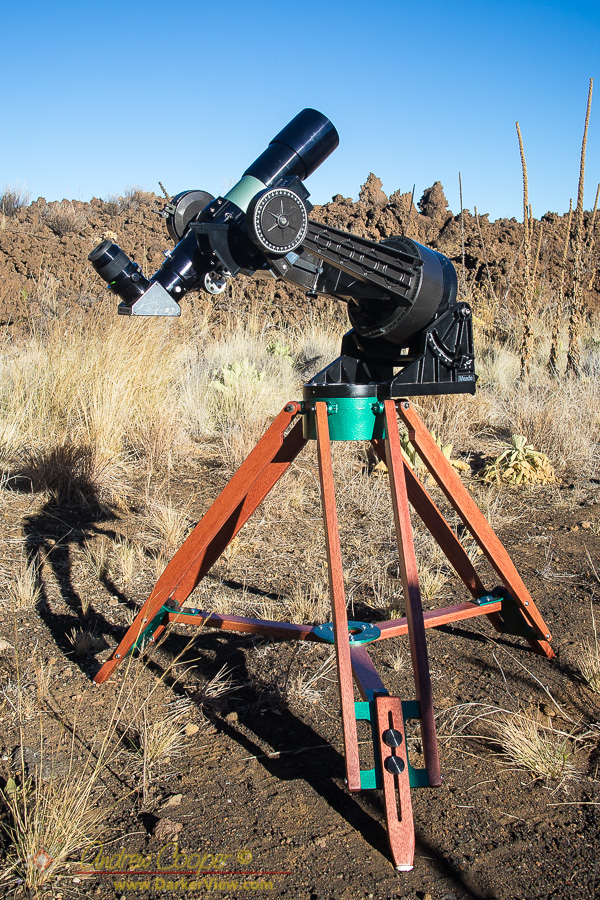
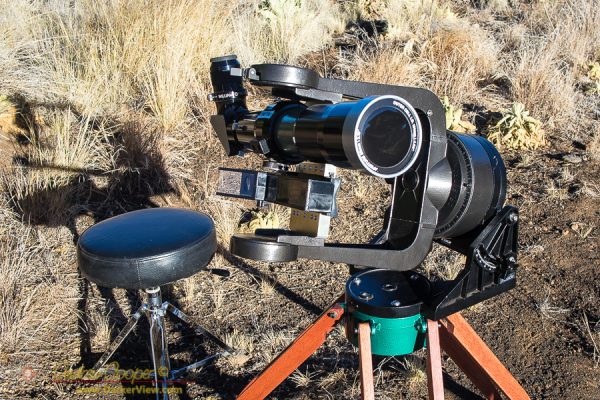
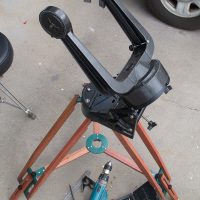
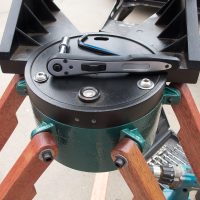
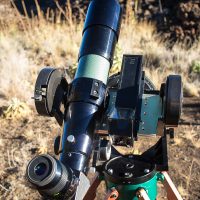
In the end it is a Celestron C8 telescope drive and forks containing custom electronics, a Meade heavy duty wedge from an LX-90, a hand-made tripod, holding a Televue 76mm APO telescope, using a Vixen style dovetail base, with a Baader film solar filter.
It is tempting to call it Frankenscope after the similarities with the classic monster.
To further add the the Mary Shelley plot similarities, much of this was revived from the junk pile. I very nearly decided to toss the drive and fork, they were that bad, peeling paint and rusty bolts. A great deal of work was necessary to re-animate these components.
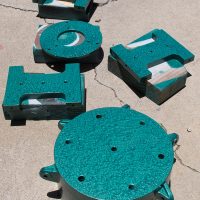
The wedge came from a telescope that was killed in an unfortunate incident with an aquarium heater. The heater was used to de-humidify the OTA and prevent fungus on the optics. Note: Aquarium heaters are not made to operate out of water.
Several new aluminum parts were machined from scraps, some of which were scavenged when the observatory shop was being cleaned out and a lot of metal stock was tossed.
Many of the electronic components used to build the drive corrector were also scavenged parts from dead electronics, this includes the 1.8432MHz crystal that forms it’s beating heart. This heartbeat keeps the mount turning at exactly sidereal rate.
Yeah, you could call it Frankenscope.
But I will call it Hodgepodge.
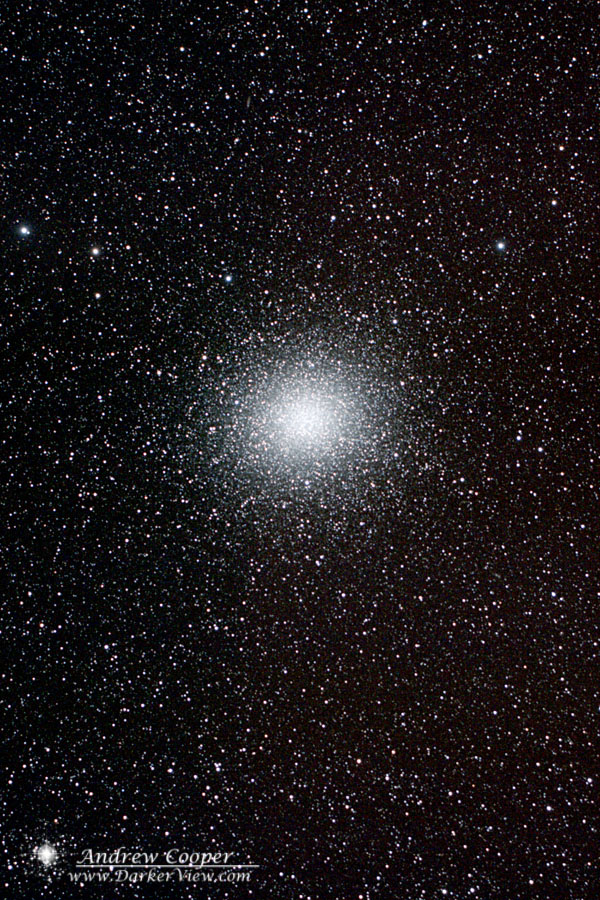
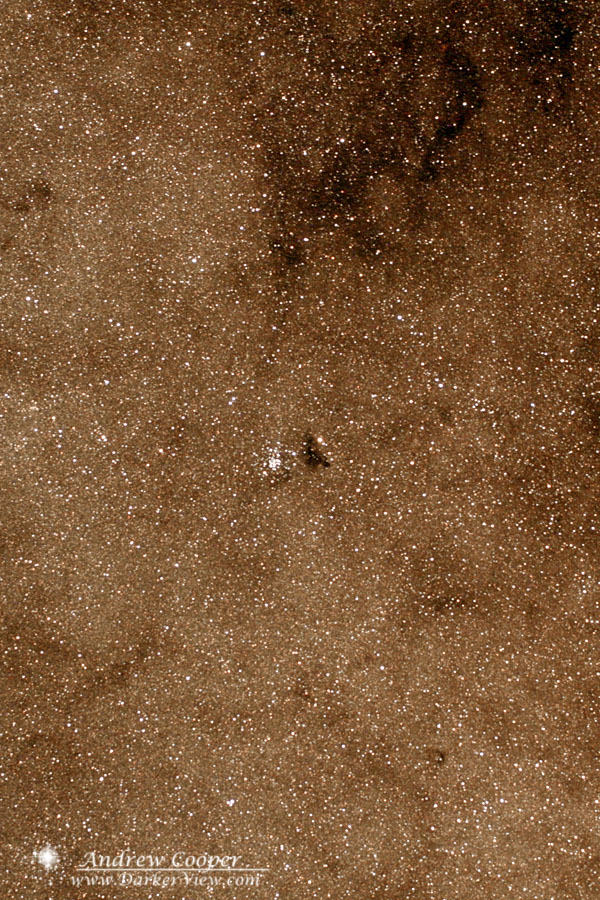
A frame filled with stars beyond counting while looking into a small part of the core of our Milky Way galaxy. This area of the sky is endlessly entrancing as you see the immensity of our galaxy demonstrated in a very dramatic fashion.
At the center is the small star cluster NGC6520 and the dark nebula B86. These two create one of my favorite showpiece views when viewing from a dark site with a large telescope. Even many people who have done a fair amount of observing have never looked at a dark nebula before. A great object to select when other telescopes are showing the usual stuff.
The photo is the sum of five separate five minute exposures with the Canon 20Da and a TV-76mm telescope. Taken from my driveway in Waikoloa the image is about two degrees (four times the width of the full Moon) from top to bottom.
A good night in the driveway last night.
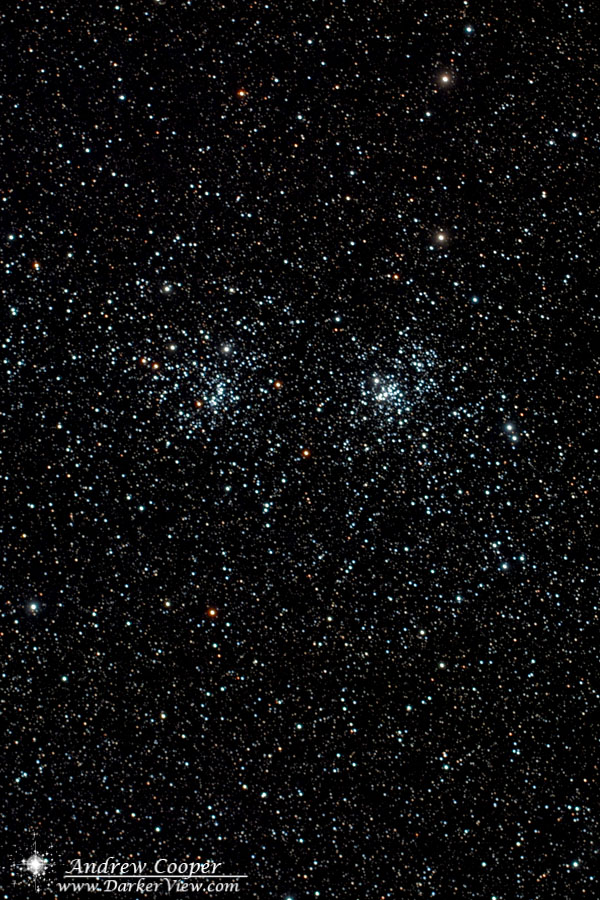
I want to use this combination camera and telescope with a very wide field to work over the dark nebulae of the Summer Milky Way. With 384mm focal length the full frame camera gives me over 5.35° x 3.56° field of view. The beehive also lent itself to the wide field, another large object that was worth a stop to shoot.
Aside from one little equipment issue to start, more an operator education issue, the gear worked great. Note to self… Must turn off camera WiFi before the camera will link to the computer via USB. I am currently using APT to control the camera, a very impressive bit of software. The auto-guider worked perfectly, frame after frame nearly identical. I can slideshow through dozens of sub-frames and not see any difference, no drift!
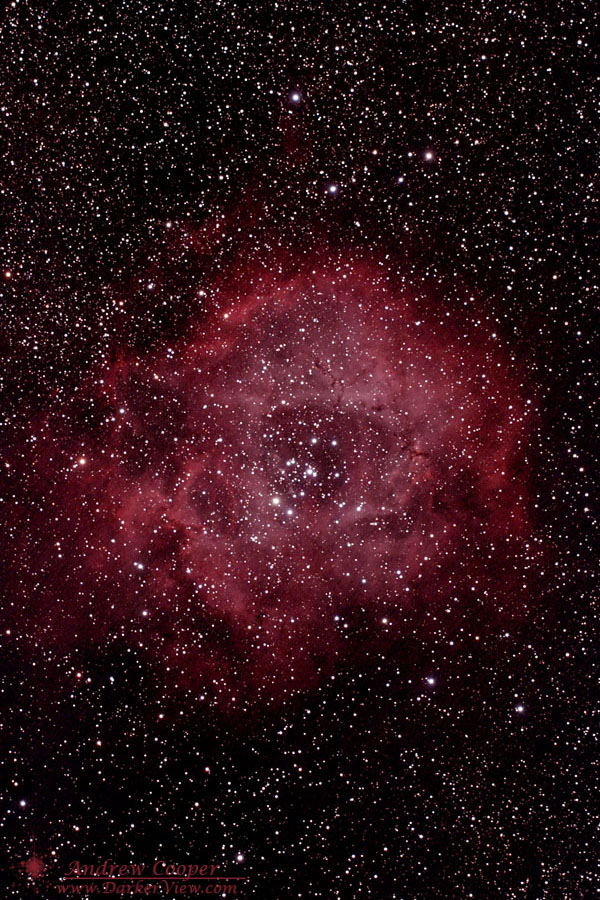
A single sub-frame of the Rosette Nebula is shown to the right. The Rosette is an emission nebula with most of the light emitted at the wavelength of Hα 656.28 nm. My Canon 6D is stock, no astrophoto modifications. Despite an IR cutoff filter that blocks much of the Hα light the camera captures a fair amount of the nebula. Perhaps I should get a 48mm Hα filter for the camera to shoot from the driveway.
With everything working so well I really need to haul the rig up to Hale Pohaku for a night of imaging under darker skies than I get down at 1000ft. Next weekend is dark-of-the-Moon weekend. Need to plan an outing?
It will take a bit to process the results of the night. As usual, keep an eye here on Darker View for the finished photos.
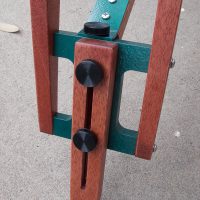
A rigid mount to adapt the TeleVue-76 to the SBIG STi autoguider? I need such a solution, I have both of these bits of kit that need to be wed together for the minimal astrophoto setup. As I am unlikely to find such a part commercially, I would have to make it myself.
Another couple hours in the machine shop were in order, another small pile of aluminum chips. This actually went pretty quickly, these are easy cuts to make. No tapping is required, the four holes are simply drilled through. The two hours included design and cleanup for a quick project.
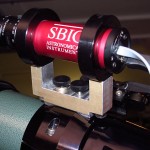
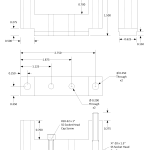
The TV-76 has a rather non-standard mounting point on top for accessories like this. A pair of #10-32 threaded holes, 0.75″ apart and located in a slot 0.625″ wide milled into the mounting ring. This seems simple enough. An adapter made for the TV-76 should work with any of the TeleVue refractors that use this mounting. Another concern is that the solution must also be very rigid, any flexure between the autoguider and the telescope will result in smeared stars.
The design assumes that you have the additional guiding kit sold by SBIG for the STi autoguider. This provides the mounting rings that clamp the camera body.
The hardware required will be two ¼-20 x 1½” socket head cap screws, and two #10-32 x 1″ socket head cap screws. A pair of plastic press on caps convert the #10 screws to knobs. All parts you can find in a neighborhood hardware store.
The mount is 1.5″ high to set the autoguider away from the main OTA, as to not encounter any vignetting. This also allows space to get fingers onto the mounting knobs. The dimensions are chosen so that standard screws protrude by just the right amount. I messed this up on the one I made, machining the center to far. As a result a few washers are needed for the screws that mate with the refractor. This is fixed in the mechanical drawing.
To co-boresight the TV-76 with the autoguider it was necessary to slip a 1/4″ washer between the mount and the rear ring as a shim. With that in place the same object is centered in both fields of view. The STi has a 2.7° x 2.2° field when used with the 100mm lens supplied in the SBIG accessory kit. With this wide field of view it also serves as a finder to locate and frame the photographic target.
It assembles nicely, a good start. The true test will be the quality of the images produced by the rig.
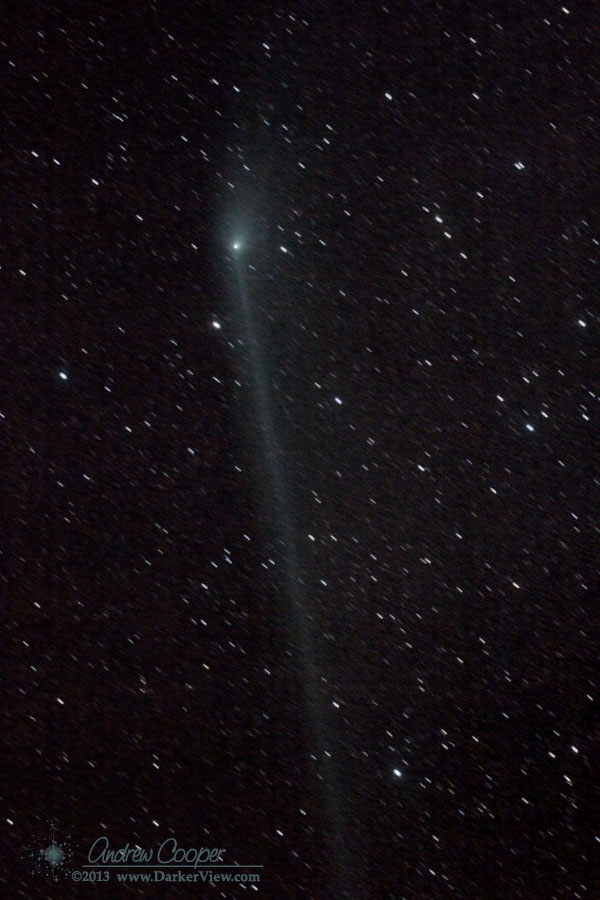
Well past perihelion comet C/2011 L4 continues to put on an impressive show. Amateur sky-watchers have been enjoying the impressive anti-tail reaching out a few degrees from the coma. True, you may need a telescope or at least good binoculars to see the comet. It may be dimming, but still worth the effort to observe.