A Battery Caddy for the AM5

The ZWO AM5 telescope mount is a great piece of kit… It integrates very well with software allowing easy computer control, just click and go. The mount tracks wonderfully allowing excellent astrophotos. It is small, does not require a counterweight for smaller ‘scopes, and precise polar alignment is a breeze.

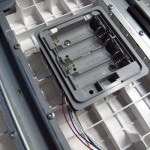
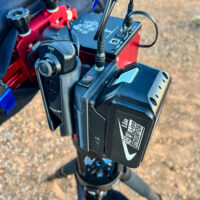
A 3D printed battery caddy on the side of a ZWO AM5 telescope mount

The mount is not without issues… Without a camera integrated into the system the GOTO accuracy is awful, using the mount as a visual mount is frustrating. You really need to have at least a guide camera and the ASI Air computer connected to allow to plate solving and automatic correction of the position at the end of each slew to a new target.

Another issue is that the mount has no concept of cord wrap. It will happily spin around and around as you wander across the sky. In equatorial mode this is not an issue, in alt-azimuth mode this runs the risk of damaging your equipment if you do not notice the power cord getting wrapped up on the mount in the dark.

Yes, I did that.

Continue reading “A Battery Caddy for the AM5”
Battery Corrosion Again

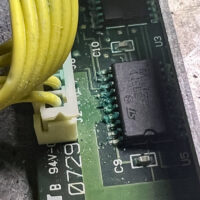
Leaking alkaline batteries, the bane of our portable, battery powered existence. All too many times I have found myself repairing electronic devices damage by leaking batteries, or just junking the gear when the damage is too severe.

Corrosion damage in the base section of a Celestron 8SE mount

This time the device in question was just a bit too valuable to dispose of despite fairly extensive damage.

A Celestron Nexstar 8SE telescope.

Continue reading “Battery Corrosion Again”

A 6V Lead-Acid Battery Charger Using the LM555

How do you power a device that must stay on through an event that may cause a power outage? Battery backup of course. But that answer leads to whole new level of complications. There must be a circuit in place to allow power to be drawn from the battery or the power supply. The proper battery technology should be chosen. You need a another circuit to care for the battery, allowing for very long term reliability. Long term? Years.

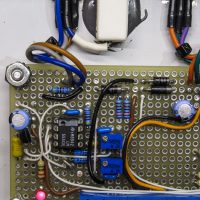
6V Lead-Acid Battery Charger
A 6V lead-acid battery charger based on the venerable LM555.
A good answer for the battery technology is sealed lead-acid. A properly used lead-acid battery should last a decade or more while providing power to operate for over a day. Lead-acid may not be a good choice for a portable device where weight and size are the primary considerations. But for a stationary application this venerable technology is a good choice.

What about the charge circuit? A simple charger that can fully charge the battery, but not overcharge the battery is needed. In the case of lead-acid charging is usually accomplished by charging to a chosen voltage before shutting off or lower the voltage to a safe lower value called a “float charge”.

Continue reading “A 6V Lead-Acid Battery Charger Using the LM555”

Replacing the Celestron NextStar GPS Battery

When your Celestron GPS telescope will not get GPS fix for a long time, or the GPS will not work at all, it is time to replace the battery on the GPS receiver board. Another symtom is when the telescope may get a fix, but it is incorrect, the time or location no where close.

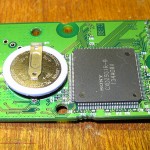
Celestron Telescope GPS Module
The Celestron GPS telescope GPS module with the original battery
Instructions for replacing the battery are posted elsewhere about the web. There are excellent instructions for battery replacement on the NexStar Resource Site. It was those instructions I was following when I was recently replacing the battery in our ‘scope.

The GPS board is found in the main section on the oldest telescopes, but located in the arm in later ‘scopes. Our is located in the arm, a small circuit card just under the inside plastic panel connected to an antenna by a cable. Simply remove the four screws holding the plastic panel and you have access. The antenna cable can be disconnected with some gentle tugging, two screws for the board, one more connector and the board comes out. The battery is found hidden on the underside of the PCB.

Continue reading “Replacing the Celestron NextStar GPS Battery”

Repairing a Wii Balance Board

In an age of cost cutting on products to compete in a very competitive market place, some producers seem to go too far. Reducing the quality of the product to the very edge in order to shave a few pennies. One consequence of this has been more battery leaks, with Duracell being by far the worst offender. Seriously, why does anyone still buy Duracell products! This time it was a friend who brought me the latest corrosive disaster, a Wii Balance Board with a mess in the battery compartment.

Wii Battery Compartment Repairs
The battery compartment of a Wii Balance Board after the repair
At least the balance board was easy to get apart, just a mess of screws on the back to remove, a few minutes with a phillips screwdriver. First remove the feet with three screws each, then the backplate with another ten screws. The unit is essentially a fancy bathroom scale with load cells in each foot. Rather nicely made, the engineers did a good job here.

Opening the case reveals the good news and the bad news. Good… The battery compartment is removable with just another couple screws. Bad… The damage here is severe, the small circuit board under the battery compartment is heavily corroded, traces and components destroyed. Good… The complex circuits for the unit, the processor and transmitter, are on another circuit board on the other side of the balance board and are untouched. Bad… The battery contact plating is gone, these are unusable. Even the wiring harness is damaged.

Continue reading “Repairing a Wii Balance Board”

A Dummy Battery Adapter for the Canon 20Da

Another quick project to solve a little equipment issue. I realized I had a problem the morning before I was planning to spend a night shooting astrophotos up on the mountain. The batteries for my 20Da are old and do not hold a charge, no way I was going to be able to use the camera through the night.

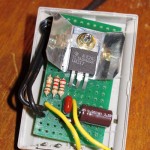
The Regulator Installed
The regulator circuit installed inside the battery shell and connected to the existing contacts
The camera is an older model that remains quite valuable to me as it has been adapted to shoot astrophotos. The 20Da model differed from the standard 20D in having live focus and a re-tuned red cutoff filter that allows the glowing red of nebulae to reach the sensor. After seven years I still use the camera regularly.

I have the AC power supply for the 20Da, this is what I have been using for some time now. Shooting astrophotos in the driveway allows access to AC power. For field use this will not do, I need to operate fully from battery power. The camera batteries that I do have for the camera are now at least six years old, and do not hold enough charge to last.

Without AC power available I needed something that could plug into one of my 12V field battery packs. I really did not want to cut up the existing AC power supply to create a version to be used with an external battery. Plus, Canon used odd, proprietary connectors on the supply. (I really hate it when they do that!) I can not even use parts of the AC supply without modification.

With only a few hours available I came up with a plan. A little digging showed I had all of the needed components on-hand. Off to the work bench!

Continue reading “A Dummy Battery Adapter for the Canon 20Da”