Lava Lake Panorama

One of the things I remembered to do on my second visit to the lava lake was to shoot a panorama set of the lake surface. The result has been assembled here, click on the image to get a full sized version for viewing..

The lake has a number of interesting features most visitors miss when viewing the active vent. The remnant of an older vent can be seen as the rough area on the far side, while on the near side is the raft or floating island that remains from the previous lava lake earlier in the year. Both of these features appear to be floating as they rise along with the lake level.

According to the latest USGS report the lake is approximately eight meters (26 feet) higher at the western end near the active vent than the eastern end. The level has risen about 51 meters (167 feet) since this eruption stated on September 29th for a total volume of 19.9 million cubic meters (5.3 billion gallons) of new lava. An interesting raised edge is visible along the active margin with the thick inactive crust that has formed over the last month.

A panorama of the lava lake in Halemaʻumaʻu
A panorama of the lava lake in Halemaʻumaʻu, click to view the full size image

Manipulating EXIF Tags for the Mavic Air

One of the fun things you can do with the panorama images created by the Mavic Air drone is to upload them to places these images can be seen a wide audience. Posting to Facebook is fun, but very few places will see more traffic than images posted to Google Maps.

The PanoEXIF GUI
The PanoEXIF GUI
I have posted a few dozen 360 photo spheres to Google Maps, most have been viewed tens of thousands of times, a few have view counts of a hundreds of thousands of times. Given that I often use Maps to explore areas I intend to visit, or may never visit and just want to see, it seems proper to also contribute to this online resource.

The newer DJI drones like the Mavic Air produce 360 panoramas automatically. Stitched on-the-fly onboard the drone the panoramas are saved to the memory card ready for use at the end of the flight. The images are not without issues, the onboard stitching is quick and small flaws are usually visible. Far better results can be achieved by other stitching software in post, but the drone produced panoramas are generally good enough for web posting.

Continue reading “Manipulating EXIF Tags for the Mavic Air”

The Mavic Air Panorama Modes

One of the most useful features of the Mavic Air are the built in panorama modes. These are pre-programmed maneuvers, like the quick-shots, that take a series of exposures to stitch into a single frame.

Mauna Kea above the Morning Fog
Mauna Kea seen above morning fog, a Mavic wide panorama of nine frames
The panorama feature was offered in earlier models like the Mavic Pro, the difference in the Air is that the stitching is done on-board, ready to download from the SD card as a finished product at the end of the flight, no need to process in the DJI software.

There are two panorama modes I find myself using regularly. The spherical and horizontal modes both offer a view from the drone that overcomes the limitations of the camera.

Continue reading “The Mavic Air Panorama Modes”

Morning Fogbow

As you drive to the top of the cloud layer you hit a point where the fog and the sunlight mingle. This is often between 7,000 to 9,000 feet, a mile or three below Hale Pōhaku. Passing through this zone is often a beautiful event in the day, rainbows, fogbows and misty shadows fill the mountain air…

A fogbow formed from drifting fog blowing across the Mauna Kea access road. Click on the image to peruse the panorama properly.

Mauna Kea Summit Panorama

Mauna Kea Summit at Night
The Mauna Kea summit at night, panorama of seven frames with a Canon 6D, 20s @ ISO6200 and Rokinon 14mm f/2.8 lens

It may look small, but this image is anything but small, click on it to find out. The panorama is assembled from seven frames, with final dimensions of over 12,000 x 2,000 pixels. The version posted here is a bit smaller, only 4,000 pixels wide. While it is a big image it does not really come close to the effect of actually standing there beside the camera. Also missing from the photo? The biting cold wind.

The image includes ten telescopes, two planets, two galaxies, two meteors, four volcanoes, and innumerable stars.

Google Photo Sphere for iOS

It helps that I now have an iPhone 4S in place of my ancient 3GS. Yes, I was nearly three models behind. I was in no rush to update as long as the phone did the job. The phone is a hand-me-down from Deb, who just updated to a 5S. It is not all one-sided, I recently updated to an iPad Air, while she gets by with the old iPad 2.

With the new iPad I had downloaded PhotoSynth from Microsoft, a free panorama application. My experiments with this software were far from successful, I have never achieved a satisfactory result. It is sufficient if all you want is a once around pano, but if you start to add a little vertical the stitching suffers. There are terrible stitching errors in every attempt I made to capture more than a single pass.

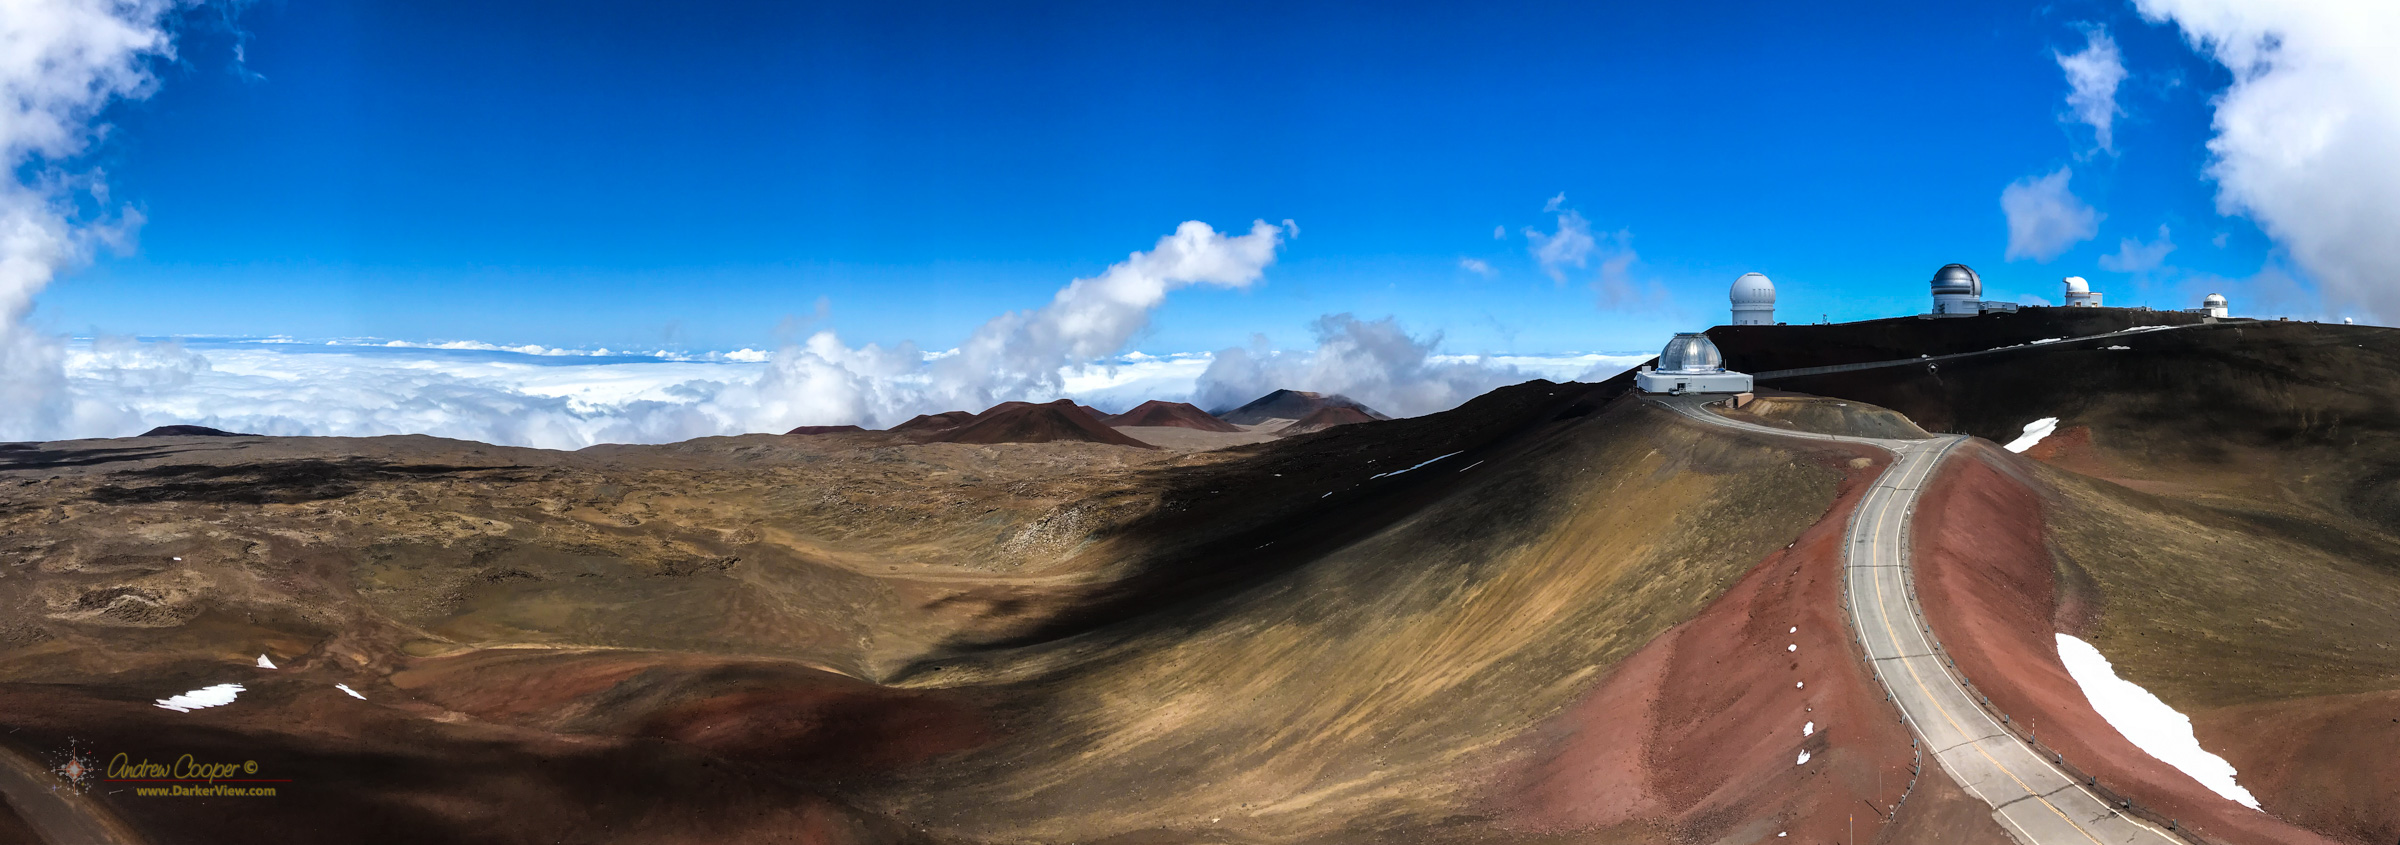
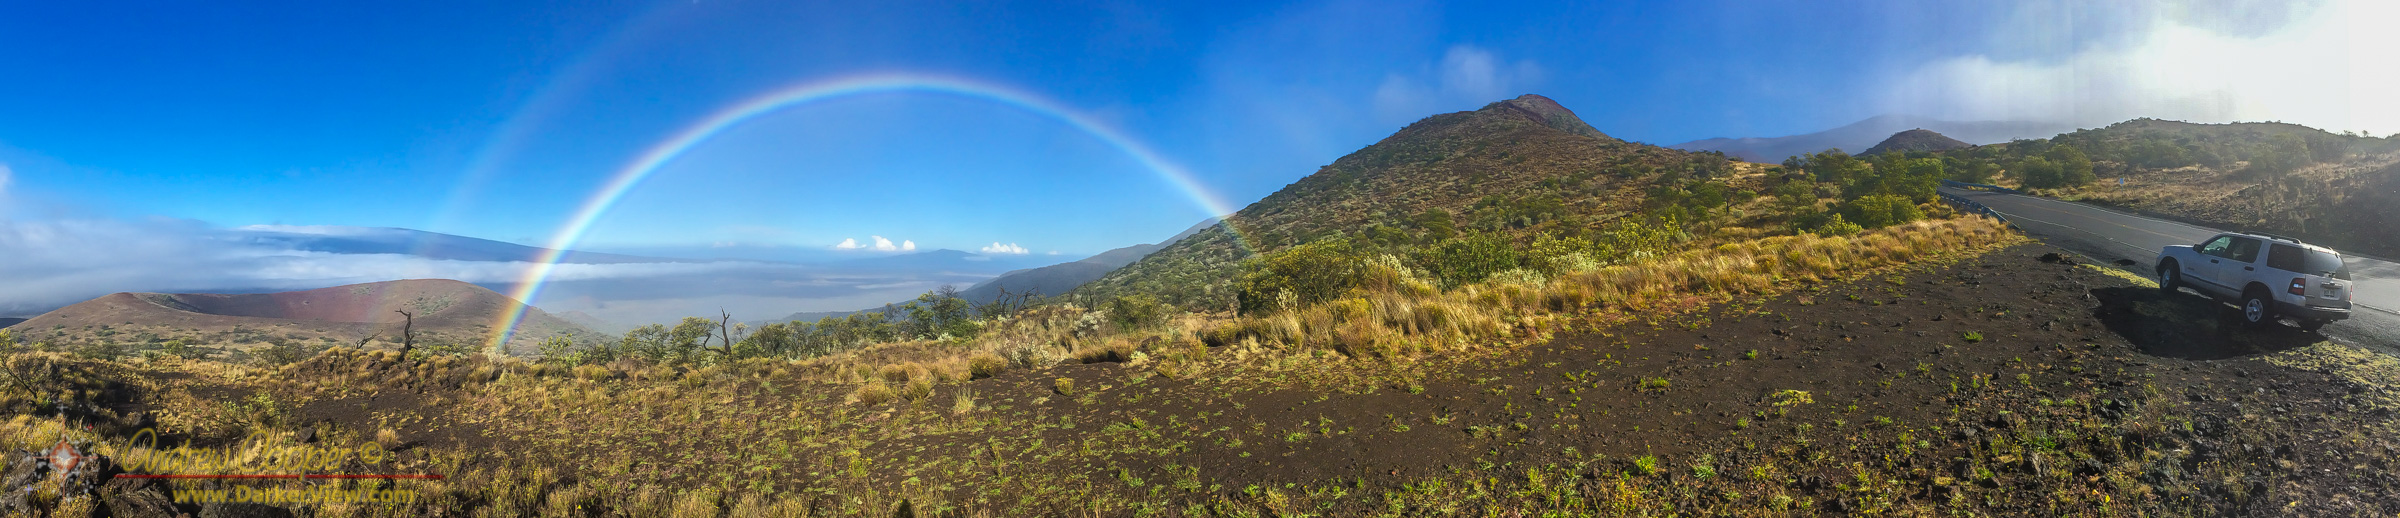
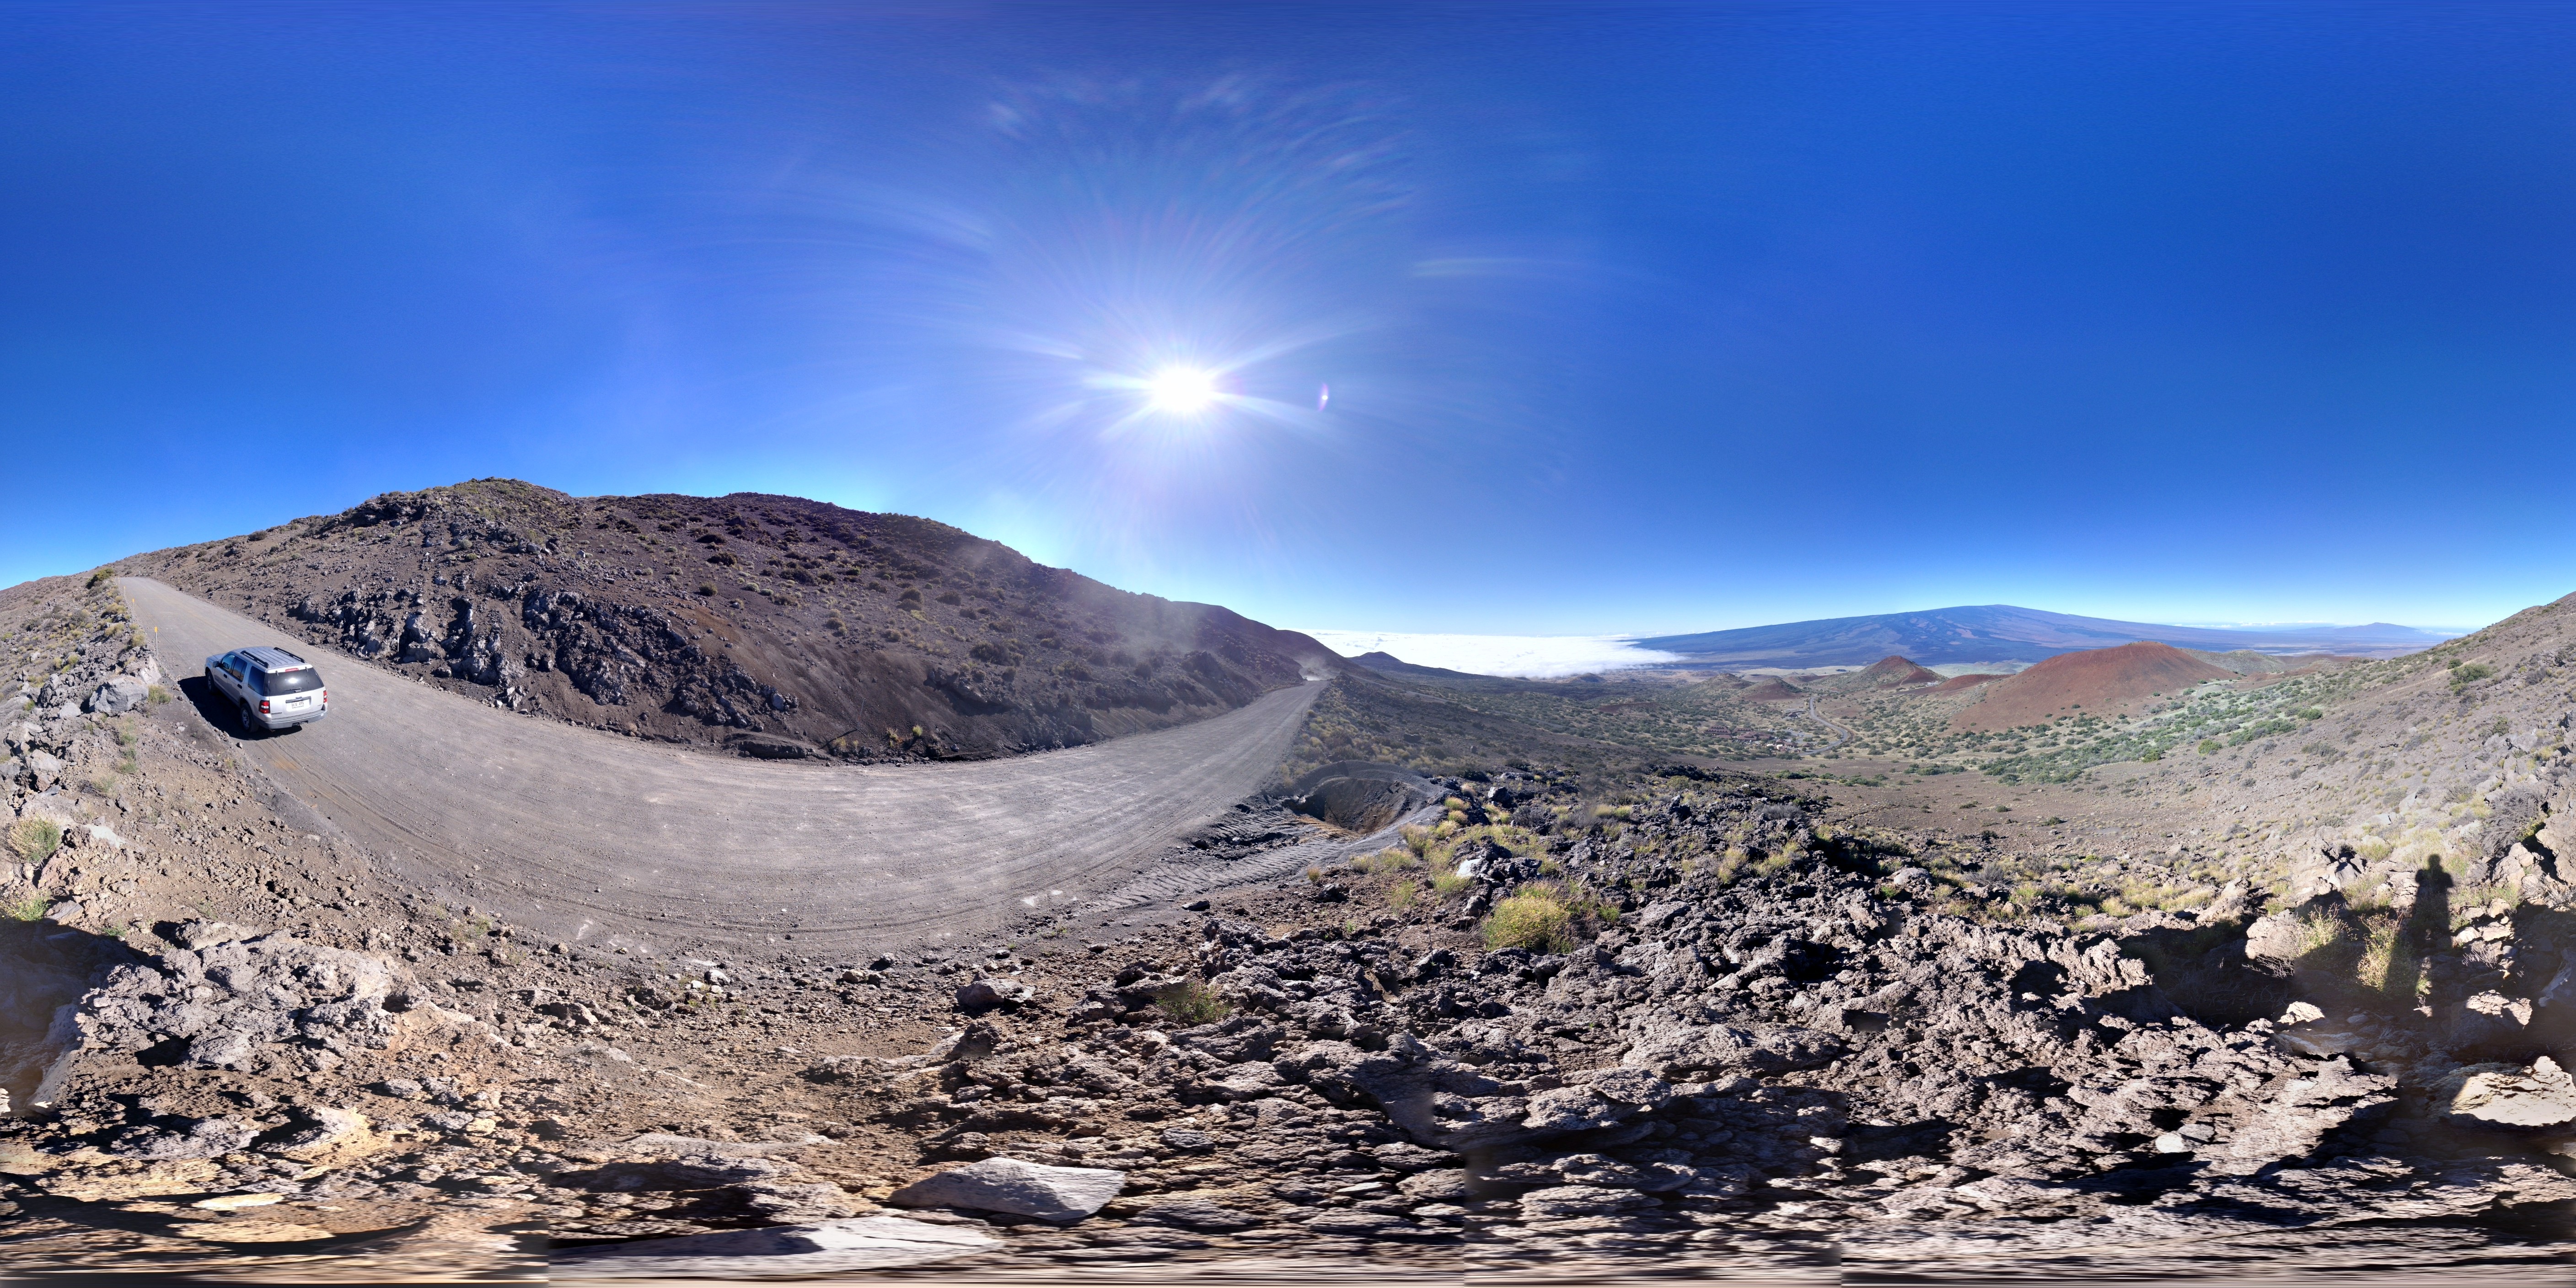
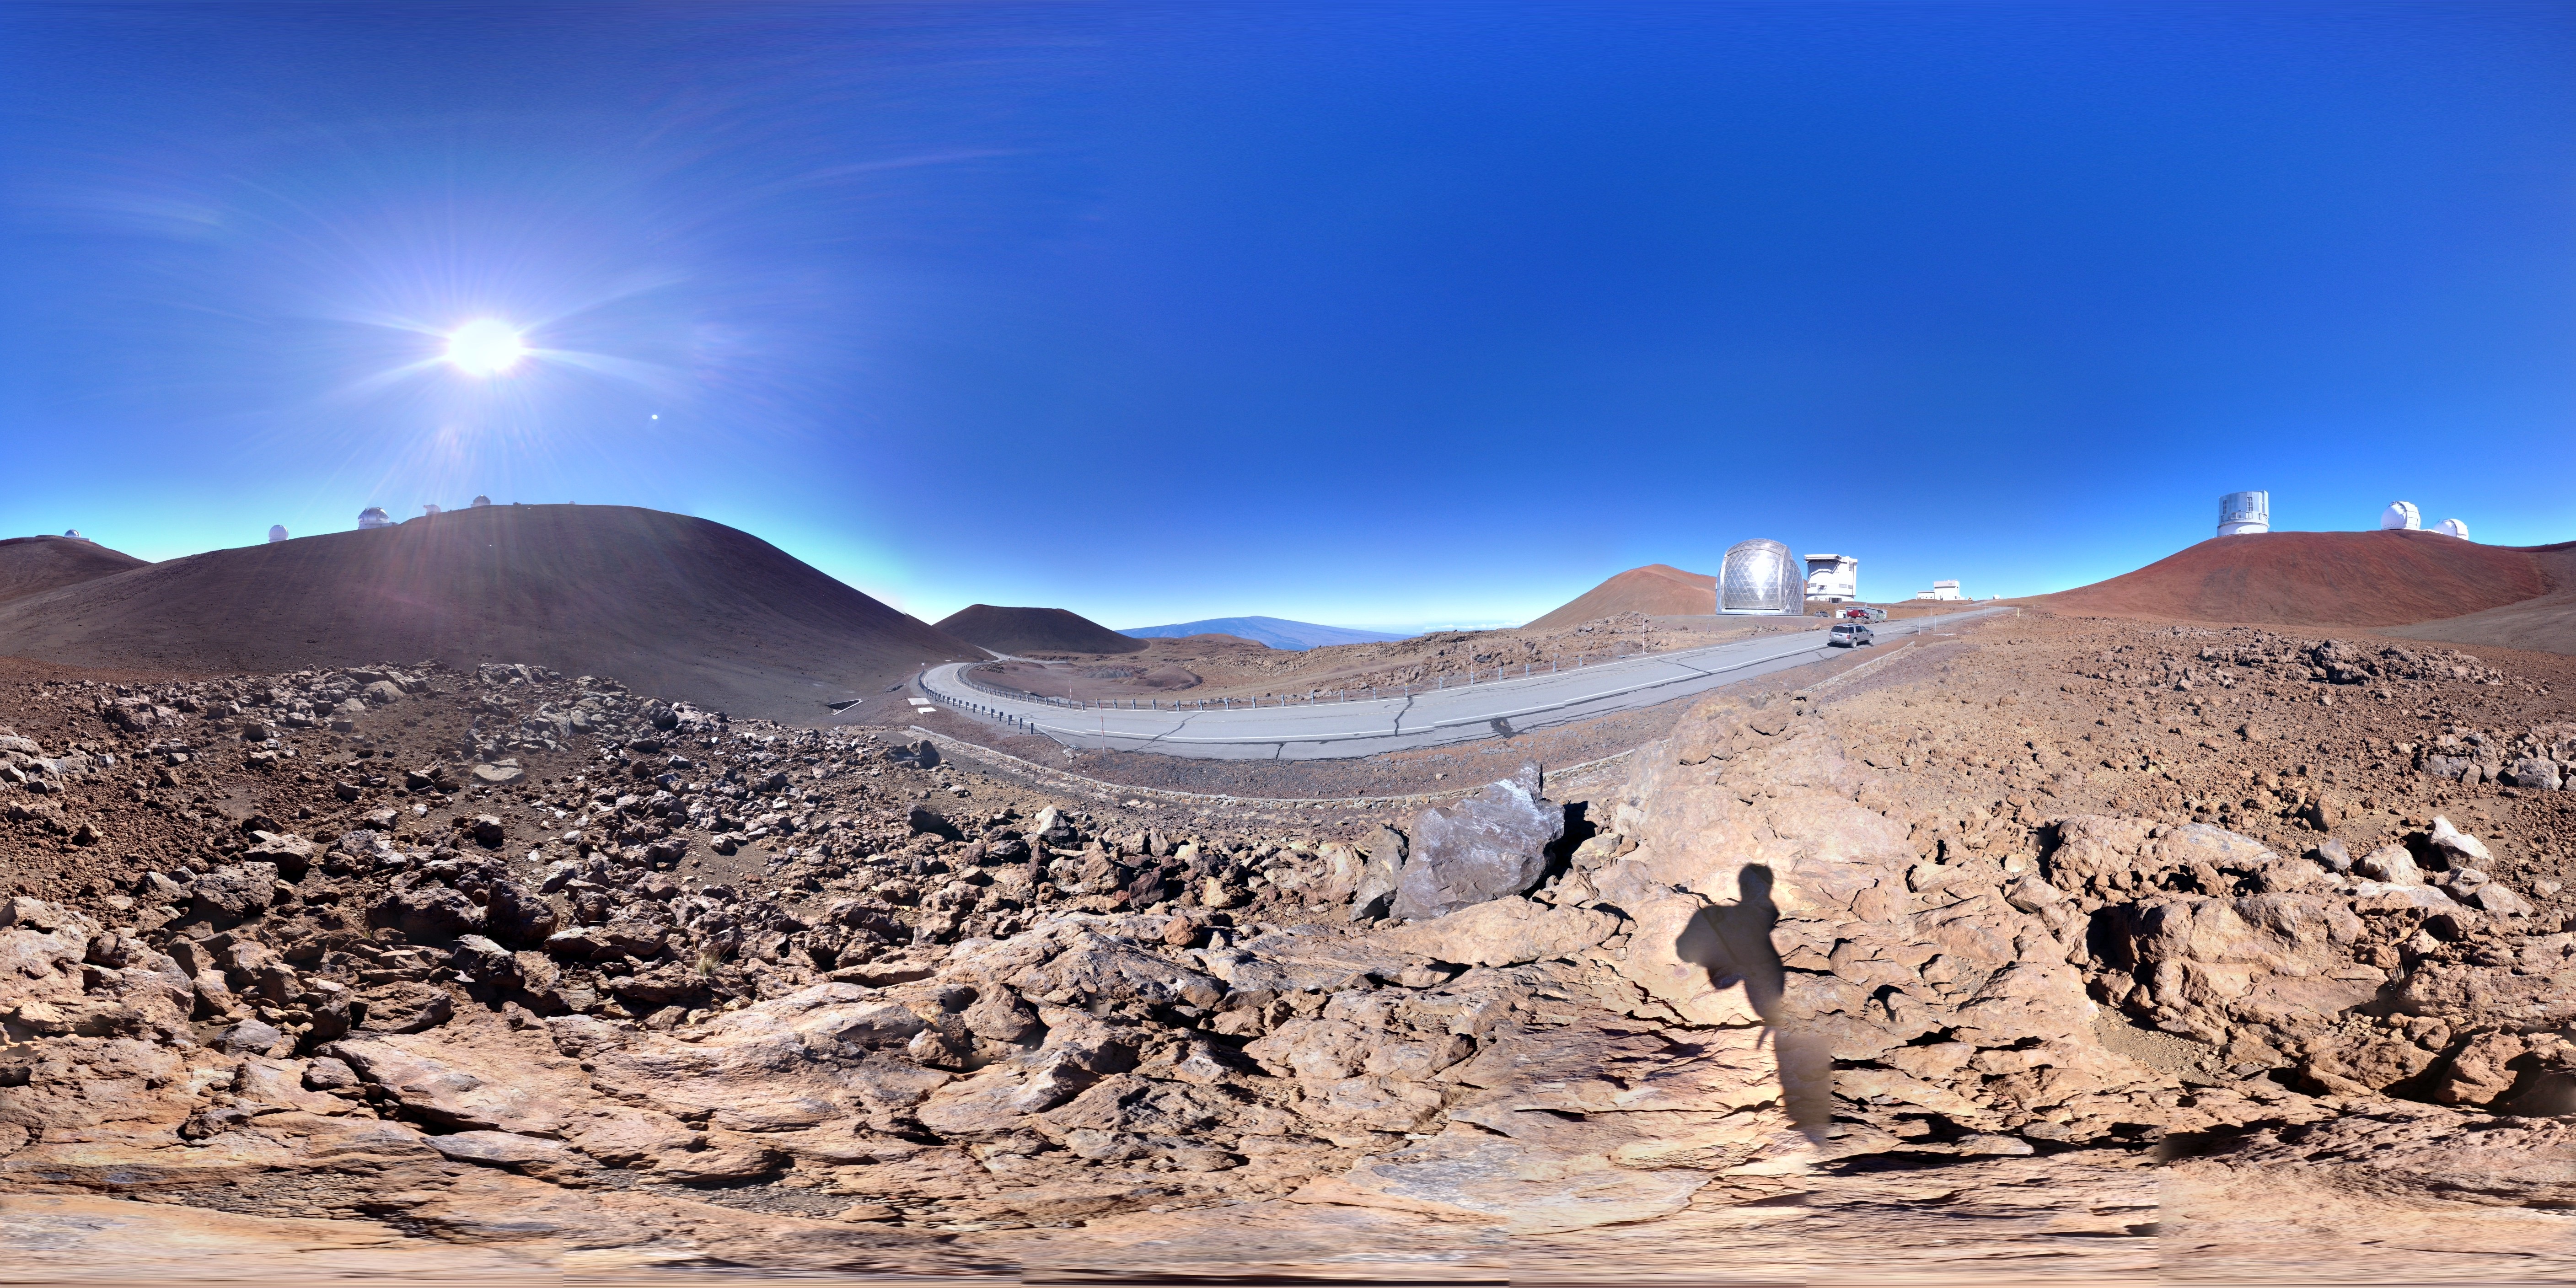
A few days later I learned that Google’s Photo Sphere app had been released for iOS I quickly headed to the app store to get it and give it a try. I shot a couple panoramas on my way up to the summit. The results? Much better, the program does assemble decent 360°x360° spheres.

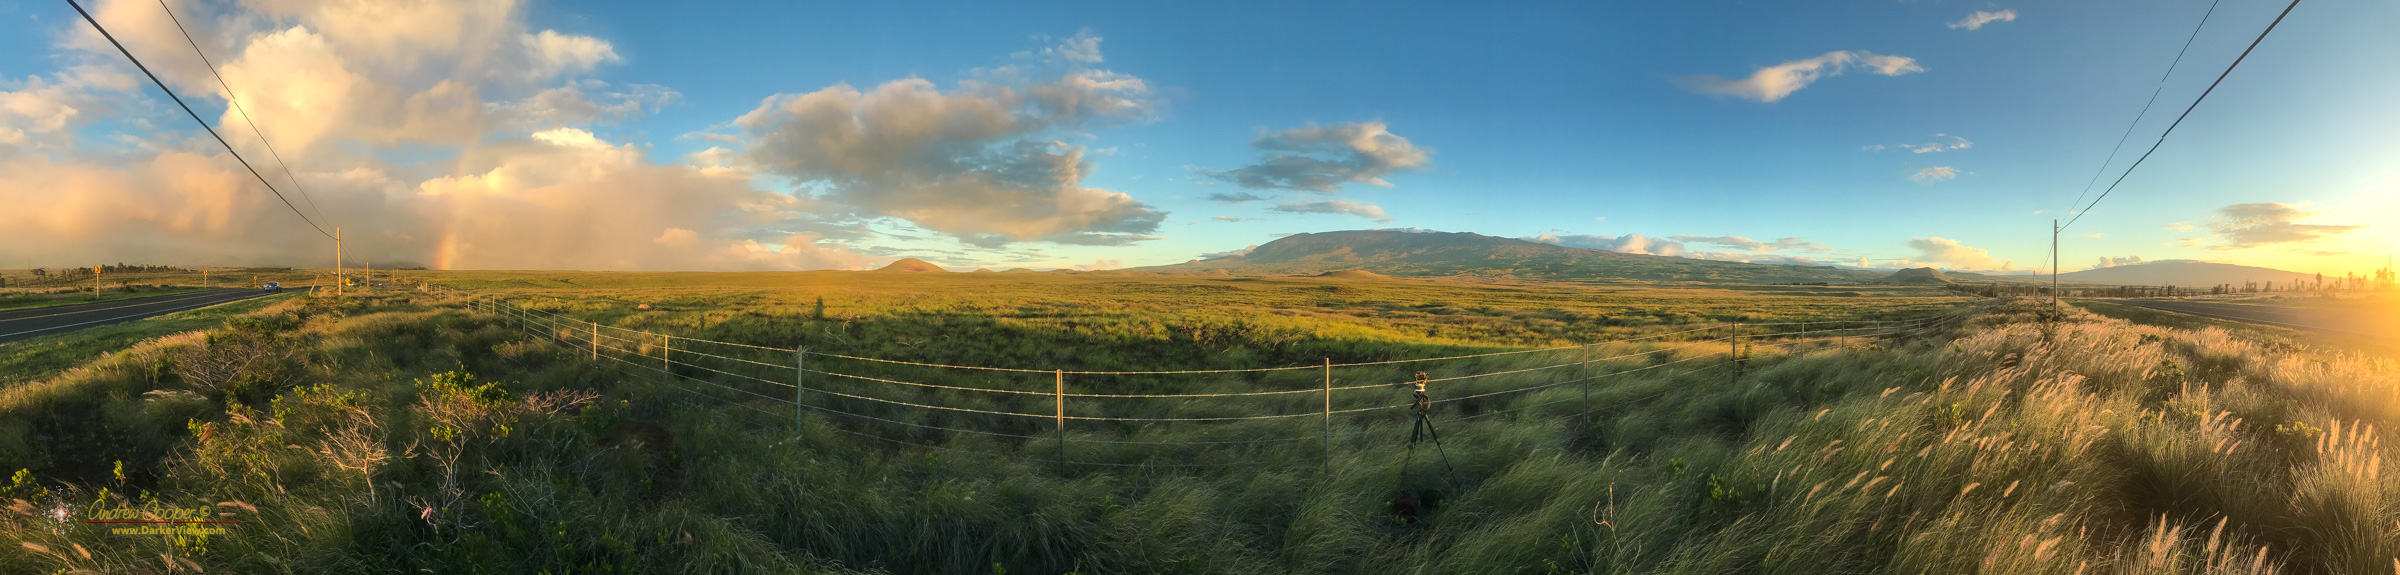
There are some conditions that will give the software trouble. Dramatic lighting around sunrise or sunset will cause trouble. The varying exposures are not handled well, over-exposing the ground and other large areas of shadow. I have gotten the best results at mid-day with the Sun high overhead and even lighting as you spin. Alternately I have seen decent twilight results when the lighting is again fairly even over the entire scene.

Some stitching errors will be visible if there are a lot of straight lines visible. This will be most apparent in a built up environment, with large structures in the image. In natural surroundings it becomes more difficult to pick out the stitch lines between frames.

It takes two to three minutes to shoot a complete sphere. You spin in place, moving the camera from image to image as you shoot. Positioning of the camera is performed by simply aligning the camera at each aim point provided in the software. It appears that the software uses the phone accelerometer to detect the correct orientation of the camera. It is a bit like a shooting video game, aim and shoot, aim and shoot, each shot is fired automatically when you get the aim right. A progress bar surrounding the button at the bottom of the screen lets you know how much you have yet to do.

The app is designed to upload the images to Google Maps, making it appear as if the free app is designed as a way to create more content in Maps. While you do not have to upload your images, I have uploaded a few anyway. I do not mind contributing to a tool I have found enormously useful.

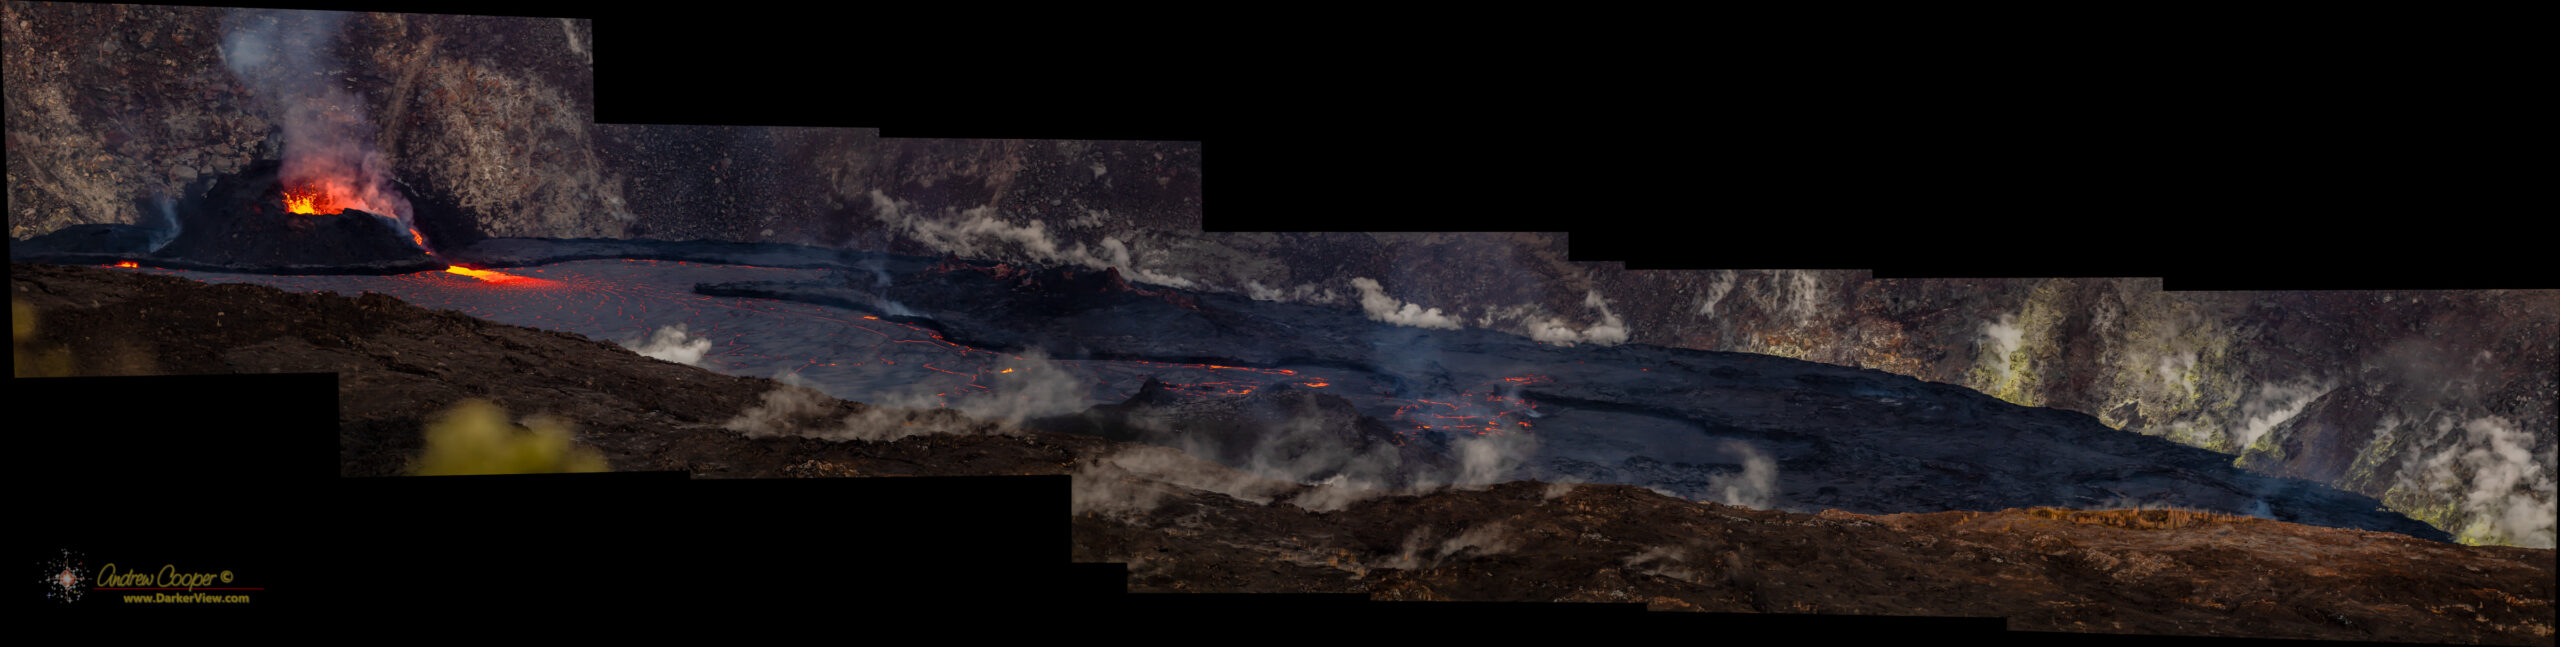
The full spheres are a lot of fun. Easy to take with the one camera you will have with you at all times. Given the half-decent photo quality of the later iPhone cameras the results are pretty good.