First Quarter
When you want to see the stars, find someplace dark

I have heard it said that the creative filter applications available for phone photography are simply a way to make bad photos look good.
I would have to say that these filters are a way to make bad photos look worse.
The web is filled with horrible photos of pets, selfies, and dinner plates, often processed through some creative filter application to somehow make the photo look hip or cool. Sorry, a bad photo is still a bad photo. Often it is far worse for the application of the filter. Fancy colors, brush patterns or mosiacs, it does not matter, it is still just bad.
I am not telling you to uninstall the application, quite the opposite! A well composed photo can be a good photo after application of the filter. You can also use the filter to overcome some limitations of phone photography. Technical defects like color, lighting, and noise are often erased when the filter is applied.
It helps that I now have an iPhone 4S in place of my ancient 3GS. Yes, I was nearly three models behind. I was in no rush to update as long as the phone did the job. The phone is a hand-me-down from Deb, who just updated to a 5S. It is not all one-sided, I recently updated to an iPad Air, while she gets by with the old iPad 2.
With the new iPad I had downloaded PhotoSynth from Microsoft, a free panorama application. My experiments with this software were far from successful, I have never achieved a satisfactory result. It is sufficient if all you want is a once around pano, but if you start to add a little vertical the stitching suffers. There are terrible stitching errors in every attempt I made to capture more than a single pass.
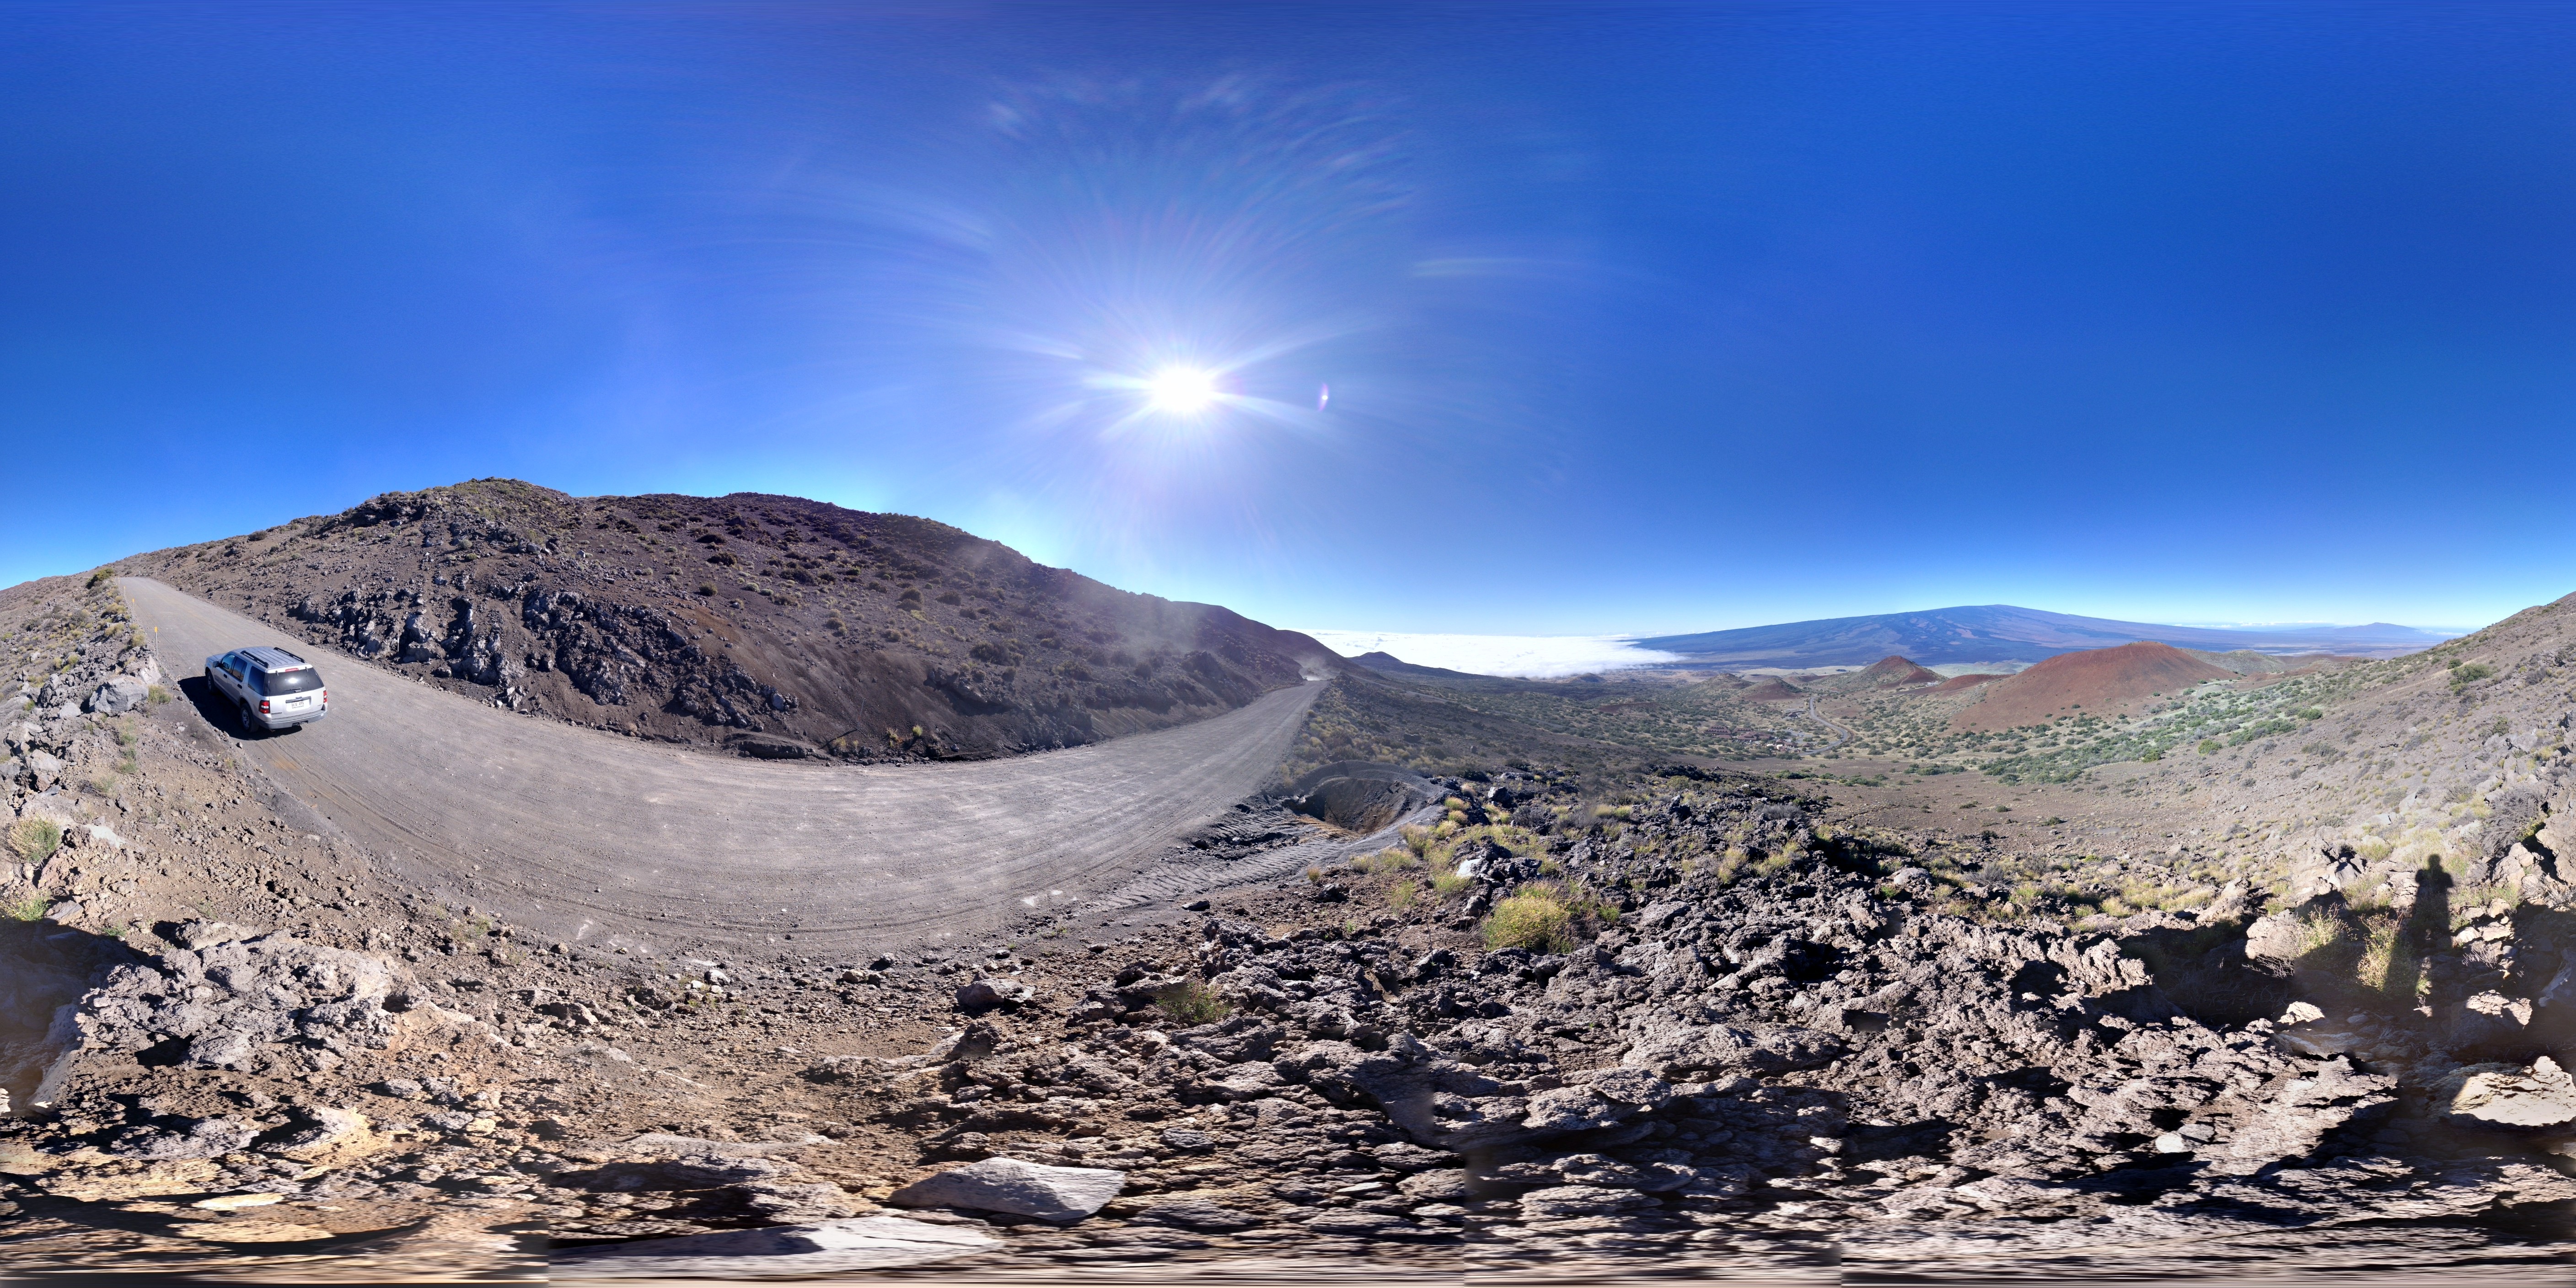
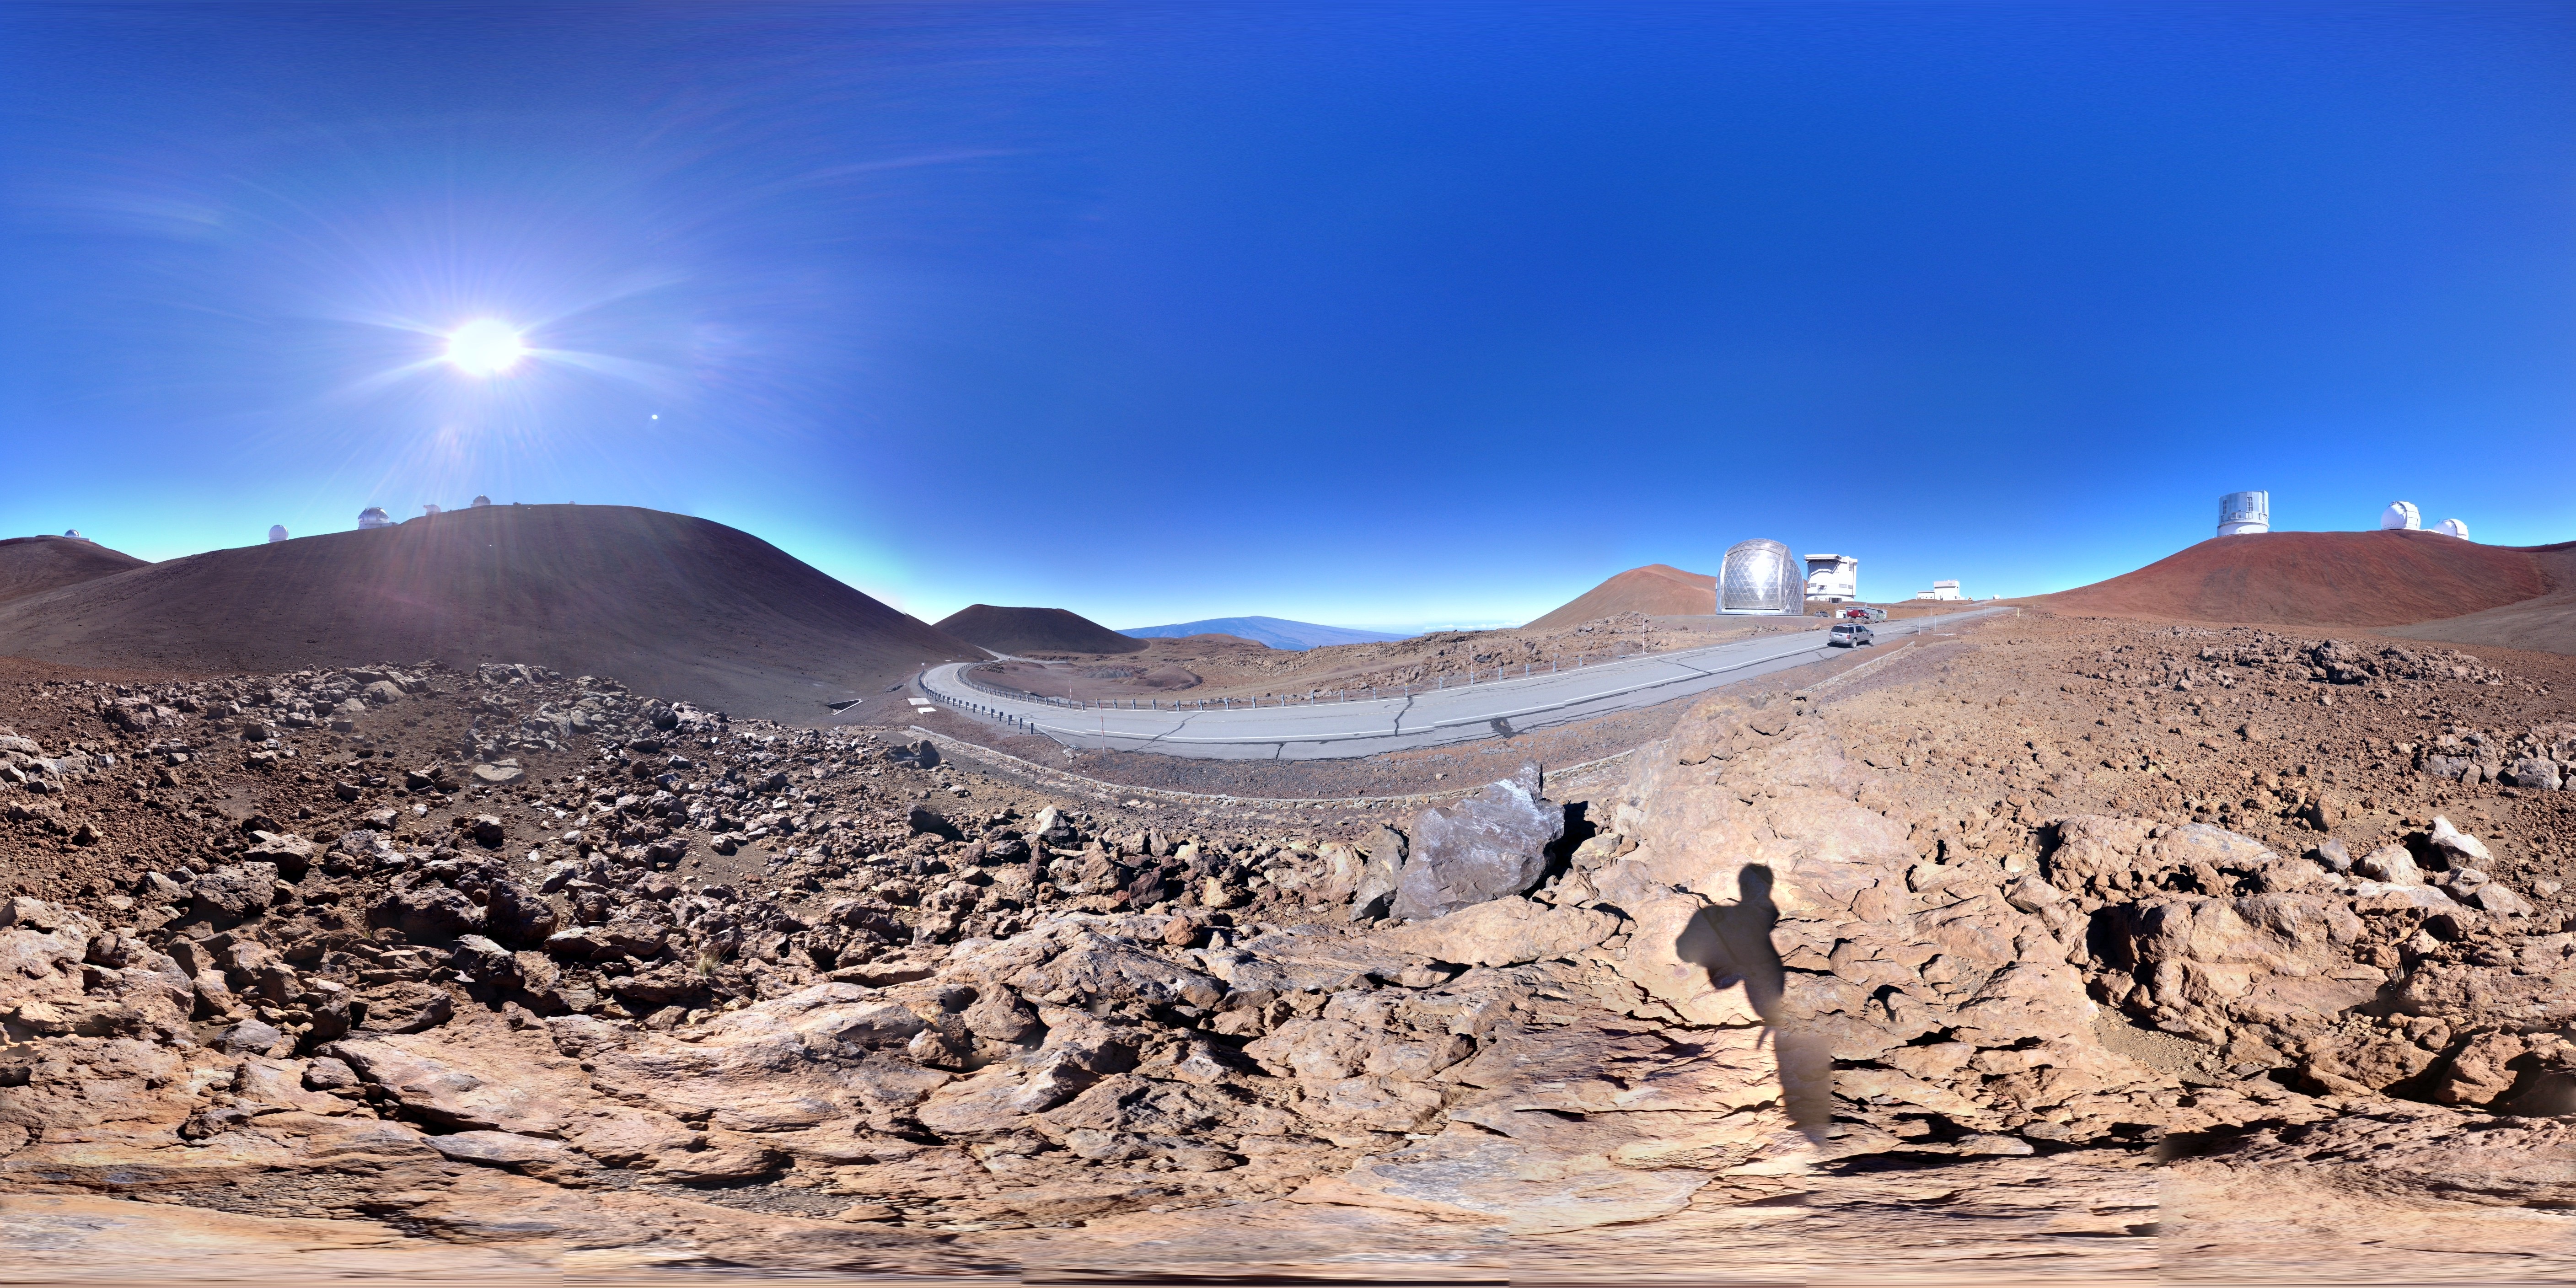
A few days later I learned that Google’s Photo Sphere app had been released for iOS I quickly headed to the app store to get it and give it a try. I shot a couple panoramas on my way up to the summit. The results? Much better, the program does assemble decent 360°x360° spheres.
There are some conditions that will give the software trouble. Dramatic lighting around sunrise or sunset will cause trouble. The varying exposures are not handled well, over-exposing the ground and other large areas of shadow. I have gotten the best results at mid-day with the Sun high overhead and even lighting as you spin. Alternately I have seen decent twilight results when the lighting is again fairly even over the entire scene.Some stitching errors will be visible if there are a lot of straight lines visible. This will be most apparent in a built up environment, with large structures in the image. In natural surroundings it becomes more difficult to pick out the stitch lines between frames.
It takes two to three minutes to shoot a complete sphere. You spin in place, moving the camera from image to image as you shoot. Positioning of the camera is performed by simply aligning the camera at each aim point provided in the software. It appears that the software uses the phone accelerometer to detect the correct orientation of the camera. It is a bit like a shooting video game, aim and shoot, aim and shoot, each shot is fired automatically when you get the aim right. A progress bar surrounding the button at the bottom of the screen lets you know how much you have yet to do.
The app is designed to upload the images to Google Maps, making it appear as if the free app is designed as a way to create more content in Maps. While you do not have to upload your images, I have uploaded a few anyway. I do not mind contributing to a tool I have found enormously useful.
The full spheres are a lot of fun. Easy to take with the one camera you will have with you at all times. Given the half-decent photo quality of the later iPhone cameras the results are pretty good.
Amateur astronomers learn to love the dark.
Unlike the rest of the human species we enjoy seeing the night sky and have learned not to fear the darkness, rather to embrace it. This phlisophy is carried over to our devices as well. We set our computer screens for minimum brightness with red on black color schemes. We understand dark adaptation and what it means for our vision.
You may note that Darker View uses a dark color scheme. This is not by chance, there was a great deal of thought put into the light on dark color scheme here on DV, with full understanding of the advantages of dark on light schemes.
Many people do not like light on dark schemes, avoiding websites that use such colors. Other folks far prefer such color schemes, particularly people who spend long hours at the computer, programmers and CAD technicians in particular. Programming environments and CAD software make switching color schemes easy, understanding the personal color preferences are critical to good software useability.
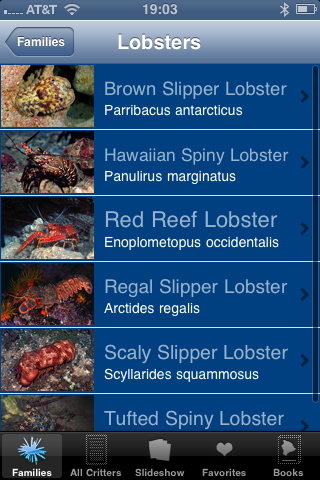
There are numerous guides to the reef life found around the Hawaiian Islands. Most are superficial, suitable for the casual tourist snorkeler at best. Short of delving into the professional level publications there are two sources I use all the time. The books by Hoover, one on fish and the other for the invertebrates, are my first stop when attempting to identify an animal. These well thumbed references are usually found on my desk beside the computer.
What about an app to do that?
To my pleasant surprise I have found that there is indeed an app. Combining information from John Hoover, Keoki Stender’s excellent photography, plus information from a few other contributors, you can now download everything to your phone for easy reference, even without a data connection.
Actually there are several apps in the series. As with Hoover’s books, fish and invertebrates are handled separately. You can get the phone version or the iPad oriented HS version.
This snorkelers guide to the most common invertebrates and other commonly seen water inhabitants in Hawai’i includes 374 gorgeous photos together with extensive notes for each. All content is by an experts in the field: Keoki and Yuko Stender, and snorkeling guidebook authors, Judy and Mel Malinowski. As a bonus, links to underwater videos by Keller Laros, Rob Whitton, Mel Malinowski and others are provided. – Description of Reef Critters Hawai’i
The apps are well organized and quick to use. As with any book, it helps to be able to recognize at least the family of fish or critter, this helps in navigating to the correct section. Scrolling though a list of species, each with a thumbnail image, allows quick choice of possible identifications.
It is unlikely that the apps will replace my use of the books… The listings are not as complete as the books or websites, many of the less common species are missing. There is generally only one photo per species, neglecting some color phases and juvenile stages. Still, a quick ID reference in the phone is quite convenient. There are a number of videos which I find fairly useless, I would gladly trade the memory requirements for a more complete species listing.
I have no trouble with the $4.99 cost of the apps, I consider it a contribution to the folks who have put together the great references I have used for many years of diving Hawaiian reefs.
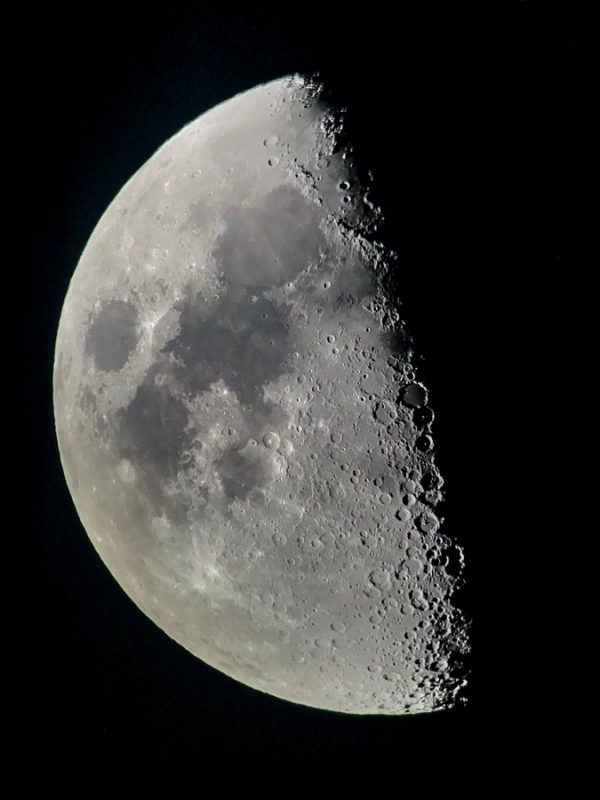
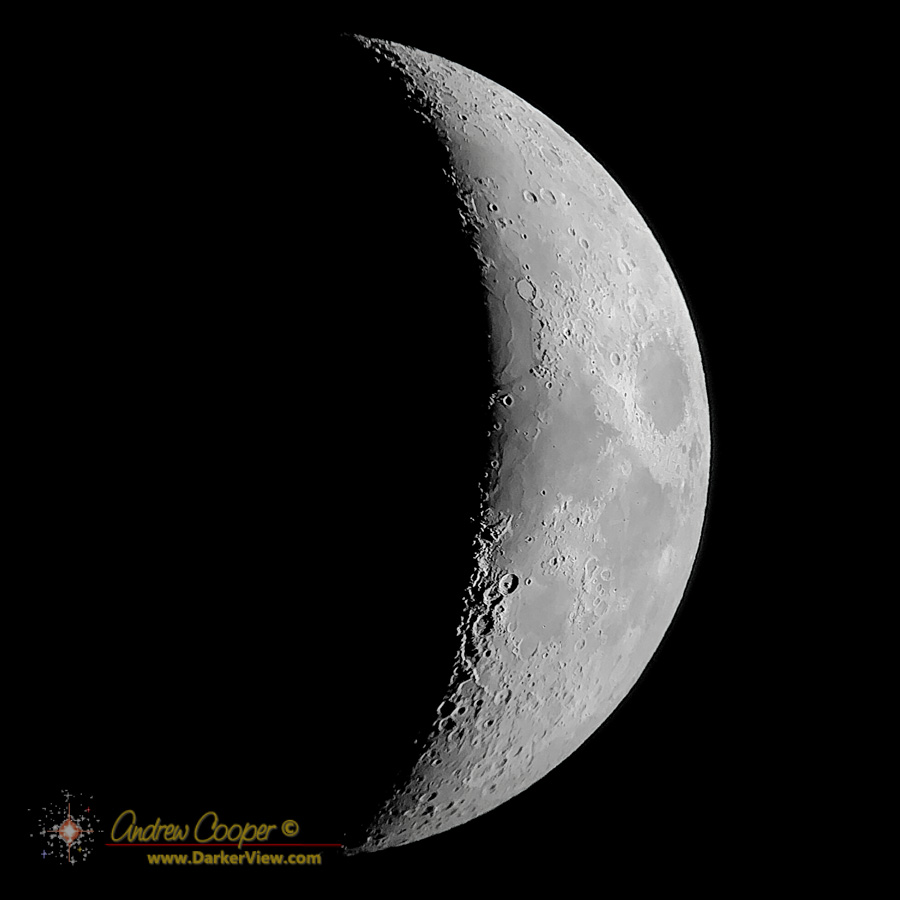
Despite numerous attempts, I had never managed a decent shot of the Moon using an iPhone. When showing people how to do afocal photography, I have leaned how to make just about any compact camera perform nicely, but routinely seen nothing but trouble with cell phone cameras.
Lunar photography is incredibly popular with folks using the telescope, a great activity for a night with a bright moon. Long ago I found that an inexpensive 20-25mm Plössl is a good match for the lens of most compact cameras. On a 1-2m focal length telescope this combination can produce very nice lunar photos. The setup does not work with cell phone cameras. Though people do try, the results have been routinely disappointing.
Working a resort star party recently, I discovered a combination of telescope and eyepieces that works very well. A C11 telescope, an f/6.3 focal reducer, and a 20mm Nagler type 2 eyepiece produced very nice photographs with several different cell phone cameras. The result was a very happy audience and a lot of great lunar photos. As people walked away from the telescope they were rapidly replaced by a crowd holding glowing screens, all wanting to get a nice lunar shot for themselves. I will have to explore other telescope/eyepiece combinations to find another solution that does not involve a $500 eyepiece.
