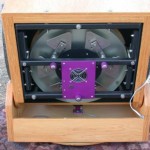
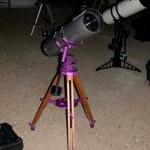
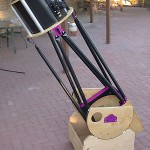
Yes, Andrew’s Home for Wayward Telescopes has a new resident, an 8″ f/6 1978 vintage Cave Astrola.
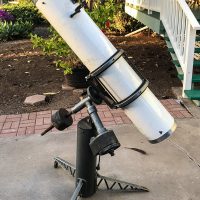
The 8″ Cave Astrola as it arrived
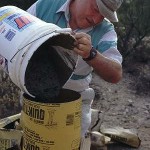
This telescope was literally rescued from the dump. Matt, the owner of the excellent Mountain Road Cycles in Waimea found the telescope at the transfer station.
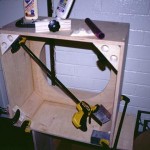
I have previously published a description of Hodgepodge, the mish-mash mount I used for the solar eclipse. While I wrote about the mount, and posted some photos, I did not really cover the construction. Now for some details…
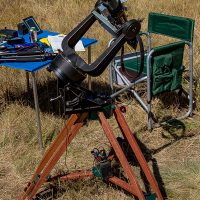
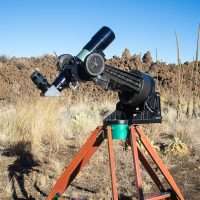
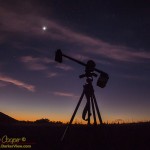
Hodgepodge set up at Grant’s Spring to photograph a total solar eclipse
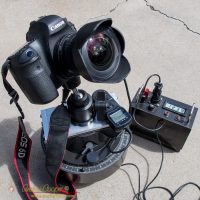
A few months back I rebuilt the drive unit of an old Celestron mount, installing a drive corrector into the base unit in the process. I have used this sidereal drive for time lapse, but it can also be used to mount a telescope again. Better yet, with a few minutes reconfiguration, it can do either.
With the solar eclipse looming on the calendar I realized I needed a tracking mount to allow photography. Tracking would allow me to keep the Sun and Moon in the field without wasting precious seconds framing the image during the eclipse. It would also enable longer exposures without motion blurring the image.
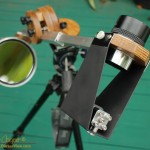
In the end it is a Celestron C8 telescope drive and forks containing custom electronics, a Meade heavy duty wedge from an LX-90, a hand-made tripod, holding a Televue 76mm APO telescope, using a Vixen style dovetail base, with a Baader film solar filter.
It is tempting to call it Frankenscope after the similarities with the classic monster.
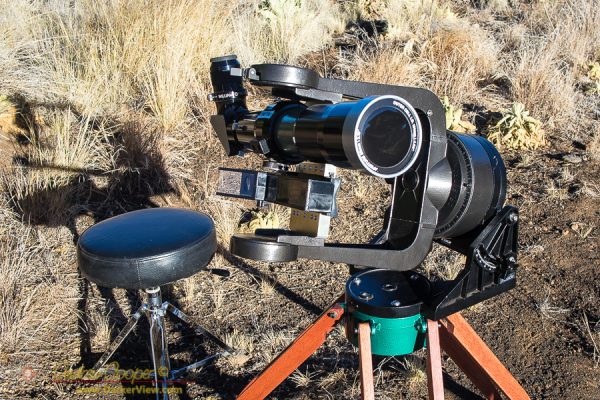
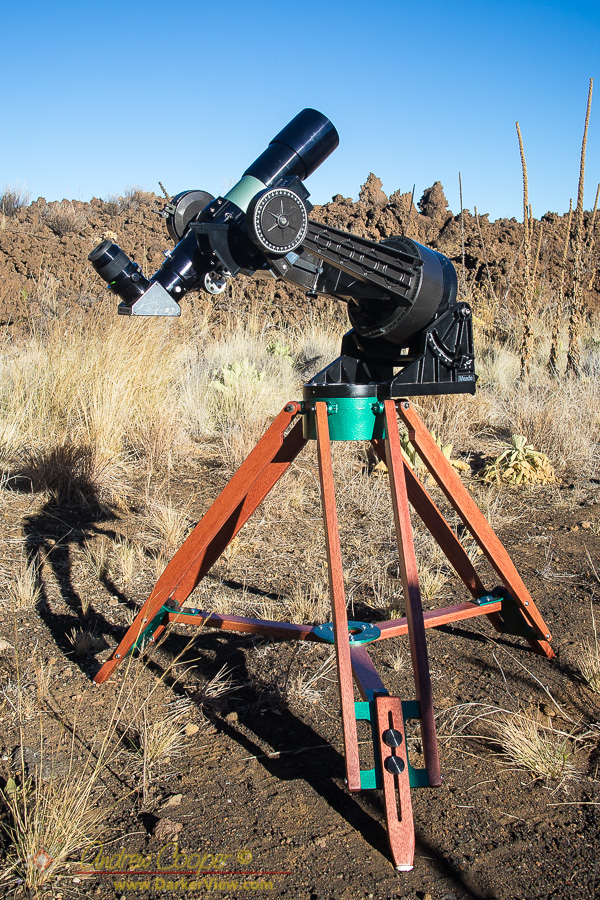
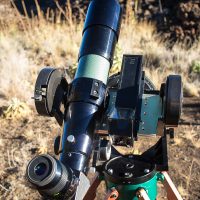
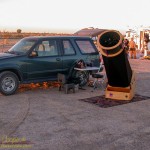
Hodgepodge setup on the side of Mauna Kea with the TV-76mm and Telrad on the plate
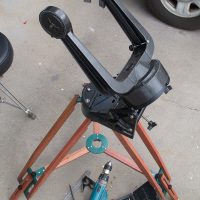
To further add the the Mary Shelley plot similarities, much of this was revived from the junk pile. I very nearly decided to toss the drive and fork, they were that bad, peeling paint and rusty bolts. A great deal of work was necessary to re-animate these components.
The wedge came from a telescope that was killed in an unfortunate incident with an aquarium heater. The heater was used to de-humidify the OTA and prevent fungus on the optics. Note: Aquarium heaters are not made to operate out of water.
The Hodgepodge mount assembled for the first time
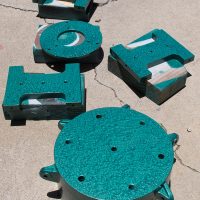
Several new aluminum parts were machined from scraps, some of which were scavenged when the observatory shop was being cleaned out and a lot of metal stock was tossed.
Many of the electronic components used to build the drive corrector were also scavenged parts from dead electronics, this includes the 1.8432MHz crystal that forms it’s beating heart. This heartbeat keeps the mount turning at exactly sidereal rate.
Yeah, you could call it Frankenscope.
But I will call it Hodgepodge.
The Hodgepodge mount assembled for the first time
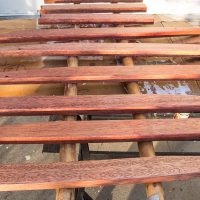
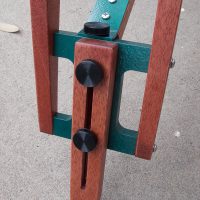
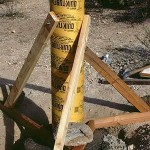
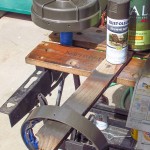
The legs and other parts of the field tripod with a fresh coat of polyurethane
Parts for the Hodgepodge field tripod drying in intense tropical sunlight
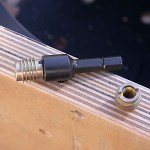
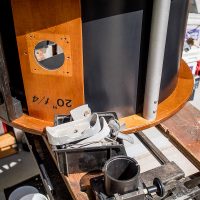
The extendable foot section for the Hodgepodge field tripod
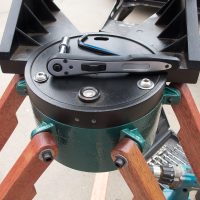
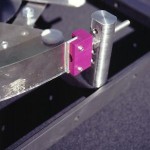
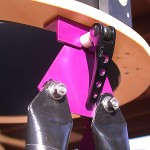
The Meade wedge bolts to a Celestron field tripod head without modification
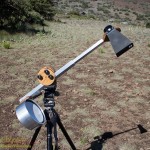
Hodgepodge setup on the side of Mauna Kea with the TV-76mm and Telrad on the plate
Hodgepodge setup on the side of Mauna Kea with the TV-76mm and Telrad on the plate
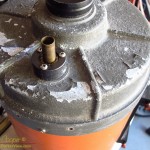
Telescope clock drives from the 1980’s or earlier often used AC synchronous motors. These commonly available AC motors are used to power timeclocks, record player turntables, and telescopes, anyplace a motor needed to run at a very accurate speed.
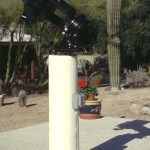
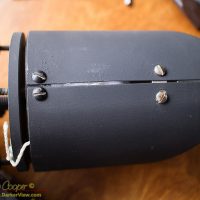
A Celestron telescope drive configured as a sidereal rate tracking camera platform
The speed of a synchronous motor is set by the frequency of the powerline, in North America and many other places this is 60Hz. As the frequency must be synchronized for every power station on the grid the frequency is quite accurate, a feature exploited by clockmakers and telescope builders. Once found everywhere these motors are less common, but are still around.
Drive Correctors
It was the common use of these motors in telescope drives that led to the invention of the drive corrector, a device that was once a required piece of kit for serious amateur astronomers. Drive correctors like this were needed when operating from a battery at some remote location, generating AC from a 12Vdc car battery.
You also needed a drive corrector for guiding while doing astrophotography. The corrector could speed up or slow down the telescope drive a bit to correct the telescope drive speed and stay on target, something not possible with the fixed 60Hz of the mains supply. Thus the term drive corrector.
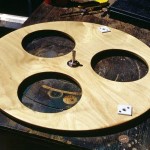
Gluing the mirror box for Deep Violet, and 18″ f/4.5
The 18 point mirror cell, built to the plans from Barry & Kriege
The primary mirror support strap
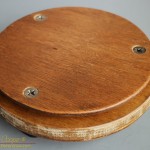
The ground board with center pivot and teflon pads in place
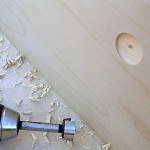
Drilling a pocket to accommodate a carpet pad in the side of the rocker box
Deep Violet fully assembled and nearly ready for dark
Looking at the mounted mirror cell and primary mirror
Deep Violet at Sentinel, Arizona for the 2015 Pierre Schwarr Star Gaze
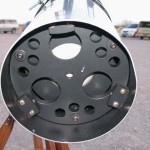
Looking in the rear of the tube at the mirror cell
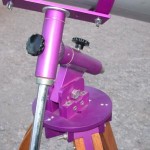
Detail of the tripod head, latitude adjustment and the RA and declination axis
Primero setup at Jarnac Observatory among a friendly crowd of other telescopes
Stripping and cleaning the 14×100 binoculars
A completely disassembled Celestron Cometron telescope
Detail of the upper truss tube with the lever type latch
Detail of the brass threadserts used to hold the lower truss clamp
A 12.5″ dobsonian telescope after the refit
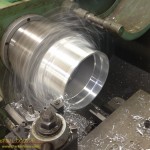
Machining the mirror cell from a piece of scuba tank
The mirror cell prior to installing the primary mirror with the focus knob at the back of the strut
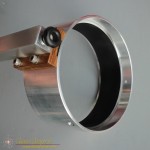
A very standard design for the mirror mount
A front view of Makaʻiki ready to observe
Makaʻiki with the main strut extended for use
Makaʻiki under the stars for the first time at Hale Pōhaku on the side of Mauna Kea
The forms for the pier upright filled and leveled
Bill Lofquist pouring concrete into the upright part of the pier
The completed pier with a telescope atop
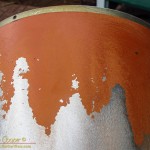
Looking at what remains of the paint on an old Celestron C8 orange tube telescope
The orange paint just crumbles away under a few sweeps of a power sander
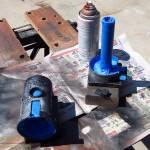
Parts of the mount prepped and taped for painting
Paint drying on the front and rear castings of the old orange tube
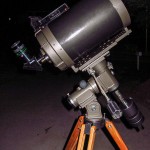
A restored Celestron C8 on a similarly restored TeleVue Renaissance mount.
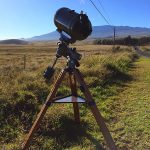
The C8 set up along the old Saddle Road for Mercury Transit
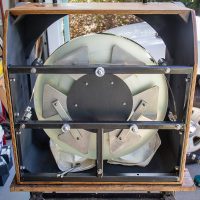
Re-assembling the secondary cage on the 20″ Obsession. The truss tube clamps still need to be cleaned up and re-installed, same with the focuser.
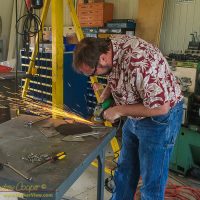
Grinding the heads off a few screws
The rusted hardware removed from a 20″ Obsession telescope
Opening up the truss tube clamps by widening the slot with a hacksaw.
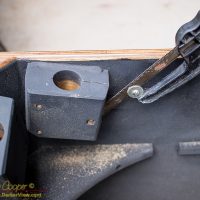
A fix for the secondary mount
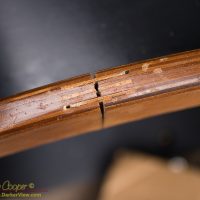
A failed plywood joint
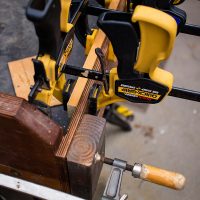
Clamping the rocker box of a 20″ Obsession
Installing the primary mirror. This is a Galaxy Optics 20″ f/4. Oddly enough Sky Hudek, the son of John Hudek, the owner of Galaxy is a good friend and dive buddy.
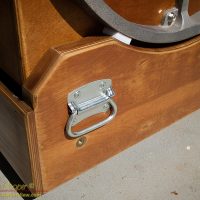
Trunk handles added to the rocker box to make picking it up and loading it in a vehicle easier. They are mounted just high enough to avoid the wheelbarrow handles when installed.
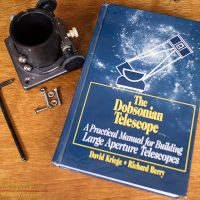
My copy of The Dobsonian Telescope by David Kriege and Richard Berry
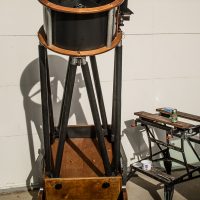
20″ f/4 Obsession #004 fully assembled for the first time in over a year. Ready for alignment and use!
In restoring a 20″ Obsession telescope I found myself pulling a book from the shelf that had not been opened in a while. David Kriege and Richard Berry’s The Dobsonian Telescope – A Practical manual for Building Large Aperture Telescopes is a book I once read cover to cover.
My copy of The Dobsonian Telescope by David Kriege and Richard BerryThe information here was critical in the success of my building Deep Violet, my 18″ telescope. Within the pages of this book are plans and drawings of the important bits as well as detailed discussions of what does, and does not work, when building a telescope.
The Dobsonian Telescope is the primary reference for those building large amateur telescopes. This book, along with the design revolution that went with it, put large telescopes in the hands of countless amateur astronomers. These telescopes extended the capabilities of amateur observers immensely, allowing spectacular views of deep space objects that were only fuzzy smears in the eyepiece before. Want to see the spiral arms of galaxies? A 20″ telescope can do that!
As I perused my well thumbed copy I was surprised to find bits of my own telescope plans used as bookmarks. There was dust on the top of the pages, but I still remembered where I disagreed with Kriege in the dimensions of the mirror box, or how to place the truss tube clamps. I may have deviated from the plans shown here in some aspects, but in other parts of the design I directly used the dimensions shown in the book.
So many old memories, good memories. Pursuing an art that has been around for four centuries, combining bits of wood and glass to make an instrument that can reveal our universe. Sure you can simply buy a very good modern telescope. But it is hard to overstate the pleasure of building one yourself. This is an art that can still be done in a garage, with tools available at the local hardware store, with results that can rival or even surpass something purchased from a catalog.
I have already posted about the restoration of an orange tube C8. That was only part of the story, the telescope is paired with a TeleVue Renaissance mount that was in the same poor condition as the optical tube. The mount required the same treatment, a complete tear down and restoration to reverse the ravages that tropical humidity had wrought upon the metal parts.
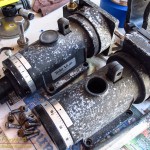
The RA and declination axis removed from the mount for further disassembly and restoration
Corrosion was the issue. While the mount was mostly functional, it was looking horrible. The aluminum under the paint was corroding into a fine white powder. Most of the screws were quite rusted along with the counterweight shaft where the chrome was flaking away and the rust spreading. If allowed to continue the mount would soon be the piece of junk it looked like. There was something wrong with the clutches as well, they do not lock firmly and needed to be inspected.
The mount was sold by TeleVue in the 1980’s paired with their APO refractors. The mount is actually a re-labled unit manufactured by the Japanese firm Carton Optics as the model Super Nova or RSM2000. Well regarded by amateur astronomers you can find postings of well used and beloved mounts still in use thirty years later. Examining the mount I find I agree with those who like it. There is much to love in the solid smooth motion, this looks to be worth the effort of restoration.
Thus I set about the task of stripping down the mount into component pieces… Of the rusted hardware only one screw required drilling out, the hex drive head stripping when I tried to remove it. Fortunately I again had the proper tools, a set of easy outs to remove the remains of the screw after I had drilled the head off. I was able to remove the screw without any damage to the aluminum castings.
It looked horrible! The paint was coming off everywhere with heavily corroded aluminum underneath. Most of the screw heads were small balls of rust, with hopefully enough remaining to fit a screwdriver to and remove. For a precision optical instrument this small telescope was not very encouraging.
Looking at what remains of the paint on an old Celestron C8 orange tube telescopeOn the bright side the optics looked to be in decent shape. While there was some dirt and mold on the corrector, the primary looked almost perfect. Not bad considering the condition of the metal parts. Maybe, just maybe, this telescope is salvageable.
The telescope in question is an old orange tube Celestron C8. Thousands of these little telescopes were manufactured in the 70’s and 80’s. It was the C8 that set the standard for amateur telescopes at the time. The C8 is still in production forty years later, but the tubes are no longer painted orange as they were originally. Compact, yet offering decent performance, these telescopes were well regarded and hold a special place in the memories of many amateur astronomers. I have seen these little orange telescopes at dozens of star parties, even bolted to the side of huge professional telescopes for use as finders.