Cropping the Photo

You never frame a photo properly when taken. This is a lesson I learned long ago… In the sometimes frantic process of shooting the photo, you rarely have a chance to frame the subject correctly. That moment when the whale surfaces, or the bear looks right at you, there is little time to adjust the photo for best impact, you just shoot.
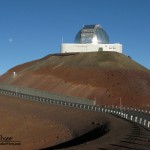
IRTF
The moon setting over the NASA Infrared Telescope Facility (IRTF), note how the imposing feeling is created by placing the telescope high in the image
The lesson that you take from this, and hopefully apply when shooting, is to shoot a bit wide in order to allow yourself flexibility in the processing. Zoom out a little, knowing that you will crop away some of the image in processing. A wise photographer understands this, the hard lessons one learns along the way. It is much later when you sit at the computer and can truly look at the photo that you can evaluate how best to arrange the subject.

Rotation is also an issue, many photos are taken handheld, often hastily in the moment. These will have small errors in rotation. Do not even mention shots taken from a pitching boat! A modest crop of the photo will also allow correction on the image rotation.

The choice of crop is critical, it is the first step in my processing of the photo. Either the crop works, or move on to the next photo in the folder. Almost all photos can be improved by cropping in a little, to cut away the extraneous areas and to concentrate the viewer’s attention on the primary subject. Much of the time I will throw away 10-25% of the photo, not cropping a lot, just tightening up the composition.

Adobe LightRoom acknowledges this fact of photography, the crop and rotate tool is on top, first on the left of the processing tools. Crop it in, perhaps straighten the rotation, then you know if the photo is worth any further effort.

The art is in choosing the crop… How much to crop. How to position the major elements. This decision is an aesthetic choice of the photographer, and as with many such choices, there is no single best answer. There are some rules that can help. These are rules that can help, but are not ironclad, they can be broken if the composition calls for it.

Continue reading “Cropping the Photo”

A Night on the Summit

A photographer needs a guide around Keck for the night? Setup time-lapse cameras throughout the facility? Sounds like fun… Sign me up.

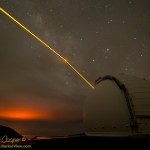
Two Lasers
Two AO lasers aimed at the galactic center with a large red glow coming from Kilauea
Thus I meet local photographer Jason Chu at Keck in the afternoon and help him drag a mountain of camera gear into the summit facility. We loaded quite a pile onto the cart, eight full DSLR cameras and a stack of tripods. The plan is to set them up in the domes for the night then re-collect the cameras in the morning. Six cameras in the domes and a couple more to carry through the night.

Two lasers, both aimed at the galactic center were on the schedule for the second half of the night. Andrea Ghez and her team having time on both telescopes. The weather looked a bit problematic, thick cirrus covered the sky, but the forecast called for clearing after midnight.

Jason came with a carefully drafted plan, where to set and aim each camera, timer settings, lens choice, all carefully considered. A pretty good plan too, only a few details needed changing as we placed each camera. Four cameras in Keck 1, another two in Keck 2. One camera placement was my idea… Clamped to the Keck 1 dome where it would track with the telescope. I had spent a few minutes in the machine shop putting together a solid camera clamp.

Unfortunately the clouds did not clear as predicted, thin cirrus hanging on through the night. It was clear just to the west, but stubbornly would not give us the clear skies we needed overhead. Several times it looked to clear, but the clouds would thicken again. We did have both lasers on sky for a few minutes, just enough for a few photos and not long enough to do any science.

With high hopes for some dual laser time-lapse I was ready to set up my own camera, but ended up with only a few still photos. Jason got a few nice shots during that short time, having eight cameras helped make the most of those few minutes. I did get a nice video clip of the telescope shot by rotating the dome with a camera.

Jason is working on a personal project and will be out shooting more images in the dark. I will certainly feature the results of his effort here on DarkerView when he finishes. For myself? I will have to schedule another opportunity to go up and shoot some laser time-lapse. There is an intriguing night at the beginning of July on the schedule with both Keck lasers. I also need to mail Jason a camera remote, an accomplishment that only one bit of camera gear got left behind.

The Sola Photo 800 Dive Light

Once you descend below a few feet underwater photographs begin to be all greens and blue. The reason is that water absorbs the red light, leaving a very skewed color balance in the images. Thus bringing a light source with you becomes important to allow the underwater world to be seen in vivid color.

Sola Photo 800
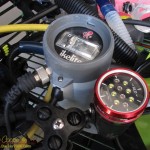
The Sola Photo 800 mounted beside the Ikelight strobe
I routinely use a strobe on my camera, resulting in very nice still images. But the strobe is useless for video. Thus my interest in a light that can be used as a main dive light and as a video light underwater.

Enter the Sola Photo 800 by Light and Motion… The Sola offers a nice flood with an even field of illumination for video. Several of my dive buddies use Sola lights, Thus I have had a chance to check out the lights firsthand before putting down a few hundred dollars. I was particularly noting the build quality and the control setup, both are excellent. With dozens of dives on the lights they still work well. Perhaps I should consider one of these little units?

There are several models available, but it is the photo version I was looking at. The light provides 800 lumens of white in an evenly illuminated, large field. The photo version also offers a red mode for framing and focusing that purportedly does not change the behavior of the subject. Deep red light is not seen by many marine critters as there is little to no red light at depth to be seen.

A coincidence of decent sales on the Sola lights occurring on my birthday resulted in a package appearing on my lanai. I ordered light with both the hand grip mount and with a ball mount that will allow attachment to my camera rigs.

Continue reading “The Sola Photo 800 Dive Light”

Halemaʻumaʻu or Dante’s Inferno?

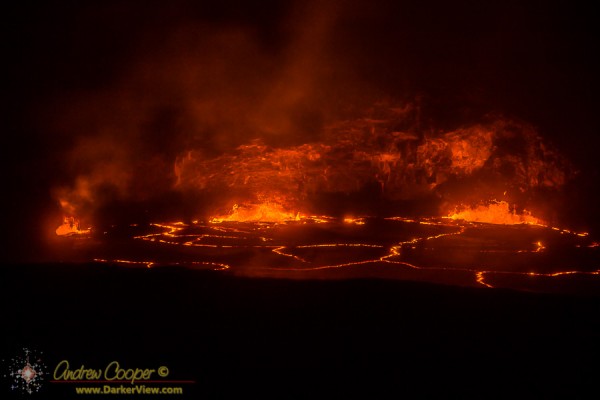
Processing photos of the Halemaʻumaʻu lava lake presents quite the challenge. The very bright lava fountains are difficult to properly expose while showing anything of the surrounding scene. Yet another try is shown here. This version uses very heavy tonal editing to compress the dynamic range of the lava fountains while expanding the low end of the histogram to show detail in the rock walls. The result is interesting, but quite different than seen in person…

Lava Lake at Halemaʻumaʻu
The lava lake at Halemaʻumaʻu sport several fountains of lava along the far rim, May 2, 2015.

Watching the Lava Boil and Froth

Watching the fantastic scene below me it was the famous lines from a play that came to me…

Halemaʻumaʻu Lava Lake
The lava lake at Halemaʻumaʻu on the morning of April 27, 2015

Double, double toil and trouble;
Fire burn, and cauldron bubble.

Witch’s scene from
Shakespeare’s MacBeth

This cauldron is roughly 500ft (200m) across and filled not with a witches brew, but a seething pool of lava. And while a line from Shakespeare might begin the description, it can not fully capture the reality… A churning pool of lava, mostly crusted over with thin sheets of dark material broken by brilliant red cracks. Along the edges bright fountains are powered by gasses escaping from deep below. In the night the brilliance of the lava lake was startling, illuminating the plumes of gasses and the low clouds over Kilauea Caldera.

To see this cauldron I had gotten up well before three in the morning for the nearly two hour drive across island. I traveled over Saddle Road and then up the volcano highway to Kilauea. Why the effort? The lava lake that has been present in the Halemaʻumaʻu crater was visible for the first time, at least from any publicly accessible place in the park. Normally the surface of this lava lake has been several hundred feet below the crater floor, hidden from direct view. An unprecedented surge of pressure in the Kilauea magma chamber has pushed the lake level to new heights, almost spilling out onto the floor of the crater.

Driving into the park revealed the first surprise. I was part of a little convoy of half a dozen vehicles, a bit unexpected at 4am. Arrival at the Jagger Museum parking lot I encountered an almost full parking lot, just a few spaces left in a very large lot. There were several hundred visitors already on the large terrace viewing area. A huge crowd, all here to see the lava.

Continue reading “Watching the Lava Boil and Froth”

Working Late Again

When most folks work late at the office it is a boring evening at a desk staring at a computer. I may have stared at a computer a bit, but it was hardly a boring evening.

CloudCam Image
A focusing test shot from the Keck CloudCam
The task that had me staying late was to focus the new cloud camera. To accomplish this task I needed a dark sky and stars. The plan is the same as I have used before, work the day and then stay into the evening.

Waiting for darkness had it’s advantages, an opportunity to do a little photography. In addition to the usual tool bag and lunch I took my camera gear with me.

With Sniffen on the roof while I watched the frames on the computer, I called the corrections up to him on the radio. It is tricky work to focus a fast lens, made worse by the need to do it remotely. We had to wait for each 30 second exposure, painfully slow. I hesitated to ask Sniffen to sit much longer out in the cold, but he was game and ready to assist. His tiny adjustments were deftly made, I watched as the lens moved through focus.

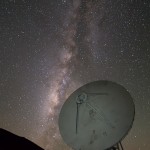
VLBA & Milky Way
The summer Milky Way soars over the VLBA antenna atop Mauna Kea
The focus is not as good as I would like to see, I suspect that the Sigma 18mm f/1.8 lens leaves a little to be desired when used wide open. Perhaps one of the Rokinon lenses would work better. Or maybe I just need to step the lens down a stop or two.

After leaving Keck I took my time wandering down the mountain. I stopped at IRTF for a set of panorama shots. One of the first things I noted was the lack of airglow. Last time I shot from the summit the airglow was intense. Despite using the same camera and lens, with the same settings, the bright red glow was missing. Only a pale green near the horizon to be seen in the shots.

On a whim, I drove out to the VLBA antenna for a set of shots. This radio telescope was something different than the usual telescope shots I take. I walked around the dish until I could position the summer Milky Way beside the antenna. As the VLBA is a radio telescope there was no issue in using a little light from my flashlight to paint the dish and illuminate it for the photo.

I arrived home just before midnight, tired from a full day on the summit. The photos will wait for another day for processing.

A Long Dive

Photography can be a tedious pursuit, even more so underwater where conditions can be very challenging. This leads to a regular issue in mixed dive parties. The photographers go slow, really slow. The other divers are ready to cover some ground. This occasionally means that the guys leave me behind.

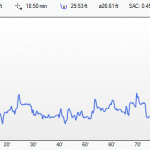
Dive Profile
Dive profile for Suck ‘Em Up Cave
While diving alone is not recommended, the risk can be mitigated. I shift to a different set of rules, a far more conservative set of rules if I am on my own. I keep the depth much shallower, to where I could do an emergency ascent with little risk, this is generally 30ft or less. I do not go very far into a cave, perhaps working the twilight zone, but not getting into the back recesses of the many little caves common along the Kona coast. These sort of rules are usually not much of a compromise. Almost all of the dive sites on the Kona coast can be enjoyed while staying shallow. Many of my best finds have been in the twilight zone of the little reef caves. Staying shallow also has the benefit of extending the dive dramatically, it simply takes far less air to fill your lungs when shallow.

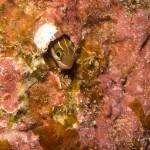
Gosline's Fang Blenny
Gosline’s fang blenny (Plagiotremus goslinei) sheltering in a worm tube, 20ft depth, Suck-Em-Up Cave
Suck-Em-Up cave fits the bill. The maximum depth here is 30ft, and there are so many entrances and skylights that an emergency ascent is always possible. The rest of the guys are planning to sweep the reef face and take a deep excursion before heading to the cave. I am planning to simply dive the cave as I have several photographic targets in mind. I am first into the water, swimming a few feet from the boat awaiting Pete, Ben and Dennis. A loud pop and woosh announces a blown o-ring on an air tank for Pete, this will lead to a short delay. I signal that I am dropping anyway, they know where I will be. The cave entrance is only a few yards from the boat. I give a salute and they wave back as I slide under.

Continue reading “A Long Dive”

Alaskan Summer

About the time you read this we should have cast off lines and left the Juneau area. The plan is to spend some time exploring the Glass Peninsula and Seymour Canal, an area we have often skipped past on our way south from Juneau. We have reservations for access to the bear viewing area at Pack Creek. Stay tuned for plenty of photos of grizzly bears fishing.

With any luck we will be back in a week. Hopefully the cats are OK with the house sitters. Hopefully the fish makes it back still frozen. And maybe I will not get eaten by a bear.


Inside Passage from Andrew Cooper on Vimeo